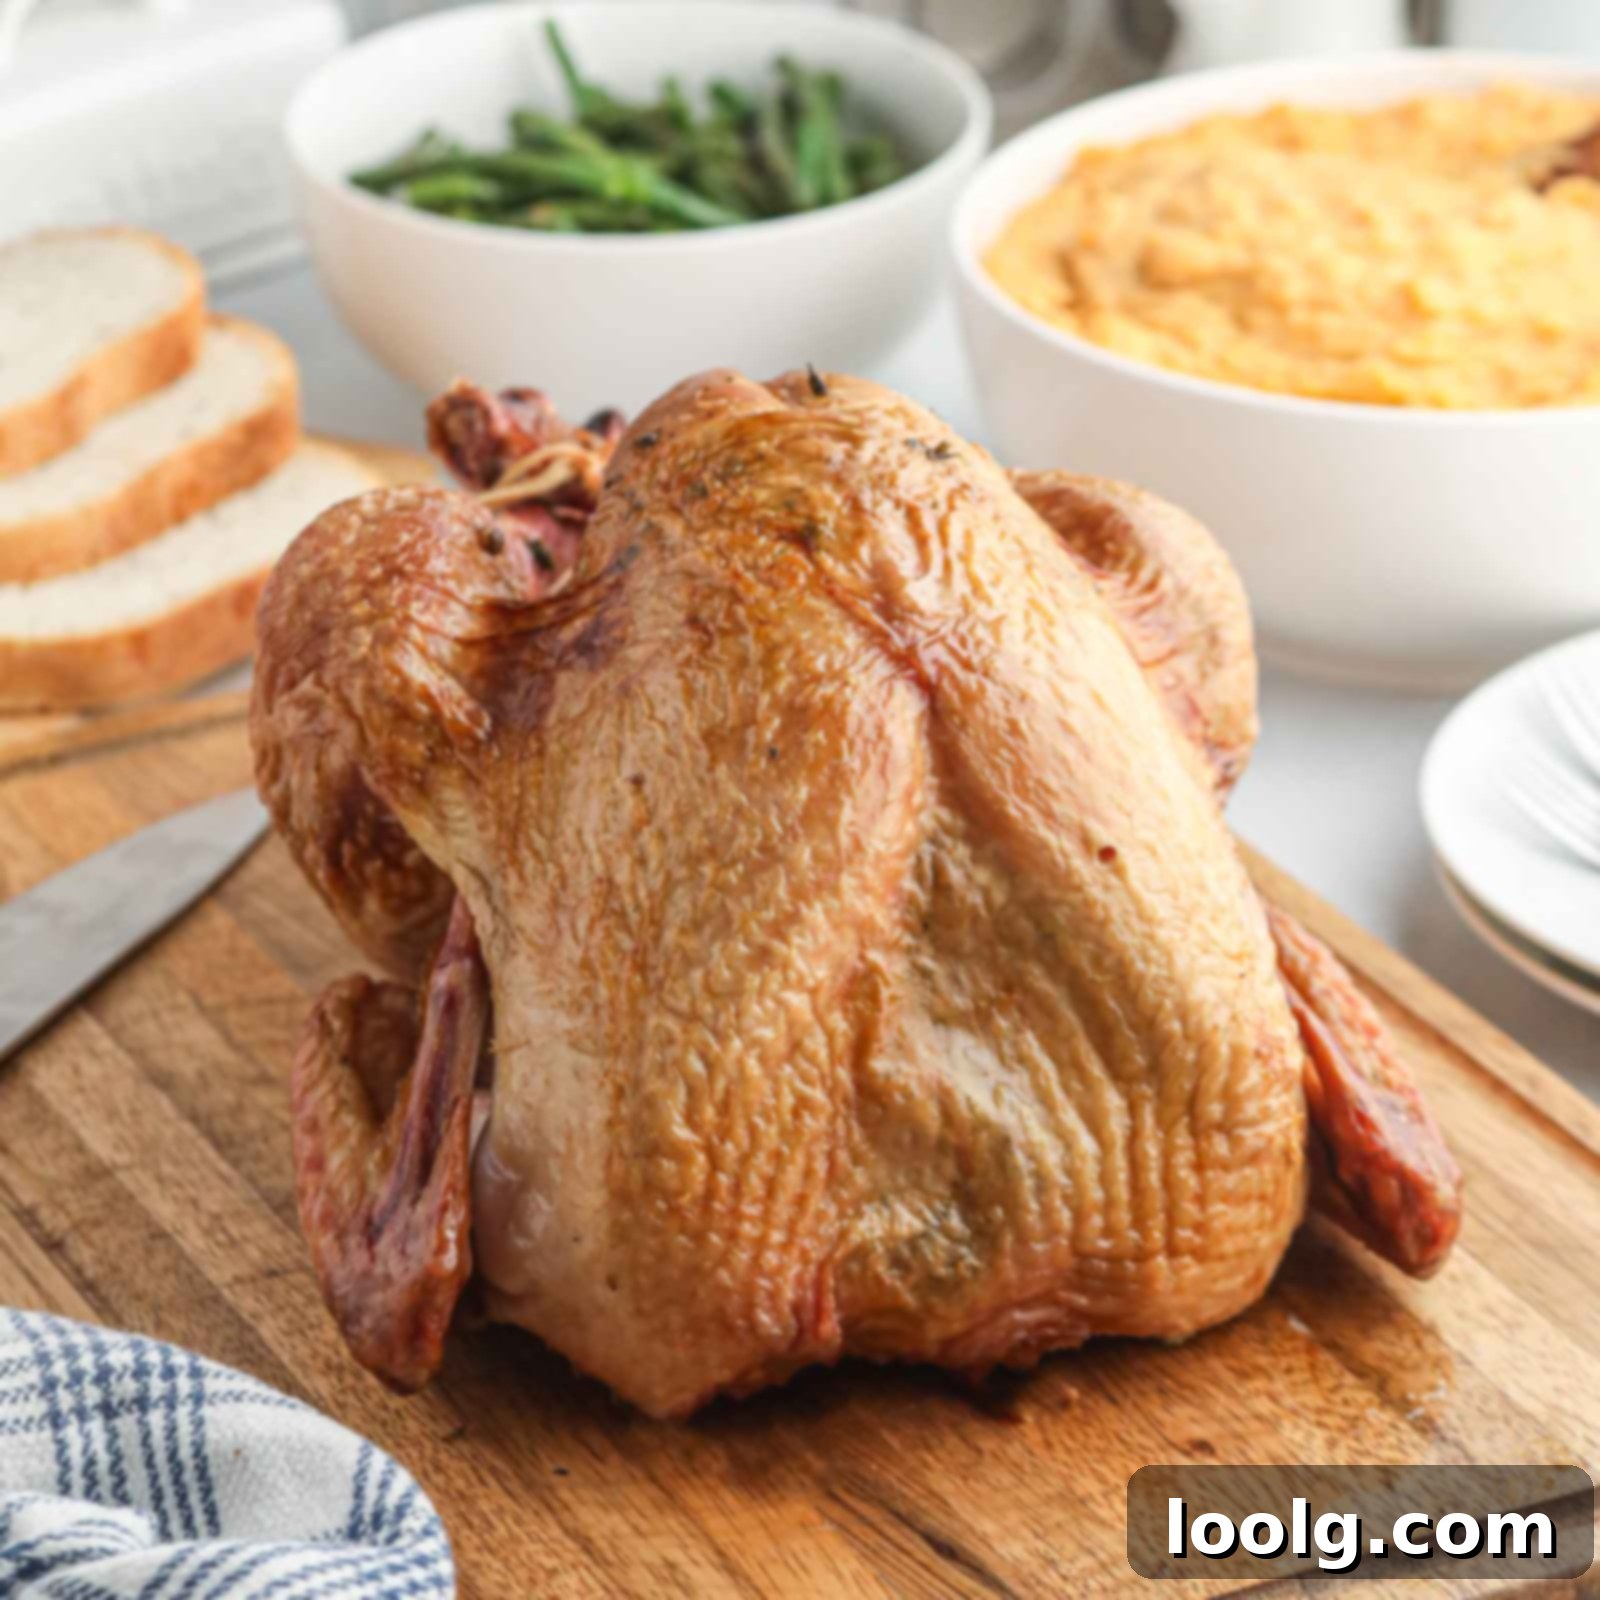
The Ultimate Traeger Smoked Turkey: A Foolproof Guide to the Juiciest Holiday Bird
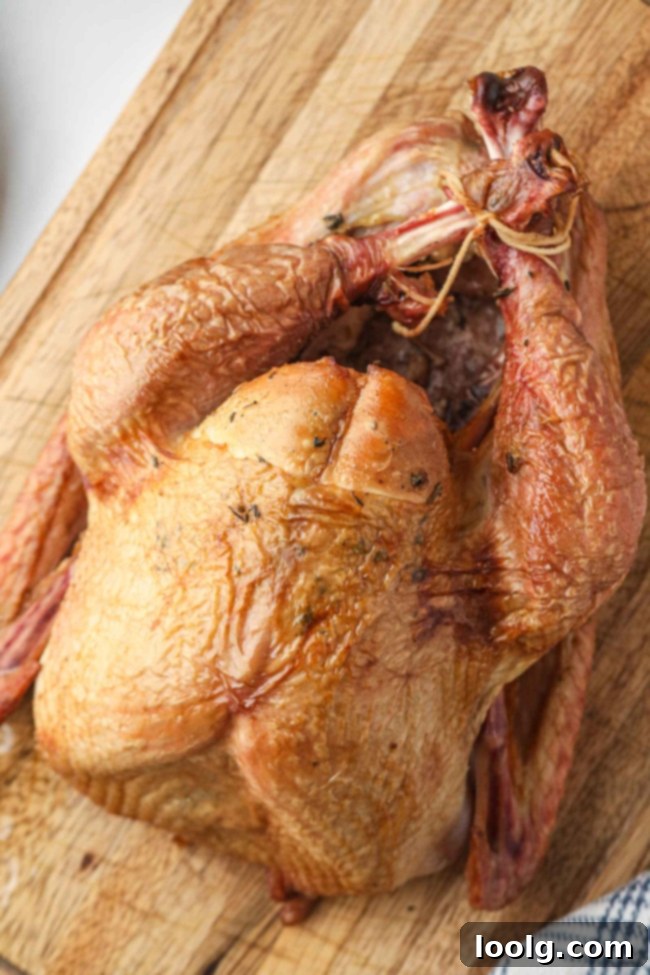
Prepare to transform your holiday meals and weekend gatherings with this incredible Traeger smoked turkey recipe. Smoking a whole turkey on your pellet grill infuses it with unparalleled flavor and tenderness, ensuring every bite is succulent and memorable. Whether you’re aiming for the perfect Thanksgiving centerpiece or simply craving a delicious new spin on turkey dinner, this method is an absolute game-changer. The best part? The process is surprisingly straightforward – no advanced culinary skills are required. Plus, it’s naturally gluten-free and keto-friendly, with easy modifications to make it paleo and dairy-free.
If the thought of cooking a whole turkey has ever felt daunting, you’re not alone. I remember feeling that same intimidation just a few years ago. My initial experiments with smoking turkey led to a few missteps. My very first attempt, for instance, resulted in a turkey that was disappointingly dry – as arid as a desert. It was then that I discovered the magic of brining, thinking, “How difficult could it really be?”
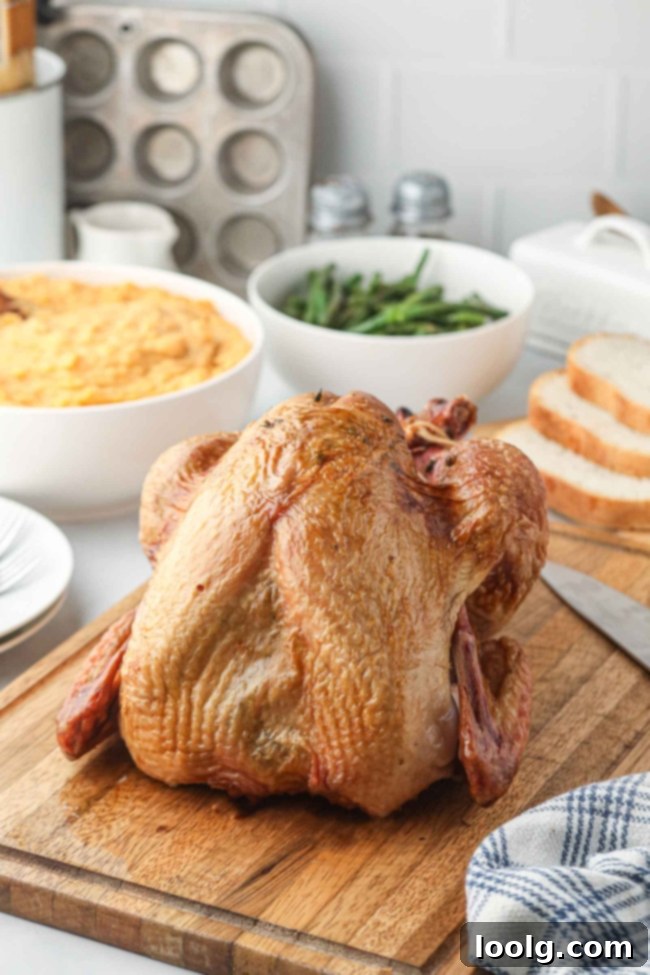
What I found was that brining is remarkably straightforward, and its benefits are consistent: a reliably juicy and incredibly flavorful turkey, every single time. This guide will walk you through each step, making sure your Traeger smoked turkey is the highlight of your next meal.
Essential Ingredients for a Perfect Smoked Turkey
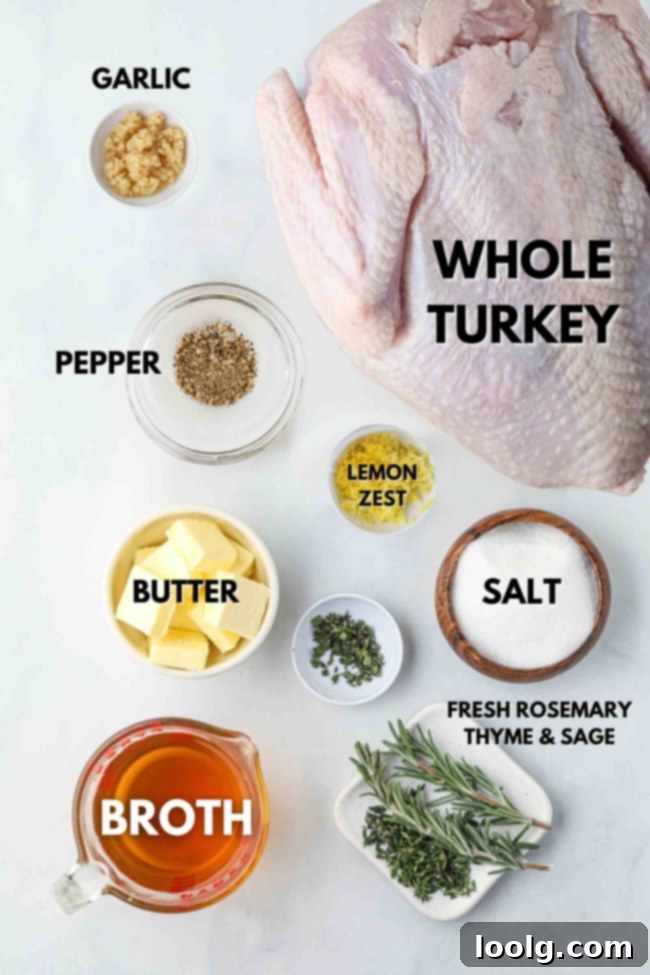
Crafting a truly exceptional smoked turkey begins with selecting the right ingredients. Here’s a detailed look at what you’ll need for both the brine and the turkey itself, ensuring maximum flavor and moisture.
For the Aromatic Brine:
The brine is your secret weapon for a moist and tender turkey. Don’t skip this crucial step!
- Vegetable Broth (3 quarts): This forms the flavorful base of your brine, adding depth beyond just salt water. Feel free to use turkey or chicken broth if you prefer, ensuring it’s low sodium if you’re concerned about overall saltiness.
- Kosher Salt (250 grams): Absolutely essential for tenderizing the meat and locking in moisture. The type of salt matters significantly here. Kosher salt has larger crystals and is free of additives like anti-caking agents or iodine, which can impart an off-flavor. If you must use table salt, opt for a pure, non-iodized variety for the best results, and be mindful of the conversion as table salt is denser.
- Fresh Rosemary, Thyme, and Sage (2 tablespoons each, finely chopped): These classic poultry herbs infuse the turkey with a fragrant, earthy aroma that beautifully complements the smoky flavor. Using fresh herbs provides a more vibrant and potent flavor profile compared to dried.
- Ice Water (5 quarts): Crucial for rapidly cooling the hot brine mixture. Adding ice water prevents the turkey from starting to cook when submerged and helps bring the brine to a safe, cold temperature quickly. The combined volume of ice and water should equate to 5 quarts for proper submersion of a 12-16lb turkey.
For the Delicious Herb-Butter Turkey:
This herb butter rub ensures a golden, crispy skin and adds another layer of flavor and richness to the meat.
- Whole Turkey (12 to 16 lbs / 5.4 to 7.3 kg): Choose a high-quality, unenhanced turkey. It’s vital to select a turkey that hasn’t been pre-salted, pre-brined, injected, basted, or enhanced, as this recipe includes its own brining process. If you purchase a frozen turkey, ensure it is completely thawed before proceeding with any steps. Refer to the thawing guide below for proper preparation.
- Unsalted Butter (1 cup / 225 grams, softened): Adds incredible richness and helps achieve that desirable crispy, golden-brown skin. For a paleo or dairy-free alternative, olive oil or avocado oil can be used successfully.
- Fresh Rosemary, Thyme, and Sage (2 tablespoons each, finely chopped): These fresh herbs echo the flavors in the brine, creating a harmonious and deeply aromatic turkey.
- Garlic (5 cloves, minced): Contributes a savory, pungent depth that pairs wonderfully with the herbs.
- Lemon Zest (from 1 lemon): Brightens the entire herb butter mixture with a fresh, citrusy note, cutting through the richness and elevating the overall flavor.
- Kosher Salt (1 tablespoon) and Ground Black Pepper (1 teaspoon): Essential seasonings to enhance the turkey’s natural flavors and ensure a well-seasoned exterior.
Please note: While specific measurements are provided, these ingredients are presented as an overview. Full, precise instructions and measurements are detailed in the recipe box, typically found at the bottom of the page, for your convenience.
Herbs vs. Spices: Customizing Your Turkey’s Flavor Profile
When it comes to seasoning your smoked turkey, you have a choice between fresh herbs and dry spices, each offering a distinct flavor profile. For traditional holiday feasts like Thanksgiving, many prefer the classic, aromatic notes of fresh herbs. This recipe leans into that preference, utilizing fresh rosemary, thyme, and sage, which impart a bright, earthy, and subtly piney flavor.
These fresh herb flavors pair exceptionally well with beloved Thanksgiving side dishes such as Baked Butternut Squash with Garlic and a vibrant Rainbow Carrots Recipe, creating a cohesive and comforting meal.
However, if your palate (like mine!) gravitates more towards the bold and robust flavors of spices, you have plenty of options. For example, my Smoked Turkey Breast recipe uses a blend of paprika, garlic powder, and a hint of cayenne pepper for a delightful spicy kick. This is a perfect recipe if you’re serving a smaller crowd and don’t require an entire turkey. The good news is that you can easily adapt that same spice rub for this whole turkey recipe; simply omit the fresh herbs in the rub and apply your preferred spice mixture instead.
Understanding Salt Conversions for Brining
Accuracy in salt measurements is paramount for a successful brine. Different types of salt have varying crystal sizes and densities, meaning that a cup of one type won’t necessarily weigh the same as a cup of another. To ensure consistency and the perfect salinity for your brine, weighing your salt is the most reliable method. For this brine recipe, you’ll need precisely 250 grams of salt. To help you achieve this accurately with common kitchen salts, here’s a quick conversion guide:
- Morton Kosher Salt: Approximately 1 cup
- Diamond Crystal Kosher Salt: Approximately 1 ¾ cups (due to its lighter, flakier texture)
- Fine Table Salt (non-iodized): Approximately ¾ cup (as it is much denser)
Always double-check your salt type and use a kitchen scale if possible for the most precise results. This ensures your turkey absorbs just the right amount of salt for optimal juiciness and flavor without becoming overly salty.
Why Brining Your Turkey is Worth the Effort
Brining a turkey is a technique that can dramatically elevate your final dish, transforming a potentially dry bird into a remarkably juicy and flavorful masterpiece. Whether it’s “worth it” largely depends on your desired outcome and willingness to invest a little extra time. Let’s explore the key advantages and considerations to help you decide:
The Advantages of Brining
- Unmatched Juiciness: This is arguably the biggest benefit. Brining works by infusing the turkey meat with moisture and salt. The salt helps denature muscle proteins, allowing the cells to absorb and retain more liquid during cooking. This acts as a buffer, ensuring the meat stays incredibly juicy and tender, even if it’s slightly overcooked – a common pitfall with lean cuts like the breast. For turkeys smoked at low temperatures, which can sometimes lead to dryness, brining becomes even more invaluable. It’s particularly recommended for leaner heritage or organic turkeys that naturally contain less fat.
- Enhanced, Even Flavor: A well-crafted brine allows herbs, spices, and other aromatics to penetrate deeply into the meat, far beyond just the surface. This results in a turkey that is seasoned more evenly throughout, offering a consistently delicious flavor in every bite. It contrasts sharply with methods like injecting where flavor is concentrated in pockets; brine provides a more uniform taste. However, if your recipe already involves injecting the turkey (like a Deep Fried Whole Turkey), brining might be redundant as the injection serves a similar purpose.
- Improved Texture: Beyond just juiciness, the salt in the brine actively breaks down tough muscle proteins. This chemical process tenderizes the meat, resulting in a noticeably more tender and pleasant bite, making the turkey more enjoyable to eat.
Considerations and Minor Drawbacks
- Time and Space Requirements: Brining isn’t a quick process. It typically requires 12-24 hours, demanding foresight and planning. Furthermore, a large container (like a brining bag within a cooler or a very large pot) is needed, which can take up significant refrigerator space, especially for larger turkeys. It can also be a bit messy.
- My Verdict: It’s Worth the Hassle! While these points are valid, consider the investment you make in a high-quality turkey and the hours you’ll spend smoking it. A little extra time for brining guarantees a superior result that will be appreciated by everyone at your table. In my opinion, the elevated flavor and juiciness far outweigh the minor inconveniences.
- Pre-Enhanced Turkeys: If you’re looking to bypass the brining step, you can opt for turkeys labeled “enhanced” or “self-basting.” These turkeys are often pre-brined or injected with a salt solution by the producer, reducing or eliminating the need for additional home brining. Always check the label carefully if you choose this route.
Selecting the Right Size Turkey for Your Gathering
This recipe is perfectly scaled for a 12 to 16-pound (5.4 to 7.3 kg) turkey, ideal for most family gatherings. To accurately determine the size of turkey you need, a general rule of thumb is to plan for 1.25 pounds (566 grams) of turkey per person. This usually provides a generous serving for each guest.
However, if you’re like me and love having plenty of leftovers for delicious meals like Instant Pot Turkey Soup with Noodles or sandwiches, consider increasing your estimate to 1.5 to 2 pounds per person. This ensures you’ll have ample turkey to enjoy beyond the main event.
Here’s a quick guide to help you estimate based on your guest count:
- 4 – 6 guests: 6 to 8 lbs. turkey
- 7 – 9 guests: 9 to 12 lbs. turkey
- 10 – 12 guests: 12 to 15 lbs. turkey (This recipe’s target range)
- 13 – 16 guests: 16 to 18 lbs. turkey
- 17 – 20 guests: 20 to 24 lbs. turkey
If you choose a turkey larger than 16 lbs., remember to adjust the brine measurements and the smoking time accordingly. A larger bird will require more brine and significantly more cooking time.
The Critical First Step: How to Safely Thaw Your Turkey
Properly thawing your turkey is a crucial, non-negotiable first step for ensuring it cooks evenly and safely. An improperly thawed turkey can lead to uneven cooking, with some parts undercooked while others are overcooked, and can also pose food safety risks. Here’s a detailed guide to help you thaw your turkey correctly.
Method 1: Thawing in the Refrigerator (Safest and Easiest)
Thawing your turkey in the refrigerator is by far the safest and most recommended method. It requires significant advance planning, so be sure to account for the necessary time. Place your turkey, still in its original packaging, in a large pan or on a tray with a lip to catch any potential drips. Position it on the lowest shelf of your refrigerator to prevent cross-contamination.
Here’s a general guideline for refrigerator thawing times:
- 4 lbs. turkey: 1 day
- 8 lbs. turkey: 2 days
- 12 lbs. turkey: 3 days
- 16 lbs. turkey: 4 days
- 20 lbs. turkey: 5 days
- 24 lbs. turkey: 6 days
Once completely thawed, your turkey can safely remain in the refrigerator for an additional 1-2 days before you proceed with brining and cooking. This method allows for flexibility in your cooking schedule.
Method 2: Thawing in Cold Water (Faster Option)
If you find yourself short on time and haven’t allowed enough days for refrigerator thawing, the cold-water method is a faster, yet still safe, alternative. It’s imperative that your turkey remains in its original, unopened packaging or is placed in a completely sealed, leak-proof bag to prevent water from coming into contact with the meat. Submerge the packaged turkey completely in cold tap water, ensuring it stays fully covered. Change the cold water every 30 minutes to maintain a safe temperature and prevent the water from becoming too warm. Allow approximately 30 minutes of thawing time per pound of turkey.
For example:
- 12 lbs. turkey: Approximately 6 hours
- 16 lbs. turkey: Approximately 8 hours
Critical Note: Turkeys thawed using the cold-water method must be cooked immediately after thawing. This means you will need to skip the brining step in this recipe, as brining would require additional refrigeration time which isn’t safe after a cold-water thaw.
Important Things to Avoid for Food Safety
- Never thaw a turkey at room temperature or in warm water. These conditions create a “danger zone” where bacteria can multiply rapidly, making the turkey unsafe to eat.
- Avoid starting the smoking process with a partially frozen turkey. A partially frozen turkey will cook unevenly, potentially leading to undercooked sections and a poor overall result. Always ensure your turkey is fully thawed before beginning any preparation.
A Detailed Smoking Timeline for Thanksgiving Day (or Any Special Occasion)
Planning is key for a perfectly smoked turkey, especially on a busy holiday like Thanksgiving. This timeline is designed to have a 12-pound turkey ready to carve around 2:00 p.m. Please remember that this is an estimate; actual times can vary based on your turkey’s exact size, the efficiency of your smoker, and how frequently you open the lid. A general guideline for smoking a 12-16 lb turkey at 225°F (107°C) is 30-40 minutes per pound, totaling approximately 6-10 hours.
Thanksgiving Eve: Brining Preparations
- Any time between 5:30 a.m. and 5:30 p.m.: Prepare your brine according to the recipe instructions. Ensure the salt is fully dissolved and the mixture has cooled completely to room temperature.
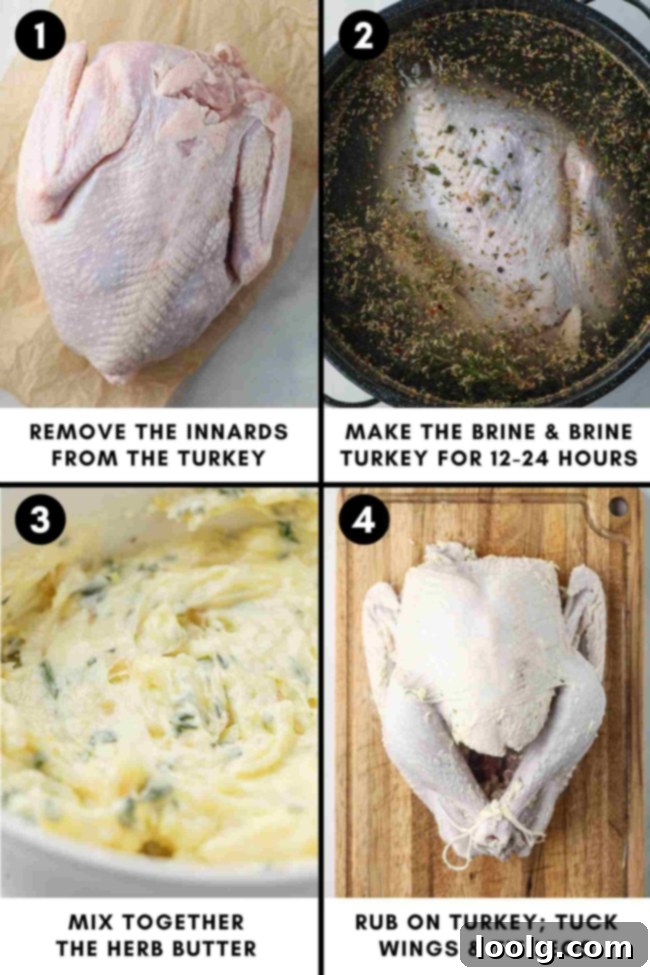
- 30 minutes after brine preparation: Remove the giblets and neck from the turkey cavity. Place the turkey in a sturdy brining bag (or large container) and add the cooled brine. Ensure the turkey is fully submerged. Seal the bag tightly and refrigerate it, or place it in an ice-filled cooler to maintain a safe temperature below 40°F (4°C). Allow it to brine for 12-24 hours.
Thanksgiving Day: Smoking Day!
This sequence aims for a 2:00 p.m. serving time. Adjust your start times if you need to serve earlier or later.
- 6:30 a.m.: Remove from Brine & Rinse. Take the brined turkey out of the refrigerator. Remove it from the brine, discard the brine, and rinse the turkey thoroughly under cold running water, both inside and out. Pat it very dry with paper towels – this is crucial for crispy skin.
- 6:45 – 7:00 a.m.: Prepare & Apply Herb Butter. In a small bowl, combine your softened unsalted butter with finely chopped fresh rosemary, thyme, sage, minced garlic, lemon zest, kosher salt, and black pepper. Mix well. Carefully work your fingers under the turkey skin to separate it from the breast meat, being careful not to tear the skin. Rub about half of the herb butter mixture directly onto the breast meat under the skin. Apply the remaining herb butter generously over the entire exterior of the turkey. Tuck the wing tips under the turkey’s body and tie the legs together with kitchen twine to ensure even cooking.
- 7:00 – 7:15 a.m.: Preheat Your Traeger. Close the lid and preheat your Traeger pellet smoker to 225°F (107°C) for about 15 minutes to allow it to reach a stable temperature and start producing consistent smoke.
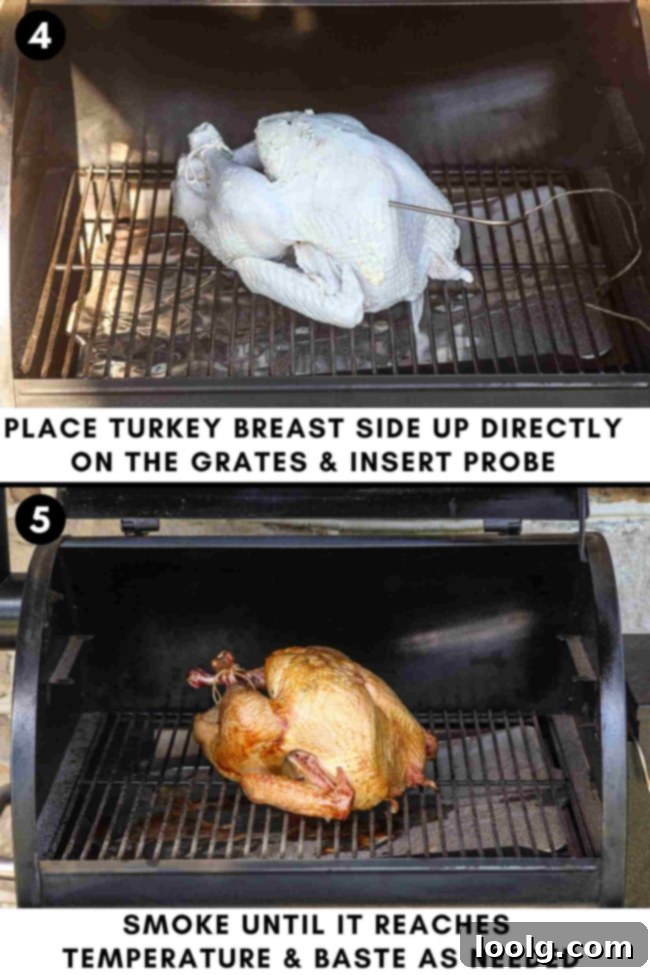
- 7:15 – 7:30 a.m.: Place Turkey & Insert Probe. Carefully place the prepared turkey directly onto the grill grates, breast side up. Insert a reliable meat probe into the thickest part of the turkey breast, making sure it doesn’t touch any bone, which can give an inaccurate reading.
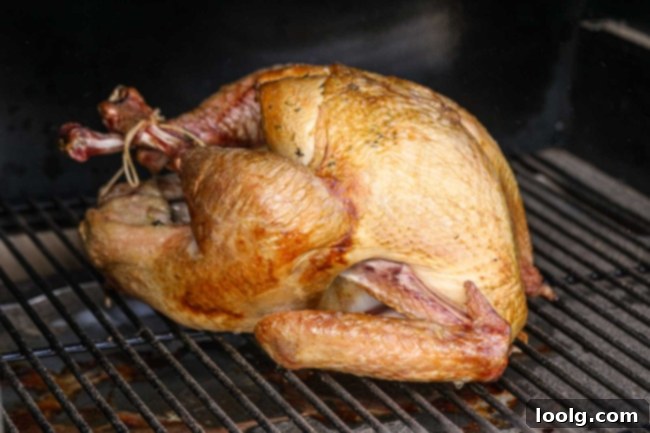
- 7:30 a.m. onward: The Smoking Begins. Close the lid and smoke the turkey at a consistent 225°F (107°C). During this long smoking phase, try to avoid opening the lid unnecessarily, as this causes temperature fluctuations and prolongs cooking time.
- 12:30 p.m. or 1:00 p.m. (Estimate): Increase Heat for Crispy Skin. This timing is approximate and depends heavily on your turkey’s progress. When the internal temperature in the thickest part of the breast reaches approximately 145°F (63°C), it’s time to raise the heat. Increase your Traeger’s temperature to 375-400°F (190-205°C). Continue smoking at this higher temperature until the internal temperature reaches 160°F (71°C) in the thickest part of the breast and 175°F (80°C) in the thighs. This final high-heat blast will take approximately 30-60 minutes and is essential for achieving a beautifully crispy skin.
- 1:30 p.m.: Remove and Rest. Once the target internal temperatures are reached, carefully remove the turkey from the smoker. Transfer it to a clean cutting board and tent it loosely with aluminum foil. Allow the turkey to rest for at least 30 minutes (and up to 60 minutes for larger birds). This resting period is crucial; it allows the juices to redistribute throughout the meat, ensuring a tender and moist final product. During this time, the turkey’s internal temperature will also continue to rise slightly, reaching the final safe temperature of 165°F (74°C) in the thickest part of the breast.
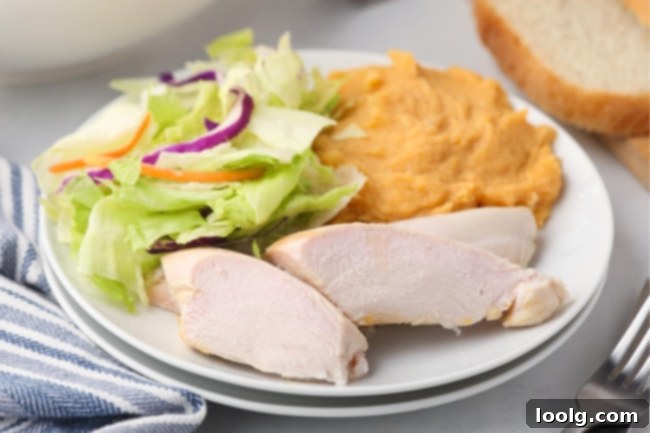
- 2:00 p.m.: Carve and Serve! Your perfectly smoked, incredibly juicy, and flavorful turkey is now ready to be carved and served to your eager guests!
Can You Smoke a Turkey Ahead of Time?
While you certainly can smoke a turkey a day or two in advance, it’s generally agreed that a freshly smoked turkey offers the best flavor and texture. The smoky aroma and tender juiciness are at their peak right off the smoker, after a proper rest.
However, if your schedule simply doesn’t allow for smoking on the day of serving, preparing it ahead is a viable option. To store it, first let the turkey cool completely. Then, wrap it tightly in plastic wrap, followed by a layer of aluminum foil, and place it in a large, airtight bag before storing it in the refrigerator. It will keep well for 1-2 days.
To reheat, preheat your oven to 325°F (163°C). Place the turkey (or carved pieces) in a roasting pan, add a splash of chicken or turkey broth to the bottom of the pan to help maintain moisture, and cover it loosely with foil. Reheat until it’s warmed through to a safe internal temperature. Be mindful that reheating can sometimes cause the turkey to dry out slightly, so basting it with broth during the reheating process can be beneficial.
Storing Leftover Smoked Turkey
Having leftover smoked turkey is a blessing, offering opportunities for many delicious meals. Here’s how to store it properly to maintain freshness and safety:
- In the Refrigerator: Once the turkey has cooled completely, carve the meat off the bone and store it in an airtight container. It will keep safely in the refrigerator for up to 4 days.
- For Freezing: For longer storage, wrap individual portions or larger pieces of carved turkey tightly in aluminum foil, then place them in a freezer-safe bag or container. Properly frozen smoked turkey will maintain its quality for up to 3 months. When ready to use, thaw it overnight in the refrigerator before gently reheating.
Wood Chips vs. Pellets for Your Traeger Smoker
Both wood chips and wood pellets are excellent fuel sources for imparting that signature smoky flavor to your turkey on a Traeger. While I often prefer the slightly more pronounced smoke ring and flavor from wood chips, either option will yield fantastic results for this recipe.
Understanding Wood Chips:
- Composition: Wood chips for smoking are typically made from various hardwood trees. It’s crucial to avoid using softwoods like pine, cedar, or fir, as their high resin content can impart an unpleasant, bitter, or resinous taste to your food.
- Soaking Myth: There’s a common misconception that wood chips should be soaked in water before use. However, for pellet smokers like a Traeger, or even many traditional smokers, soaking is generally not recommended. Soaked chips primarily produce steam rather than clean smoke, which can lead to inconsistent smoking and make it harder to maintain a stable temperature in your smoker. For optimal smoke flavor, use dry wood chips.
Understanding Wood Pellets:
- Composition: Pellets designed for smokers are made from compressed hardwood sawdust. They are engineered to burn hot and long with remarkable consistency. High-quality pellets are typically made from 100% hardwood, without any additives, binders, or fillers, ensuring a pure smoke flavor.
- Hopper Management: If you’re using pellets, especially for a long smoke like a whole turkey, keep an eye on your smoker’s hopper. You may need to refill it periodically to ensure a continuous fuel supply and prevent the smoker from running out during the cook.
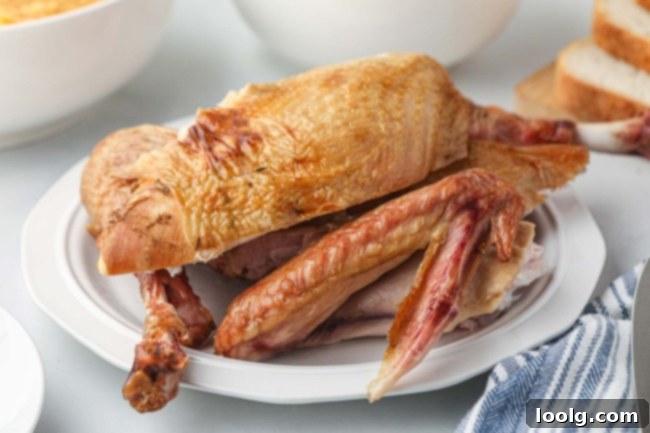
The Best Smoke Flavors for a Turkey
Choosing the right wood for smoking your turkey can significantly influence its final flavor profile. For poultry, milder, fruit-based woods are often preferred as they impart a sweet, subtle smokiness that complements the delicate turkey meat without overpowering it. Excellent wood choices include:
- Apple: Offers a very mild, slightly sweet, and fruity smoke flavor. It’s a classic choice for poultry and pork, providing a beautiful golden-brown color.
- Cherry: Similar to apple, cherry wood delivers a sweet, fruity smoke that is mild and pleasant. It also contributes a lovely reddish hue to the turkey’s skin.
- Hickory: A bit stronger than fruit woods, hickory provides a robust, bacon-like flavor. Use it sparingly if you prefer a lighter smoke, or more generously for a bolder taste. It’s a versatile choice that many love with turkey.
- Maple: Produces a mild, slightly sweet, and subtly earthy smoke flavor. It’s excellent for a gentle infusion of smokiness.
For convenience, consider a variety pack like this Mr. Bar-B-Q Wood Chip Bundle, which includes apple, mesquite, and hickory. You could use the apple or hickory for your turkey and save the mesquite for other meats, like a Smoked Ribeye Recipe.
If you prefer pellets, the Traeger Grills Signature Blend is an excellent option. This blend consists of 100% all-natural wood pellets, combining maple, cherry, and hickory – a perfect trio to enhance the natural flavors of your smoked turkey.
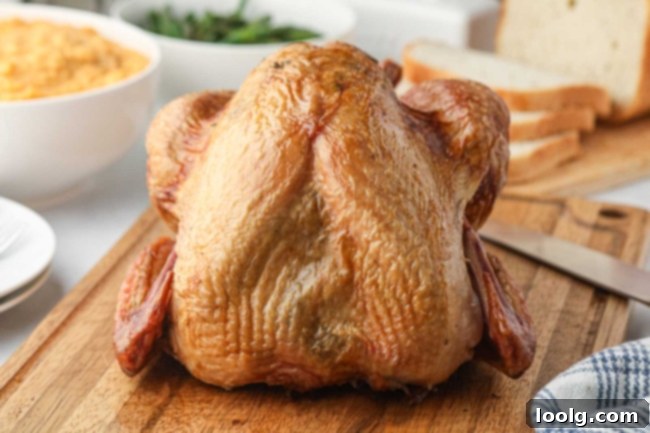
Dietary Notes: Gluten-Free & Paleo Friendly
One of the many great aspects of this Traeger smoked turkey recipe is its inherent compatibility with various dietary needs. This recipe is naturally **gluten-free** and **keto-friendly**, making it a fantastic centerpiece for those following these eating styles. Furthermore, with a simple substitution, it can easily be made **paleo and dairy-free**.
For those managing gluten sensitivities or adhering to a paleo diet, a critical step is to carefully check the labels of any store-bought broth used in the brine. While the fundamental ingredients of broth (meat, vegetables, water) are naturally free from gluten and often paleo-compliant, some commercial brands may contain hidden additives, flavorings, or thickeners that include gluten or non-paleo ingredients.
To ensure your turkey remains completely gluten-free and paleo, always look for broths explicitly labeled as “gluten-free” or “paleo-friendly.” Alternatively, making your own homemade broth is a foolproof way to control all ingredients and guarantee it meets your dietary requirements.
Perfect Thanksgiving Side Dishes to Complement Your Turkey
A magnificent smoked turkey deserves an equally impressive array of side dishes. Here are some of my favorite recipes that perfectly complement the rich, smoky flavors of this Traeger turkey, ensuring a truly unforgettable holiday feast:
- Honey Orange Cranberry Sauce: A vibrant, zesty sauce that balances the richness of the turkey.
- Naturally Gluten-free Quinoa Stuffing: A wholesome and flavorful alternative to traditional bread-based stuffings.
- Mashed Sweet Potatoes with Bacon: A delightful combination of sweet and savory, with a comforting texture.
- Sweet Potato Mac and Cheese: A comforting and creamy dish with a healthy twist, perfect for kids and adults alike.
I truly hope you’ll savor every succulent bite of this Traeger smoked turkey! It’s a recipe born from a desire for perfectly juicy, flavorful holiday meals, and it has become a cherished tradition in my kitchen. If you give it a try, please share your experience and thoughts in the comments below – I’d love to hear from you! Happy smoking! 🙂
Traeger Smoked Turkey Recipe
Ingredients
For the brine:
- 3 quarts vegetable broth or chicken or turkey broth
- 250 grams kosher salt this is equivalent to 1 cup Morton Kosher Salt, 1 3/4 cups Diamond Crystal Kosher Salt, or 3/4 cup table salt*
- 2 tablespoons fresh rosemary finely chopped
- 2 tablespoons fresh thyme finely chopped
- 2 tablespoons fresh sage finely chopped
- 5 quarts ice water combined volume of ice and water should be 5 quarts
For the turkey:
- 1 whole 12 to 16-lb (5.4 to 7.3-kg) turkey NOT one that’s already been salted/brined/injected/basted/enhanced, should be thawed (if frozen)
- 1 cup (225 grams) unsalted butter softened (or olive oil for paleo)
- 2 tablespoons fresh rosemary finely chopped
- 2 tablespoons fresh thyme finely chopped
- 2 tablespoons fresh sage finely chopped
- 5 cloves garlic minced
- 1 tablespoon kosher salt
- 1 teaspoon ground black pepper
- 1 lemon zested
Instructions
Make the brine (a day before serving):
-
Line a large container, such as a pot, bucket, or roasting pan, with a brining bag — make sure it’s big enough to hold both the turkey and the brine comfortably and will fit in your fridge. If you have a large enough pot to hold everything, you don’t need to use a brining bag.
-
Remove the innards from the turkey. Place the turkey, breast side down, into the bag. This allows the breast meat, which is more prone to drying out, to absorb more moisture and flavor. Since the breast is the thickest and most delicate part, submerging it helps ensure it stays juicy during the cooking process.
-
In a large stockpot, combine the broth, salt, rosemary, thyme and sage. Bring the mixture to a boil, stirring often to ensure the salt dissolves completely.
-
Once the mixture reaches a boil, remove it from heat, add the ice water, and allow it to cool to room temperature.
-
Once the brine has cooled, transfer it to the brining bag, ensuring the turkey is fully submerged and filled with the liquid. If you’re using a brine bag, make sure to hold the sides upright to prevent them from collapsing while you pour in the brine. If you have a second set of hands, that’s helpful! It’s fine if the bony tips of the legs stick out at the top. For larger turkeys, you might need to prepare additional brine by dissolving 1/4 cup of salt in 4 cups of warm water to cover the turkey completely. If using additional brine, make sure it’s well-mixed and chilled before adding to the main brine.
-
If the turkey floats, weigh it down with a heavy pot, a bag of ice, a stack of plates, or another heavy object.
-
Remove as much air as you can from the liner and seal it tightly. Then, place the turkey in the refrigerator or an ice-filled cooler.
-
Refrigerate the turkey for 12-24 hours.
-
Take the turkey out of the brine and discard the brine.
-
Rinse the turkey under cold running water, making sure to get into the cavity and around the neck and wings.
-
After rinsing, pat the turkey very dry thoroughly with paper towels. This is crucial for achieving crisp skin when cooking.
Smoke (the day of serving):
-
Take the turkey out of the refrigerator for 30-60 minutes before placing it on the smoker to allow it to come slightly closer to room temperature.
-
Place a drip pan under where you’ll smoke the turkey to catch drippings and minimize cleanup. Add your chosen wood chips or pellets to the smoker. Apple, cherry, hickory, and maple are excellent wood choices for turkey.
-
Preheat the Traeger smoker to 225 °F (107 °C) with the lid closed for about 15 minutes to reach a stable temperature and produce good smoke.
-
In a small bowl, combine the softened butter (or olive oil), finely chopped rosemary, thyme, sage, minced garlic, kosher salt, black pepper, and lemon zest. Mix well until all ingredients are evenly distributed, forming a fragrant herb butter mixture.
-
Carefully separate the skin from the turkey breast by gently sliding your fingers underneath, taking care not to tear the skin. Spread about half of the herb-butter mixture evenly under the skin, directly over the breast meat. Rub the remaining herb butter generously over the entire outside of the turkey, ensuring it’s fully coated for maximum flavor and browning.
-
Tuck the wing tips under the turkey’s body to prevent them from burning, and tie the legs together with kitchen twine for a compact shape and even cooking.
-
Place the turkey directly on the grill grates, breast side up. Insert a reliable meat probe or thermometer into the thickest section of the turkey breast, ensuring it avoids touching any bone, which can skew temperature readings.
-
Close the lid and smoke at 225 °F (107 °C). Smoking a 12-16 lb turkey at this temperature typically takes 30-40 minutes per pound, resulting in approximately 6-10 hours total. The exact duration depends on the turkey’s size, your smoker’s consistency, and how often the lid is opened. For crispy skin: when the turkey’s internal temperature reaches approximately 145 °F (63 °C), raise the heat of your Traeger to 375-400 °F (190-205 °C). Continue smoking at this higher temperature until the internal temperature reaches 160°F (71°C) in the thickest part of the breast and 175°F (80°C) in the thighs. This final high-heat phase will take about 30-60 minutes and is crucial for rendering fat and crisping the skin.
-
Carefully remove the turkey from the smoker and transfer it to a clean cutting board. Tent it loosely with aluminum foil and let it rest for at least 15-30 minutes (longer for larger birds). This vital resting period allows the juices to redistribute throughout the meat, ensuring a tender and moist carve, and permits the turkey to reach its final safe internal temperature of 165 °F (74 °C) in the thickest part of the breast.
-
Carve and serve your perfectly smoked turkey immediately! Let any leftovers cool completely before storing them in an airtight container in the refrigerator for up to 4 days.
Notes
It is critical to read the full instructions and plan your timing carefully. Always cook by internal temperature, not just by time, to ensure food safety and optimal results. A reliable meat thermometer is your best friend when smoking turkey.
