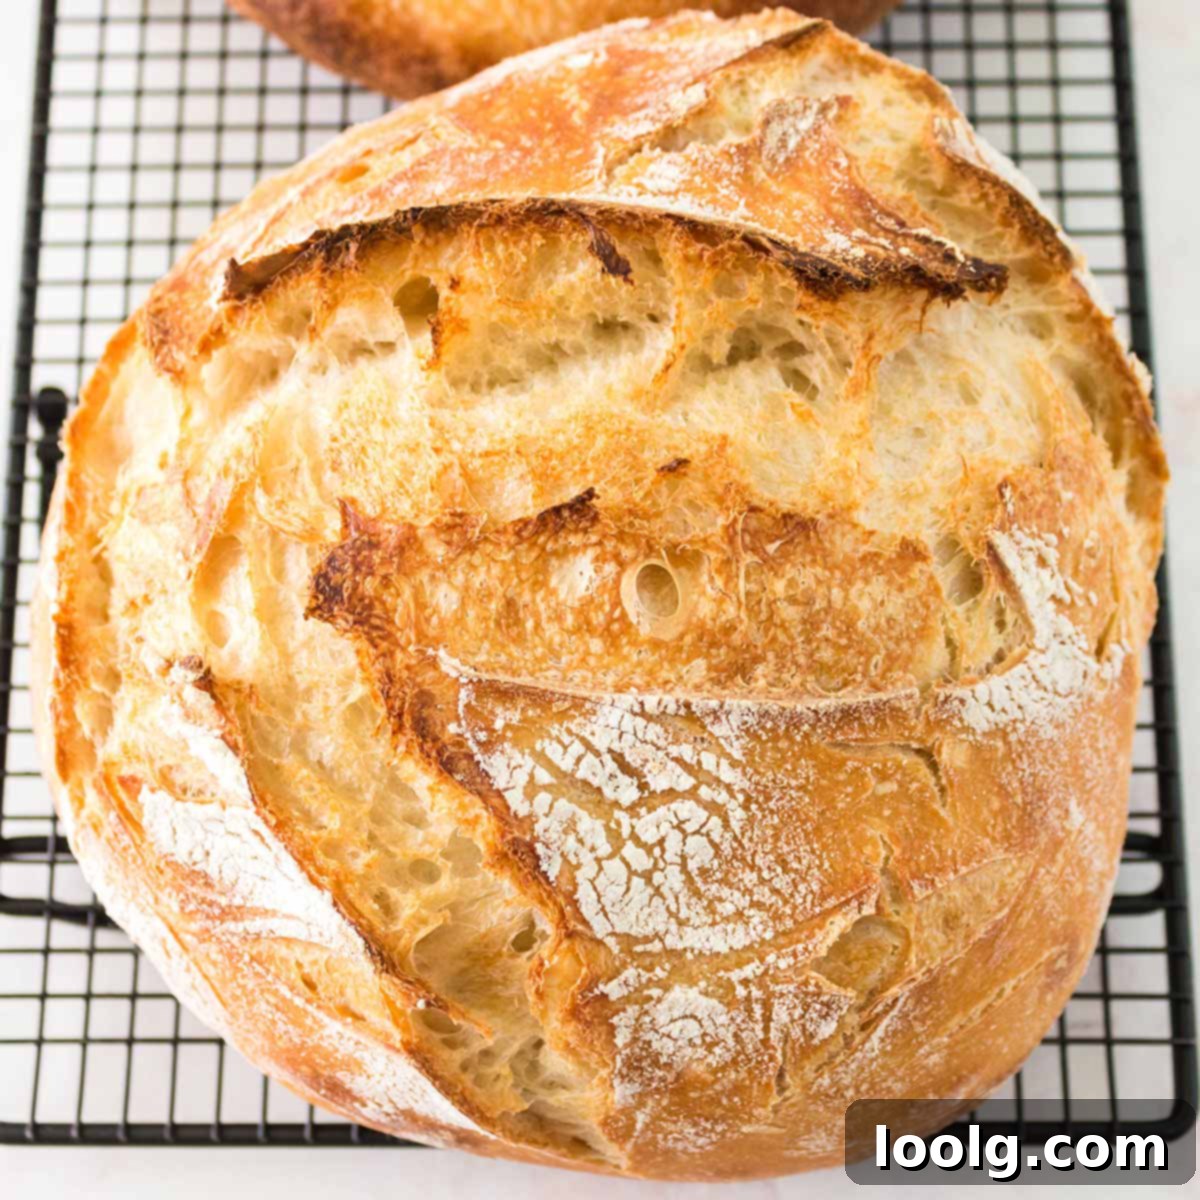
Effortless Overnight Sourdough Bread: Bake a Perfect Artisan Loaf at Home
Baking a loaf of homemade sourdough bread is an incredibly rewarding experience, and with this easy overnight recipe, it’s more accessible than ever. Imagine starting a simple process before bed, only to wake up to the delightful aroma of freshly fermented dough, ready for its final bake. You’ll be greeted with a perfectly crisp crust, a beautifully airy interior, and that distinct, hearty tangy flavor that only true sourdough can deliver. This naturally vegan bread is hands down one of the most satisfying handcrafted loaves you can create in your own kitchen, effortlessly fitting into even the busiest schedules.
Whether you’re a novice taking your first steps into the world of bread making or an experienced baker seeking a reliable and delicious recipe, a truly exceptional overnight sourdough loaf remains a cherished goal. This particular recipe is designed with simplicity in mind, making it remarkably easy for beginners to approach with confidence. The outcome is consistently a stunning, tangy loaf that boasts the rustic charm and impressive appearance of a professional artisan bake. Its long fermentation process not only develops incredible flavor but also contributes to its unique texture and improved digestibility.
Understanding Sourdough Bread: More Than Just a Loaf
At its core, sourdough bread is a slow-fermented bread that harnesses the power of natural, wild yeasts and beneficial bacteria, rather than relying on commercial baking yeast, to achieve its characteristic rise. This ancient method of leavening gives sourdough its distinctive tangy flavor, incredibly crisp crust, and wonderfully chewy texture. But its benefits extend far beyond taste and texture; sourdough is often lauded for being easier to digest and more nutritious than traditional commercially produced bread.
The magic of sourdough lies in its unique ingredient: a sourdough starter. This live fermented culture, a symbiotic colony of wild yeast and lactobacilli bacteria, acts as a natural leavening agent. During the long fermentation process, these microorganisms work diligently to break down carbohydrates and proteins in the flour. This biochemical transformation is key to sourdough’s superior qualities. For instance, the naturally occurring acids produced by the lactobacilli help to pre-digest the gluten, making it less challenging for many people to digest. While it’s crucial to understand that sourdough is *not* gluten-free (a point we’ll explore further below), this partial breakdown of gluten can significantly improve tolerance for those with sensitivities.
Furthermore, this extended fermentation process increases the bioavailability of essential nutrients. Sourdough bread is a good source of vitamins and minerals like folate, calcium, potassium, magnesium, and various B vitamins. The fermentation also produces antioxidants, which are compounds known to help lower the risk of certain cancers, combat signs of aging, and support the body in managing chronic diseases such as arthritis. With such an impressive nutritional profile and an undeniable taste, embarking on the journey of making sourdough bread from scratch is a deeply satisfying endeavor that you’ll undoubtedly want to revisit time and time again.
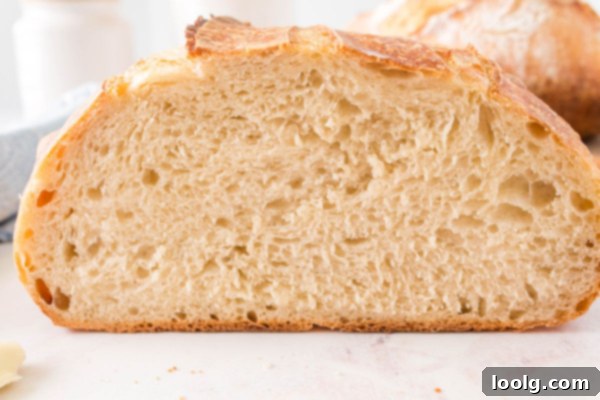
Essential Ingredients for Your Overnight Sourdough
Despite its artisan appeal, baking a truly fantastic loaf of overnight sourdough requires surprisingly few ingredients. With just four basic components and a little bit of time and effort, you’ll be well on your way to enjoying a heartwarming, delicious bread to kickstart your day.
- 1 cup active sourdough starter: This is the heart of your sourdough. Ensure your starter is active and bubbly, fed within 4-12 hours before you plan to mix your dough.
- 3 1/4 cups room temperature bottled water, divided*: The quality of your water is more important than you might think in sourdough baking.
- 8 cups unbleached all-purpose flour: The choice of flour profoundly impacts the texture and flavor of your final loaf.
- 5 teaspoons salt: Essential for flavor, strengthening the gluten, and regulating fermentation.
*A note on water: It is widely believed among sourdough bakers that chlorinated tap water can inhibit the activity of your delicate sourdough starter. Chlorine can harm the beneficial wild yeasts and bacteria that are vital for fermentation. To avoid this, you have a couple of straightforward options: you can either boil your tap water and allow it to cool completely before using it in your recipe, which helps dissipate the chlorine, or opt for bottled, filtered water. Using bottled water ensures a neutral environment where your starter can thrive.
If you find yourself with extra sourdough starter after embarking on this baking adventure, don’t let it go to waste! There are many creative ways to incorporate it into other delightful treats. For a savory snack that’s perfect for sharing, consider trying these fantastic-looking Sourdough Pretzel Bites!
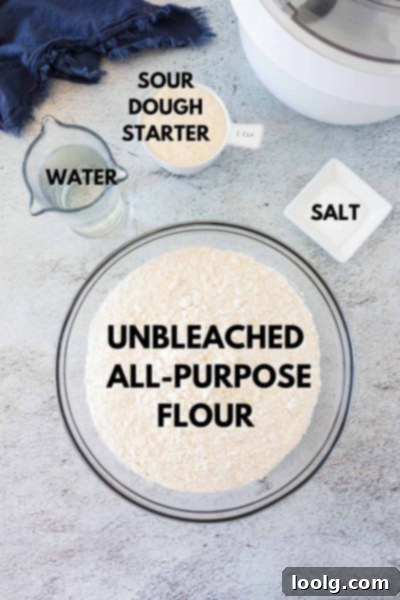
The Importance of Unbleached Flour in Sourdough Baking
When selecting flour for your sourdough bread, opting for unbleached all-purpose flour is highly recommended. Unbleached flour undergoes a natural aging process, allowing it to whiten slowly over time through exposure to oxygen. This natural maturation process results in a flour that tends to produce a denser and tougher texture, which is ideal for resilient baked goods like hearty breads and certain sturdy desserts. Its protein structure is better preserved, leading to stronger gluten development.
While “unbleached” suggests a lack of chemical treatment, it’s important to be an informed consumer. Although unbleached flour typically contains fewer chemical additives than its bleached counterpart, some brands, particularly in the U.S., might still include flour improvers like potassium bromate. Potassium bromate is used to strengthen dough and promote higher rising. However, its use has been banned in the European Union, Canada, China, and many other countries due to concerns about its potential carcinogenic properties. While the health risks associated with the small amounts of such oxidizers in flour are a subject of ongoing debate, for peace of mind and optimal health, it’s always advisable to carefully read ingredient labels and seek out unbleached flour that explicitly states “no chemicals added” or “potassium bromate free.”
In contrast, bleached flour is chemically aged using agents like chlorine gas or benzoyl peroxide to rapidly whiten it, creating a finer, softer, and whiter product. This accelerated process can unfortunately strip the flour of vital nutrients, including protein and calcium, and can also subtly alter its taste and texture, often making it less suitable for robust breads. Bleached flour’s softer nature makes it a better fit for delicate baked goods like cookies, cakes, and pastries where a tender crumb is desired. Benzoyl peroxide, a common oxidizing agent found in bleached flour, is known for its ability to strengthen dough and enhance elasticity, creating a more uniform and whiter appearance. Interestingly, this very chemical is also an active ingredient in many acne creams.
Ultimately, by choosing unbleached flour that is free from unnecessary chemical additives, you are not only enhancing the nutritional value of your sourdough but also contributing to the overall quality, flavor, and texture of your finished bread. This mindful ingredient choice supports both your health and the integrity of your baking.
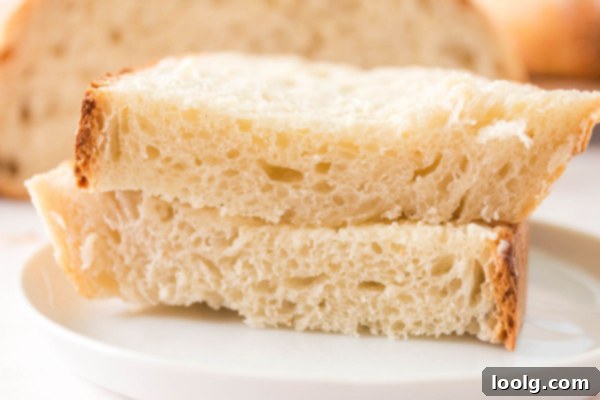
The Genius of Overnight Sourdough
There’s truly nothing quite like waking up to the promise of fresh, warm, and toasty sourdough bread, setting the perfect tone for a wonderful day. The incredible convenience and profound flavor development are what make overnight sourdough truly shine. The magic largely unfolds while you are sound asleep, as the sourdough starter slowly ferments the dough, building complex flavors and a beautiful structure. When you wake, the most labor-intensive part is complete, leaving you with just the joy of baking it off. You’ll then be ready to slice into a wonderful loaf, perfect for pairing with your favorite spread, perhaps a vibrant and naturally sweet Blueberry Chia Jam.
While overnight sourdough does involve a commitment of time, particularly for the resting and fermentation periods, the actual hands-on effort is minimal and strategically spread out. The deep, classic taste, the robust, satisfying crunch of the crust, and the healthy, chewy goodness of the crumb are unparalleled. This extended fermentation also contributes to better digestibility and a more nuanced flavor profile that short-fermented breads simply cannot achieve, making every bite a testament to the patient process.
Mastering the Stretch-and-Fold Technique
The stretch-and-fold technique is a fundamental method in sourdough baking that significantly improves the quality of your bread. Its primary purpose is to strengthen the gluten network within the dough and gently incorporate air, all without the need for intense, traditional kneading. This technique also helps to equalize the temperature throughout the dough, promoting a more even fermentation. By performing stretches and folds, you encourage the gluten proteins to align and form strong bonds, which is crucial for achieving an impressive oven spring and a wonderfully open, airy crumb structure. Ultimately, this method is key to increasing the dough’s volume and ensuring a high, beautiful rise in your finished loaf.
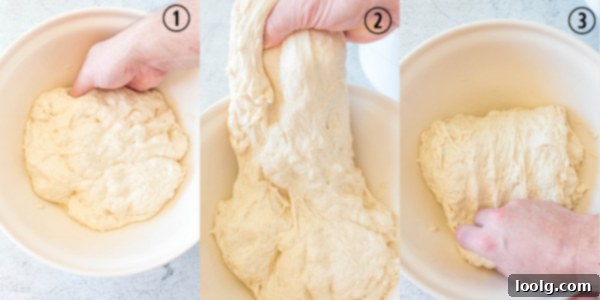
To begin, place your bowl directly in front of you. Envision the surface of your dough as the face of a clock ⏰, with the ’12 o’clock’ position being the point nearest to you. Lightly moisten your fingertips – this prevents the dough from sticking. Gently slide your fingers underneath a section of the dough at the 12 o’clock position, with your thumb resting on top. Carefully pull and stretch this section upwards, extending it as far as it will comfortably go without tearing. Then, gently fold the stretched dough back over itself, towards the center of the bowl, much like you would close a book.
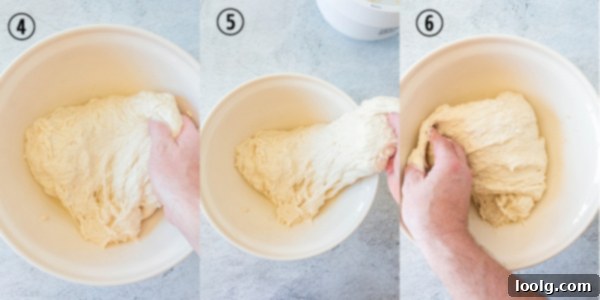
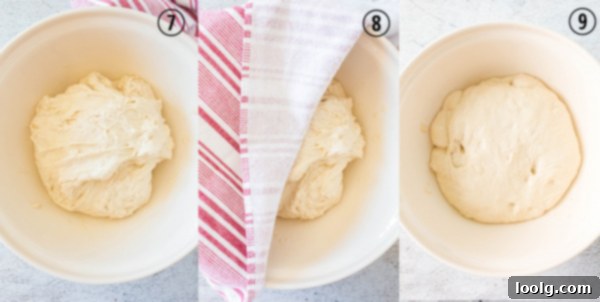
Repeat this exact stretching and folding motion at the 3 o’clock, 6 o’clock, and 9 o’clock positions around the bowl. Each set of four stretches and folds constitutes one ’round’. After completing one round, cover the dough with a clean kitchen towel and allow it to rest undisturbed for 30 minutes in a warm, draft-free environment. A turned-off microwave oven or a slightly warmed oven (turned off!) can be an excellent spot for this. For this recipe, you will repeat the stretch and fold technique a total of four times, ensuring the dough rests for 30 minutes between each round, accumulating a total resting time of 2 hours. This rhythmic process is not only simple and effective but also a truly engaging way to connect with your dough!
The Art and Science of Scoring Sourdough Bread
Scoring bread before it enters the oven serves two fundamental purposes, blending both scientific necessity and artistic expression. In bread making, there are typically three distinct rises: the initial bulk fermentation, a second rise often referred to as ‘proving’ which occurs after shaping the dough and knocking out the initial air, and finally, the spectacular ‘oven spring’ that happens when the dough hits the intense heat of the oven. During oven spring, the residual yeast and bacteria in the dough go into hyperdrive, rapidly producing carbon dioxide and causing a significant, often explosive, expansion of the dough. Without controlled scoring, this expansion can lead to uneven cracks, leaving your loaf with unsightly lumps and bumps, much like an uncontrolled volcano effect.
Scoring the bread with a sharp blade just before baking provides designated weak points or ‘vents’ in the dough’s surface. These incisions guide the oven spring, allowing the steam and gases to escape in a controlled manner. This directed expansion results in a more uniform, beautifully risen loaf with a desirable open crumb structure. It prevents the crust from tearing haphazardly and ensures a predictable and aesthetically pleasing bloom.
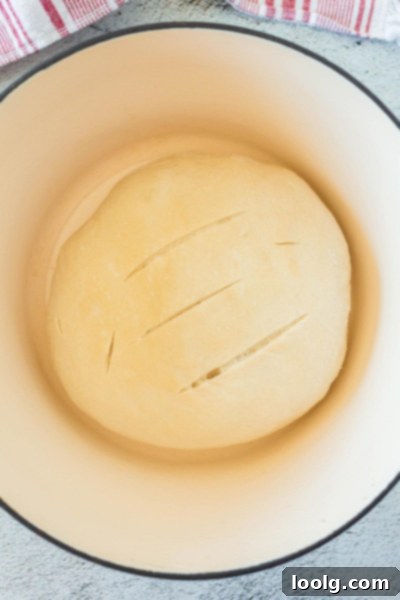
Beyond its practical function, scoring also offers an incredible opportunity for aesthetic appeal and personal expression. Historically, in the days of communal ovens, bakers would often carve their own unique ‘scoring signature’ onto their loaves. This distinctive pattern served as a personal brand, allowing them to easily identify their bread among many others. Today, it remains a wonderful way to personalize your homemade loaves, transforming them into true works of edible art.
The key to successful scoring is to use a very sharp knife or, ideally, a specialized bread lame (a razor blade holder) and to move the blade along a single, deliberate line. Aim for a depth that just barely cuts through the dough’s outer skin, allowing it to gently open and move apart as it bakes. The exact design is entirely up to your creativity – you can opt for a simple single line down the middle for a classic look, create elegant ‘X’ patterns, trendy hashtags, graceful spirals, or even intricate leaf or lace-like designs across the top of the loaf. This is your moment to craft a signature score that reflects your unique artistic flair and makes each loaf distinctly yours.
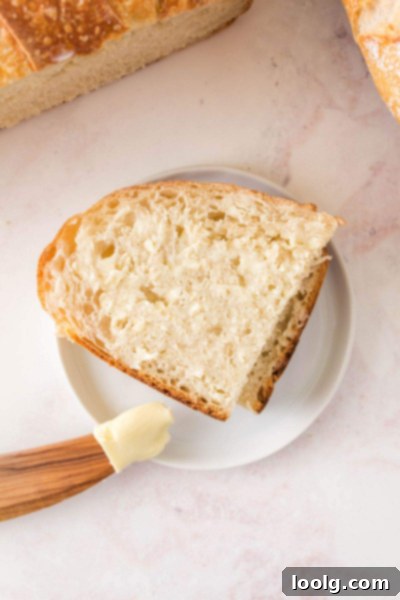
Delicious Ways to Enjoy Your Sourdough Bread
Once you’ve baked your beautiful overnight sourdough loaf, you’ll be eager to dive in! Here are some fantastic ideas to help you savor every slice of your freshly baked bread, offering something for every palate and occasion:
- Mozzarella Bruschetta: Imagine perfectly ripened, sweet tomatoes, fragrant fresh basil, and generous amounts of gooey mozzarella piled high on a toasted slice of your amazing sourdough bread. This simple yet elegant appetizer is a true crowd-pleaser and lets the robust flavor of the bread shine.
- Roasted Tomato and Garlic Soup: There’s nothing quite as comforting as a warm bowl of roasted tomato and garlic soup. Serve it alongside thick slices of toasted sourdough, perfect for dipping and soaking up every last drop of the rich, savory broth. It’s an incredibly easy and deeply satisfying meal.
- Chipotle and Sweet Pepper Hummus: Elevate your snack game with this vibrant chipotle and sweet pepper hummus. Its smoky, sweet, and slightly spicy notes make it an ideal spread for a quick afternoon bite. Slather it generously on your sourdough bread for a delicious and surprisingly simple treat.
- Smoked Corned Beef Brisket Sandwich: If you’re indulging in the rich flavors of a homemade smoked corned beef brisket, then adding your overnight sourdough bread to the menu is an absolute must. Craft an incredible, hearty sandwich that will make your next leisurely lunch an unforgettable culinary experience.
- Air Fryer Ham with Sourdough: Since your oven is already preheated for your sourdough, why not utilize your air fryer for a delicious ham recipe? It’s wonderfully easy: simply add butter, garlic, and herbs to a fully baked ham and heat it until warm and fragrant. Pair it with your fresh sourdough, and enjoy any leftovers later in the week as a tasty ham sandwich.
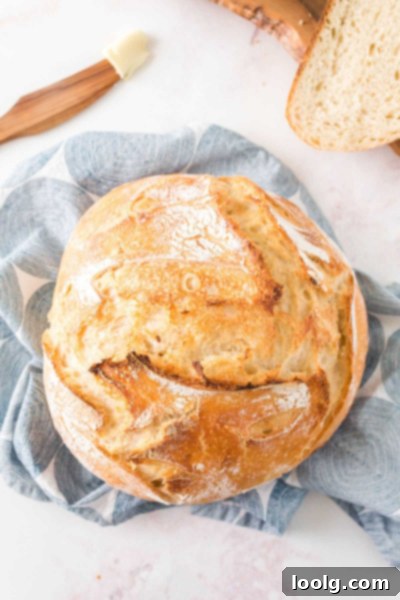
Optimal Storage Techniques for Your Sourdough Loaf
Properly storing your sourdough bread is crucial for maintaining its unique texture and flavor. Immediately after it comes out of the oven, it’s best to allow your bread to cool completely, uncovered, at room temperature for the first day. This allows excess moisture to evaporate, contributing to the development and preservation of that coveted crisp crust. The crust will generally remain at its peak texture for about one day, though it may begin to soften slightly by the second.
It’s vitally important to resist the temptation to slice into your warm bread before it has thoroughly cooled. Slicing too early can cause the interior of the bread to dry out much quicker, and it will also negatively affect the texture and flavor, resulting in a gummier, less airy crumb. Patience is a virtue in sourdough baking, and it truly pays off here!
Once the bread has cooled completely, if you choose to slice it, the best way to store it to retain moisture is to leave the cut-side down on a clean cutting board, still uncovered. This simple method helps to seal in the moisture from the exposed crumb while allowing the crust to remain crisp. If you prefer a softer crust rather than a crunchy one, you can wrap the bread in a clean kitchen towel while it is still slightly warm, which will trap steam and soften the crust as it cools.
For storing an unsliced loaf for a few days, transfer it to a large paper bag and fold the edges closed. A paper bag allows for some air circulation, which helps prevent the crust from becoming overly soft or soggy, while still protecting the bread. However, you might notice that the crust will not be as intensely crispy as on the first day. By day three, or if you notice the bread starting to dry out, it’s generally best to transfer it to a bread box or a large, airtight Ziploc bag. While this method can trap more moisture, potentially making the crust softer, you can easily revive that crispy crunch by lightly toasting the slices before serving. If you anticipate not finishing the entire loaf within a few days, freezing is an excellent option for long-term storage.
Freezing Your Sourdough: A Smart Strategy for Freshness
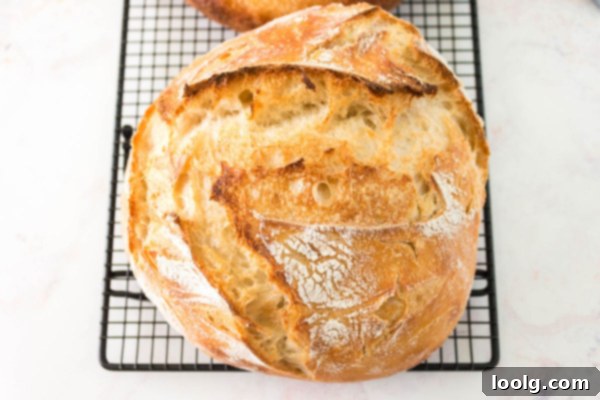
Absolutely, sourdough bread freezes beautifully! This makes it incredibly convenient to bake a double batch – bake one loaf to enjoy immediately and freeze the other for a future craving. 😉 Having a pre-baked, frozen loaf of artisan sourdough on hand is a wonderful time-saver and ensures you always have delicious bread ready when you need it.
When freezing homemade bread, the most critical step is to allow it to cool completely to room temperature before wrapping and freezing. Freezing warm bread will trap steam, which will then condense into ice crystals, leading to a soggy texture upon thawing. Once properly cooled, a frozen loaf can last anywhere from 3 to 6 months. Do note, however, that while it remains safe to eat, the longer it’s stored, the more subtle its flavor and texture may diminish over time.
To freeze an entire loaf, ensure it’s fully cooled, then place it into a large, heavy-duty freezer-safe Ziploc bag, pressing out as much excess air as possible before sealing it tightly. For added protection against freezer burn, you can also wrap the loaf tightly in plastic wrap or aluminum foil before placing it in the freezer bag. This method is fantastic for preserving your extra loaf, and when thawed and reheated, it will taste almost as amazing as the day you first baked it.
If you prefer not to freeze an entire loaf, individual slices can also be frozen with ease. Simply slice the cooled bread and arrange the slices in a large Ziploc bag. If your bread is particularly moist or you want to ensure the slices don’t stick together, you might want to place a small piece of parchment paper between each slice. This smart trick allows you to take out just one slice at a time, defrost it, toast it, and serve up a quick and delicious breakfast or snack whenever the mood strikes.
For those looking to expand their sourdough repertoire, another delightful recipe to explore is this hearty Potato Sourdough Bread, which offers a unique texture and flavor profile.
Can This Sourdough Recipe Be Made Gluten-Free?
Unfortunately, this specific sourdough bread recipe cannot be simply converted into a gluten-free version. Sourdough baking, particularly for leavened breads, relies heavily on the unique properties of gluten to create its structure, elasticity, and iconic chewy texture. Gluten forms a complex network that traps the gases produced during fermentation, allowing the bread to rise and develop its open crumb.
Attempting to convert a traditional wheat-based sourdough recipe to a gluten-free one is inherently risky and often results in a significant waste of time and ingredients. Gluten-free flours behave very differently from wheat flour; they lack the elasticity and structure that gluten provides, requiring different hydration levels, mixing techniques, and often a blend of various gluten-free flours and binders (like xanthan gum) to achieve a comparable result. While it might sometimes be possible to adapt quick bread recipes to be gluten-free, yeast-leavened breads and especially sourdough present a much greater challenge due to their reliance on gluten development.
For those needing or wanting gluten-free sourdough, the best approach is to seek out recipes specifically developed from the ground up to be gluten-free. These recipes will utilize a blend of gluten-free flours and a gluten-free sourdough starter (often made with brown rice flour or sorghum flour) and will employ specialized techniques to compensate for the absence of gluten. Rest assured, I am actively working on developing a reliable gluten-free sourdough recipe to share in the future!
So that’s it! Enjoy the incredibly rewarding process of making and savoring your own homemade overnight sourdough bread. If you bake this or any of my other recipes, I would absolutely love to see pictures of your wonderful creations on Instagram, Facebook, and Twitter! Please remember to hashtag them #fooddoodlesrecipes so I can easily find and admire your baking masterpieces.
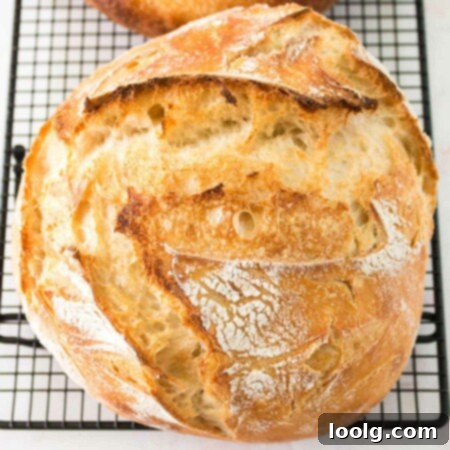
Overnight Sourdough Bread
Ingredients
- 1 cup sourdough starter
- 3 ¼ cups room temperature water divided
- 8 cups of unbleached all-purpose flour
- 5 teaspoon salt
Instructions
-
To the bowl of a stand mixer add 1 cup of your sourdough starter and 3 cups of room temperature water and mix until milky looking.
-
Mix in the flour until combined. Let the dough rest for 30 minutes.
-
Add the salt and 1/4 cup of the remaining water. Mix the dough until everything is combined and the dough comes off the side of the bowl. The dough will still be quite sticky and wet. Transfer the dough to an oiled bowl.
-
Now it’s time to stretch the dough. With the bowl in front of you, picture the dough as if it were a clock with 12 being in front of you. Grab a handful of the dough (fingers under the ball and thumb on top) at 12, pull/stretch the dough then fold it back on top, like closing a book. Do it again for 3, 6 and 9 o’clock.
-
Cover the dough and let it rest for 30 minutes in a warm, draft-free spot. The microwave is a good place.
-
Repeat steps 4 and 5 three more times. For a total resting time of 2 hours.
-
After doing the stretch and fold technique 4 times (every 30 minutes for 2 hours), cover the dough with a clean tea towel. Let it rest in an undisturbed, warm, draft-free place for 2 hours or until doubled in size.
-
Slightly flour a clean countertop and put the dough on there. Cut the dough in half and shape each half into a large ball. Let it sit uncovered on the counter for 30 minutes.
-
Get our two proofing baskets, plastic or glass bowls. Flour them with a bit of flour or put a piece of parchment paper in there and put the bread on that. This will make transferring the dough to the Dutch oven easier tomorrow morning.
-
After the 30 minutes are up, do the stretch-and-fold technique one last time and transfer the dough to the prepared bowls.
-
Cover and put in the fridge overnight.
The next morning:
-
Get your bread out of the fridge.
-
Put a Dutch oven in the oven and preheat the oven, with the Dutch oven in there, to 425 °F (218 °C). I use a 7-quart Tramontina Enameled Cast Iron Round Dutch Oven.
-
Once the oven is preheated, take the Dutch oven out of the oven and put the bread in. If you used a proofing basket, gently tilt the basket and the bread will fall out into the Dutch oven. Or you can transfer the dough into your hand, gently, so that you don’t squish the air bubbles and put the dough in the Dutch oven. You could also use parchment paper – lift the dough by holding the parchment paper edges and put in the Dutch oven with the paper.
-
Score your bread with a sharp knife or a blade. Make 2 or 3 scores on top
-
Bake, with the lid on, for 20 minutes.
-
Take the lid off and cook for another 15 to 20 minutes.
-
Remove the Dutch oven from the oven, and remove the bread from the Dutch oven. Transfer it to a cooling rack for 15 minutes before slicing.
-
Put the lid back on the Dutch oven and put it back in the oven to re-heat for 5 minutes. Then repeat steps 3 to 7 for the second bread.
Notes
When you do the stretch and fold technique, the first time the dough will be sticky and the last time you do the stretch and fold the dough will be softer and more elastic.
