The Ultimate Easy Instant Pot Hot Chocolate: Rich, Creamy & Perfect for Holiday Gatherings
There’s nothing quite like a steaming mug of rich, creamy hot chocolate to warm your soul, especially during the festive holiday season or on a chilly evening. Imagine making this beloved beverage without the constant stirring, without the risk of scorching, and in a generous batch that stays perfectly warm for hours. This is where your Instant Pot becomes an absolute game-changer for homemade hot chocolate! Forget hovering over the stove; with this Instant Pot Hot Chocolate recipe, you can effortlessly create a decadent, intensely chocolaty drink that’s ready when your guests arrive and stays warm until the last drop.
I absolutely adore utilizing my Instant Pot for crafting large quantities of warm, comforting drinks. It truly simplifies the process, transforming what can sometimes be a tedious task into a hands-off, stress-free experience. The beauty of this method lies in its convenience: once the initial steps are complete, your hot chocolate is practically self-sufficient, simmering gently and maintaining its ideal temperature thanks to the Instant Pot’s ‘Keep Warm’ function. This frees you up to enjoy your company, finish other holiday preparations, or simply relax.
For those who appreciate the joy of hot chocolate and are seeking delightful party favors or stocking stuffers, consider these Vegan Hot Chocolate Bombs. They are not only incredibly delicious but also make charming, personalized gifts. If white chocolate is more to your liking, these Halloween Hot Chocolate Bombs offer a fantastic alternative. Simply omit the decorative eyes, and you’re left with enchanting white chocolate bombs perfect for any holiday occasion, promising a magical, creamy treat when melted into warm milk.
When you’re hosting a crowd of cherished family and friends for the holidays, simplicity and efficiency are key. This Instant Pot hot chocolate recipe makes entertaining a breeze, ensuring everyone gets a cup of pure chocolaty bliss, guaranteed to bring smiles to faces.

Essential Ingredients for Your Instant Pot Hot Chocolate
Crafting the perfect hot chocolate begins with selecting the right ingredients. Each component plays a crucial role in achieving that rich, smooth, and deeply satisfying flavor. Here’s a closer look at what you’ll need and why:
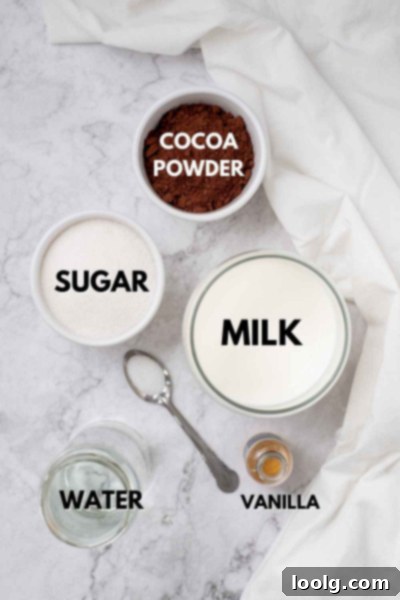
- Water: While it might seem counterintuitive for a milk-based drink, a small amount of water is essential for creating the initial cocoa paste. This method is key to preventing lumps and ensuring a silky-smooth texture.
- Unsweetened Dutch-Process Cocoa Powder: This is the secret weapon for truly exceptional hot chocolate. Dutch-process cocoa has been treated with an alkaline solution, which neutralizes its acidity. This results in a darker color, a mellower, less bitter flavor, and most importantly, it dissolves much more easily into liquids compared to natural cocoa powder. This makes it ideal for drinks, ensuring a velvety consistency without grainy residue.
- Granulated Sugar: The classic sweetener that perfectly balances the bitterness of the cocoa. You can adjust the quantity to suit your personal preference for sweetness.
- Salt: A pinch of salt might seem unusual, but it’s a critical flavor enhancer. Just like in baking, salt helps to bring out the depth of the chocolate, making it taste even more intensely chocolaty and complex. Don’t skip it!
- Vanilla Extract: A splash of good quality vanilla extract adds a layer of warmth and complexity, complementing the chocolate notes beautifully and enhancing the overall aroma.
- Whole Milk: For the ultimate rich and creamy hot chocolate, whole milk is highly recommended. Its fat content contributes significantly to the luxurious mouthfeel. For an even more decadent version, consider using half-and-half or heavy cream, which will result in an unbelievably thick and velvety beverage. If you prefer a dairy-free option, unsweetened almond milk, oat milk, or soy milk can also be used, though the texture might be slightly less rich.
Effortless Preparation: How to Make Instant Pot Hot Chocolate
Making this hot chocolate in your Instant Pot is incredibly straightforward. Follow these simple steps for a perfect batch every time:
- Create the Cocoa Paste: Begin by adding the water, Dutch-process cocoa powder, granulated sugar, vanilla extract, and salt directly into the inner pot of your Instant Pot.
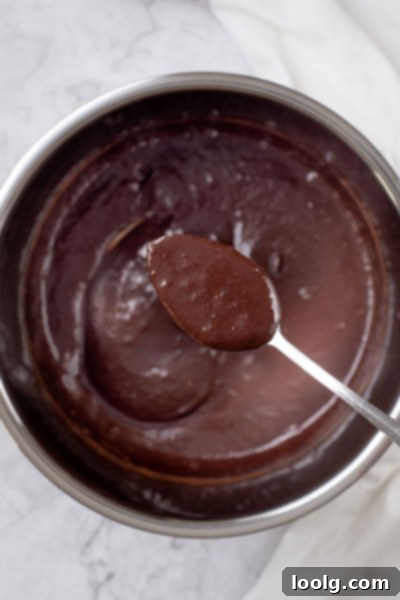
- Whisk Thoroughly: Select the ‘Sauté’ function on your Instant Pot. While it begins to heat, vigorously whisk all the ingredients together. Continue whisking until a smooth, thick paste forms. This step is crucial for dissolving the cocoa powder completely and preventing any lumps in your finished hot chocolate.
- Stir in the Milk: Once the paste is smooth, pour in the whole milk (or cream/half-and-half). Stir everything together thoroughly until well combined.
- Heat to Perfection: Continue to stir occasionally as the mixture heats on the ‘Sauté’ setting. You’re aiming for a warm, steamy hot chocolate, not a boil. The Instant Pot will gently heat the mixture, preventing scorching.
- Keep Warm and Serve: Once your hot chocolate is perfectly warm, hit ‘Cancel’ and then select the ‘Keep Warm’ function. This feature is a lifesaver, maintaining the ideal serving temperature for hours without overcooking.
- Garnish and Enjoy: Ladle the hot chocolate into mugs and top generously with a swirl of whipped cream, a dusting of cocoa powder, or any of your favorite toppings.
That’s truly all there is to it! This method is not only super easy but also ensures a consistently delicious and perfectly smooth hot chocolate every single time.
The Secret to Silky Smooth Hot Chocolate: The Paste Method
You might be wondering, “Why mix the dry ingredients with water first before adding the milk?” This isn’t just an extra step; it’s the absolute key to achieving a perfectly smooth, lump-free hot chocolate. If you’ve ever tried to mix cocoa powder directly into a large amount of cold milk, you know the struggle: stubborn clumps that resist dissolving, no matter how much you whisk.
The magic of the “paste method” lies in the fact that cocoa powder particles need a certain amount of liquid to hydrate properly. When you combine them with a small amount of water (and other dry ingredients) and whisk them into a thick paste, you’re giving the cocoa particles the ideal environment to fully dissolve and blend. This concentrated effort ensures that every granule is incorporated smoothly before being diluted by the larger volume of milk.
By creating this initial paste, you eliminate the need for lengthy, arm-aching whisking later on. Once the cocoa paste is smooth, adding the milk becomes a simple matter of stirring to combine and heat. This technique guarantees a luxurious, velvety texture that’s free from any unappetizing powdery bits, making your Instant Pot hot chocolate truly exceptional.
Why the Instant Pot is Your Hot Chocolate Hero
Beyond simply keeping your drink warm, the Instant Pot offers several compelling advantages that make it the ideal appliance for hot chocolate preparation:
- Hands-Free Convenience: The most significant benefit is the ability to walk away. No more standing over the stove, constantly stirring to prevent scorching. The Instant Pot handles the heating and keeps it warm, freeing you to focus on other tasks or enjoy your guests. This means more time to whip up delicious treats like these Peppermint Chocolate Puddle Cookies!
- Consistent Temperature Control: The ‘Sauté’ and ‘Keep Warm’ functions ensure your hot chocolate heats evenly and stays at the perfect serving temperature without boiling or cooling down. This consistency is difficult to achieve on a stovetop, where constant adjustments are often needed.
- Large Batch Capacity: The generous capacity of most Instant Pot models is perfect for entertaining. You can easily prepare enough hot chocolate for a sizeable gathering, eliminating the need for multiple small batches.
- Reduced Risk of Scorching: The Instant Pot’s non-stick inner pot and gentle heating mechanism significantly reduce the chances of your milk scorching at the bottom, a common problem with stovetop methods.
- Seamless Serving: With the ‘Keep Warm’ function, your hot chocolate is always ready to pour, allowing for a smooth and effortless serving experience throughout your event. I can truly relax, knowing that this delicious, warm beverage is taken care of from start to finish.
Storing and Reheating Leftover Hot Chocolate
It’s always a good sign when there are leftovers, and luckily, storing and reheating your Instant Pot hot chocolate is a breeze! This ensures you can savor that comforting flavor for days to come.
If you find yourself with leftover hot chocolate, allow it to cool completely before transferring it to an airtight container. Store it in the refrigerator, where it will remain fresh and delicious for up to 4 days.
When you’re ready to enjoy another mug, there are a couple of easy reheating options:
- Microwave: For a quick single serving, pour your desired amount into a microwave-safe mug. Heat it in the microwave for 30 to 60 seconds, stirring halfway through, until it reaches your preferred warmth. Be careful not to overheat.
- Stovetop: For a larger batch or if you prefer stovetop reheating, pour the cold hot chocolate into a saucepan over medium-low heat. Stir frequently to ensure even heating and prevent scorching. The key here is to heat it just enough to be warm and steamy – do not bring it to a boil, as this can alter the texture and flavor of the chocolate.
Enjoying your homemade hot chocolate a second time is just as delightful as the first!

Understanding Cocoa Powder: Natural vs. Dutch-Processed
The world of cocoa powder can be a bit perplexing, but understanding the difference between natural and Dutch-processed varieties is crucial for achieving the best results in your recipes, especially for hot chocolate.
Both are unsweetened cocoa powders, derived from cocoa beans, but they possess distinct chemical properties and are used in different culinary contexts. The journey begins with cocoa beans, which are fermented, dried, roasted, and then cracked into fragments. These fragments are pressed to form a chocolate paste, which is then dried and finely ground into unsweetened cocoa powder.
Natural cocoa powder is simply the pure, roasted cocoa bean powder. It has not undergone any neutralization process, making it naturally acidic and quite bitter with a strong, concentrated chocolate flavor. Because of its acidity, natural cocoa powder is typically found in recipes that call for baking soda. Baking soda is an alkaline leavening agent that reacts with the acid in natural cocoa, creating carbon dioxide bubbles that help baked goods rise. Popular brands like Hershey’s or Ghirardelli often offer natural cocoa as their standard variety in the US.
Dutch-process cocoa powder (an innovation from, as you might guess, the Dutch) undergoes an additional step. The cocoa beans are washed in an alkaline solution, usually potassium carbonate, which neutralizes their acidity. This process makes the cocoa “neutral” or pH-balanced, meaning it will not react with baking soda. Instead, Dutch-process cocoa is commonly paired with baking powder in baked goods, which is a leavening agent that contains its own acid.
Beyond its chemical properties, neutralizing the cocoa dramatically changes its characteristics. Dutch-process cocoa is notably darker in color, often a deep, rich brown, and boasts a much mellower, less bitter, and smoother chocolate flavor. Critically for hot chocolate, its neutralized state allows it to dissolve much more easily and thoroughly into liquids, resulting in a superior, lump-free, and incredibly smooth beverage. This is precisely why it’s the optimal choice for our Instant Pot hot chocolate recipe.
If you’re in the US, most standard cocoa powders you encounter (like regular Hershey’s) are natural. However, many brands, including Hershey’s, also produce Dutch-processed varieties, often labeled as “Special Dark” or “Dutched.” Always check the label carefully to ensure you select the correct type. For this recipe, prioritize Dutch-process cocoa powder for its less acidic, smoother flavor profile and excellent solubility. If you absolutely can’t find it, Hershey’s Special Dark cocoa powder is a good alternative that will yield similar, rich results.
Making Ahead and Gifting Hot Chocolate Goodness
The convenience of this Instant Pot hot chocolate extends to its make-ahead capabilities, making it a perfect solution for busy hosts or a thoughtful homemade gift.
Prepare Liquid Hot Chocolate in Advance:
The prepared liquid hot chocolate can be stored in the refrigerator for up to 4 days, making it ideal for prepping before a party or simply having a delicious treat on hand. Allow it to cool completely before transferring to an airtight container. For longer storage, you can even freeze it! I’ve had great success pouring cooled hot chocolate into empty, cleaned milk containers and freezing them. Thaw overnight in the refrigerator when you’re ready to enjoy.
Craft a Homemade Hot Chocolate Dry Mix:
For an even more versatile make-ahead option, or for a charming DIY gift, you can prepare a dry hot chocolate mix from this recipe’s ingredients. Simply combine the unsweetened Dutch-process cocoa powder, granulated sugar, and salt in a bowl. Mix them thoroughly until well integrated. Store this dry mix in an airtight container or a sealed bag in a cool, dry place. It will keep for several months.
When the craving strikes, or your gift recipient is ready to brew a cup, the instructions are simple: for one serving, combine 3 tablespoons of your powdered mix with 4 teaspoons of water, 2/3 cup of milk, and 1/2 teaspoon of vanilla extract. Whisk vigorously until the powder is fully dissolved and then heat gently on the stovetop over medium heat until warm and steaming, being careful not to boil.
Imagine the delight of your friends and family receiving a beautiful glass jar filled with this homemade dry mix, adorned with a festive ribbon and a small tag detailing the preparation instructions. It’s a truly heartwarming and delicious holiday gift!

Exploring Sweetener Alternatives
While granulated sugar is the classic choice for this hot chocolate, you might be curious about other sweeteners. I’ve primarily experimented with granulated sugar and coconut sugar, both yielding excellent results. Coconut sugar provides a slightly deeper, caramel-like note, which can be a delightful twist.
Maple sugar could certainly work, but its distinct maple flavor would likely be lost amidst the rich chocolate, making it a less cost-effective choice for this particular recipe. If you have another granulated sweetener that you prefer and that substitutes 1:1 for granulated sugar in recipes, it will most likely perform well here. Always consider the flavor profile of your chosen sweetener and how it might interact with the chocolate to ensure a harmonious blend.
No Instant Pot? No Problem! Stovetop Hot Chocolate
Don’t have an Instant Pot? You can absolutely still make this incredible hot chocolate on your stovetop with equally delicious results! The key steps remain the same:
First, create the cocoa paste. In a medium saucepan, combine the water, Dutch-process cocoa powder, granulated sugar, vanilla extract, and salt. Whisk these ingredients together thoroughly over medium heat until a smooth, lump-free paste forms. This paste method is essential for a silky texture.
Once your paste is smooth, gradually stir in the milk (or cream). Continue to heat the mixture over medium-low to medium heat, stirring frequently. The goal is to warm the hot chocolate until it’s steaming and hot to your liking, but critically, do not bring it to a rolling boil. Boiling can affect the texture of the milk and sometimes alter the chocolate’s flavor. Once heated, pour into mugs and enjoy!
For another delicious stovetop option, you could try this amazing-looking Mexican Hot Chocolate, which often features a hint of spice for an exciting kick!
A Crucial Instant Pot Tip: Avoid Quick Release!
Here’s a vital piece of advice for Instant Pot hot chocolate makers: **never use the quick release function with hot chocolate!** I speak from messy experience. I once attempted a recipe that suggested a 0-minute pressure cook followed by a natural release, then a manual release. Let’s just say there was a large, disgusting brown smear on my kitchen wall. The milk foam tends to spray everywhere when pressure is released rapidly.
So, to save yourself a significant cleanup (and an unappetizing sight), do not use quick release. Instead, rely on the ‘Sauté’ function for heating and the ‘Keep Warm’ function for holding. This prevents any explosive chocolate incidents and ensures a smooth, enjoyable process.
Measurements for a Smaller Stovetop Batch
If you’re not catering to a crowd and simply desire a cozy mug (or two small ones) of hot chocolate, here are the adjusted measurements for a perfect smaller batch on the stovetop:
- 2 tablespoons water
- 2 tablespoons unsweetened Dutch-process cocoa powder
- 2 tablespoons + 2 teaspoons granulated sugar (adjust to taste)
- 1/8 teaspoon salt
- ¾ teaspoon vanilla extract
- 1 cup milk (whole milk is recommended for richness; use half-and-half or heavy cream for a truly indulgent experience)
Follow the stovetop instructions mentioned above: first create a paste with the water, cocoa, sugar, salt, and vanilla, then stir in the milk and heat gently until warm. For a seasonal twist, consider this delightful Vegan Pumpkin Hot Chocolate, featuring warming pumpkin spice and maple syrup – perfect for a cozy moment for two. Alternatively, this Old Fashioned Hot Chocolate recipe yields four servings, ideal for a small family gathering.
Exciting Flavor Options and Customizations
While classic hot chocolate is divine, don’t shy away from experimenting with different flavor extracts to create unique and exciting variations:
- Peppermint Hot Chocolate: My personal favorite! Add ½ teaspoon of peppermint extract to the full batch. It’s crucial to buy *peppermint* extract, not mint extract, which often has a spearmint flavor that doesn’t pair as well with chocolate. Start with ¼ teaspoon, taste, and add another ¼ teaspoon if you desire a stronger minty kick, as extract potencies vary by brand.
- Almond or Orange Hot Chocolate: Almond extract offers a sophisticated, nutty note, while orange extract provides a bright, citrusy complement to the chocolate. Both can be absolutely amazing. Again, start conservatively with ¼ teaspoon, taste, and adjust as needed. Depending on the brand and your desired intensity, you might need up to 1 teaspoon for a full batch.
- Spice it Up: For a Mexican hot chocolate flair, add a pinch of cayenne pepper and a cinnamon stick to the pot while heating.
- Coffee Enhancement: A teaspoon of instant espresso powder or strong brewed coffee can deepen the chocolate flavor without making it taste like coffee.
- Sea Salt Caramel: A tiny pinch of sea salt in each mug can highlight the chocolate’s sweetness, especially if drizzled with caramel sauce.
Always remember to start with a small amount of extract or spice, taste, and then add more if you desire a stronger flavor. This ensures you create a customized hot chocolate that’s perfect for your palate.
Booze It Up for the Adults
For an indulgent adult treat, a dash of your favorite spirit can elevate hot chocolate to a luxurious cocktail. My absolute top pick is Baileys Irish Cream, which adds a creamy, sweet, and slightly alcoholic warmth. Once your hot chocolate is ready, you can simply pour ¼ to ½ cup (or more, to taste!) of your chosen liquor directly into the Instant Pot for the whole batch, or offer it as an individual addition at a hot chocolate bar.
Other fantastic choices include dark rum (for a warming, spiced note), amaretto (for a delightful almond flavor), or Kahlúa (to create a mocha-like experience). Experiment with different spirits to find your perfect boozy hot chocolate combination!
Create an Irresistible Hot Chocolate Bar:
One of the most exciting ways to serve this Instant Pot hot chocolate is by setting up a festive hot chocolate bar. I was incredibly inspired by Little Spice Jar’s wonderful ideas for a Hot Chocolate Bar Party, and it’s a concept that truly elevates any gathering. The Instant Pot’s ‘Keep Warm’ function makes it perfect for this, as your base hot chocolate remains at the ideal temperature throughout the event.
Lay out a variety of toppings and mix-ins, allowing your guests to become their own baristas and customize their ultimate hot chocolate creation. Here are some ideas to get you started:
- Classic Toppings: A mountain of freshly whipped cream is non-negotiable! Mini marshmallows and larger, fluffy marshmallows are also essential.
- Spices & Aromatics: Cinnamon sticks for stirring, a dusting of cinnamon or nutmeg powder, and peppermint sticks or crushed candy canes for a festive minty crunch.
- Chocolate Delights: Chocolate shavings (dark, milk, or white), mini chocolate chips, or even a drizzle of dark chocolate syrup for extra decadence.
- Sweet & Salty Twists: Caramel sauce (this Vegan Caramel Sauce is amazing!), a sprinkle of sea salt to enhance the chocolate flavor, and toffee bits for a buttery crunch.
- Homemade Goodies: For an extra special touch, offer Homemade Healthier Marshmallows. Their fresh, soft texture is unparalleled.
- Unique Additions: Consider serving a small bowl of chili powder for an authentic Mexican hot chocolate experience, or a bottle of your favorite liqueur for adult guests to “booze it up.”
Hand out those festive mugs, pour generous servings of your luscious Instant Pot hot chocolate, and let your guests design their own special, personalized treat. It’s an interactive and fun way to enjoy this comforting beverage.
Pair with Other Holiday Goodies:
Complete your holiday spread by pairing this wonderful hot chocolate with complementary treats:
- This Protein Nutella Hot Chocolate is a delightful variation made for two, adding a little protein boost to a truly indulgent drink. Kids and adults alike will adore its rich, nutty flavor.
- Add a festive crunch to your dessert platter with this Crispy Peppermint White Chocolate Bark. It’s incredibly easy to make, adorned with crushed peppermint candy canes, and makes for beautiful edible gifts.
- For a playful and refreshing dessert, try this Candy Cane Chocolate Chunk Ice Cream. It features creamy vanilla ice cream studded with crunchy candy cane pieces and rich chocolate chunks – a perfect cool contrast to warm hot chocolate!
I sincerely hope you and your loved ones enjoy your holiday celebrations, made even sweeter and cozier with this incredibly easy and delicious Instant Pot Hot Chocolate! If you make it, please take a moment to leave a comment below and share your thoughts. Enjoy every rich, warm sip!


Instant Pot Hot Chocolate
Ingredients
- 1/2 cup (120ml) water
- 1 tablespoon vanilla extract
- 1/2 cup (58 grams) unsweetened Dutch-process cocoa powder
- 2/3 cup (133 grams) granulated sugar
- 1/2 teaspoon salt
- 4 cups (946ml) whole milk (you can use half whipping or heavy cream for a richer version)
Instructions
-
Put the water, vanilla, cocoa powder, sugar and salt in the pot of the Instant Pot.
-
Whisk it all together until it forms a paste.
-
Stir in the milk/cream.
-
Turn on the Sautee function.
-
Stir occasionally until the hot chocolate is warm.
-
Hit cancel and select Keep Warm until ready to serve.
-
Top with whipped cream.
