Wholesome & Easy Icelandic Brown Bread: A Traditional Quick Bread Recipe
If you’re searching for a delicious, healthy, and incredibly easy quick bread version of the beloved Icelandic brown bread, your quest ends here! This recipe delivers a wonderfully robust flavor with the goodness of whole wheat flour, all while being remarkably simple to prepare, making it a perfect addition to your busy schedule.
The Charm of Icelandic Brown Bread (Rúgbrauð)
Icelandic brown bread, known as rúgbrauð, holds a special place in Icelandic culinary traditions. Traditionally, this dense, dark rye bread is baked by burying dough in special wooden casks near hot springs or geothermal vents, allowing the Earth’s natural heat to slow-cook it for many hours, sometimes even overnight. This unique baking method gives the bread its characteristic moist texture and a slightly sweet, earthy flavor that is truly unforgettable.
While the traditional geothermal baking method is fascinating, it’s not exactly practical for most home kitchens. This is where the beauty of a quick bread adaptation comes in. Our recipe captures the essence of rúgbrauð, bringing those comforting, wholesome flavors into your home with a significantly simpler and faster approach. It’s a wonderful way to experience a taste of Iceland without needing a trip to a volcano!
Why This Quick Bread Recipe is a Must-Try
Life can be chaotic, and sometimes, you need a reliable recipe that promises delicious results without requiring hours of effort or advanced baking skills. This Icelandic brown bread quick bread recipe is precisely that – a good old standby that consistently earns rave reviews. It’s the ideal choice for anyone looking for a comforting, homemade treat that’s both healthy and straightforward to make. Unlike yeast breads that demand proofing and multiple rises, this quick bread comes together quickly, with the most challenging part being the wait for it to cool down before slicing into its deliciousness.
Even for those who adore the process of making intricate yeast breads, this quick bread version stands out as a personal favorite. It’s wonderfully unfussy – no nuts, seeds, or fruits to complicate things – just pure, wholesome bread goodness. Its simplicity is its strength, allowing the natural flavors of the ingredients to shine through. Plus, it’s a healthy choice, thanks to the generous addition of whole wheat flour, which adds fiber and a nutty depth.

A Beloved Family Tradition
This particular recipe holds a special sentimental value for our family. It’s one that my husband absolutely adores, and I can always count on him to devour it. In fact, it’s not uncommon for me to bake a couple of loaves just to ensure he has enough for breakfast the next day! He prefers it plain, enjoying the subtle sweetness that comes from the brown sugar and molasses. While you could certainly reduce the brown sugar if you prefer a less sweet loaf, we find it’s just perfect as is, striking a delightful balance.
The recipe itself was introduced to me by my husband, who received it from an old family recipe book. And yes, his family is indeed Icelandic! It’s truly special to think that this bread has likely been prepared and enjoyed by generations, carrying a piece of Icelandic heritage through time. There’s something profoundly comforting and satisfying about recipes that come with such a rich history and family connection.

Icelandic Brown Bread
Ingredients
- 2 cups (250 grams) whole wheat flour
- 1 1/2 cups (188 grams) all purpose flour
- 1 teaspoon salt
- 1 teaspoon baking soda
- 3/4 teaspoon baking powder
- 2 tablespoons brown sugar
- 2 cups buttermilk
- 1/4 cup (80 grams) molasses (not blackstrap)
Instructions
-
Preheat your oven to a gentle 300 °F (150 °C). This low temperature is key to achieving the bread’s characteristic dense and moist texture, mimicking a slow bake. Thoroughly grease or butter a standard loaf pan (approximately 9×5 inches) and set it aside. Proper greasing prevents sticking and ensures your beautiful loaf comes out easily.
-
In a large mixing bowl, combine all the dry ingredients: the whole wheat flour, all-purpose flour, salt, baking soda, baking powder, and brown sugar. Whisk them together until they are well combined, ensuring the leavening agents and sugar are evenly distributed. In a separate measuring cup, measure out 2 cups of buttermilk. If you don’t have buttermilk, you can easily make a substitute: add 1 1/2 tablespoons of vinegar or lemon juice to your measuring cup, then fill it up with regular milk to the 2-cup line. Let it sit for 5 minutes until it slightly curdles. Stir the molasses into the buttermilk mixture. Pour this wet mixture into the dry ingredients. Using a sturdy spoon or spatula, mix thoroughly until just combined. Be careful not to overmix, as this can lead to a tough loaf. A few lumps are perfectly fine.
-
Once your batter is mixed, gently pour it into the prepared loaf pan. Allow the batter to stand in the pan for 10 minutes before placing it in the oven. This short resting period allows the flours to fully hydrate and the leavening agents to begin their work, contributing to a better texture. After the rest, place the loaf pan into your preheated 300 °F (150 °C) oven and bake for 60 minutes. The longer, slower bake helps develop the deep flavor and ensures the bread is cooked through without drying out.
-
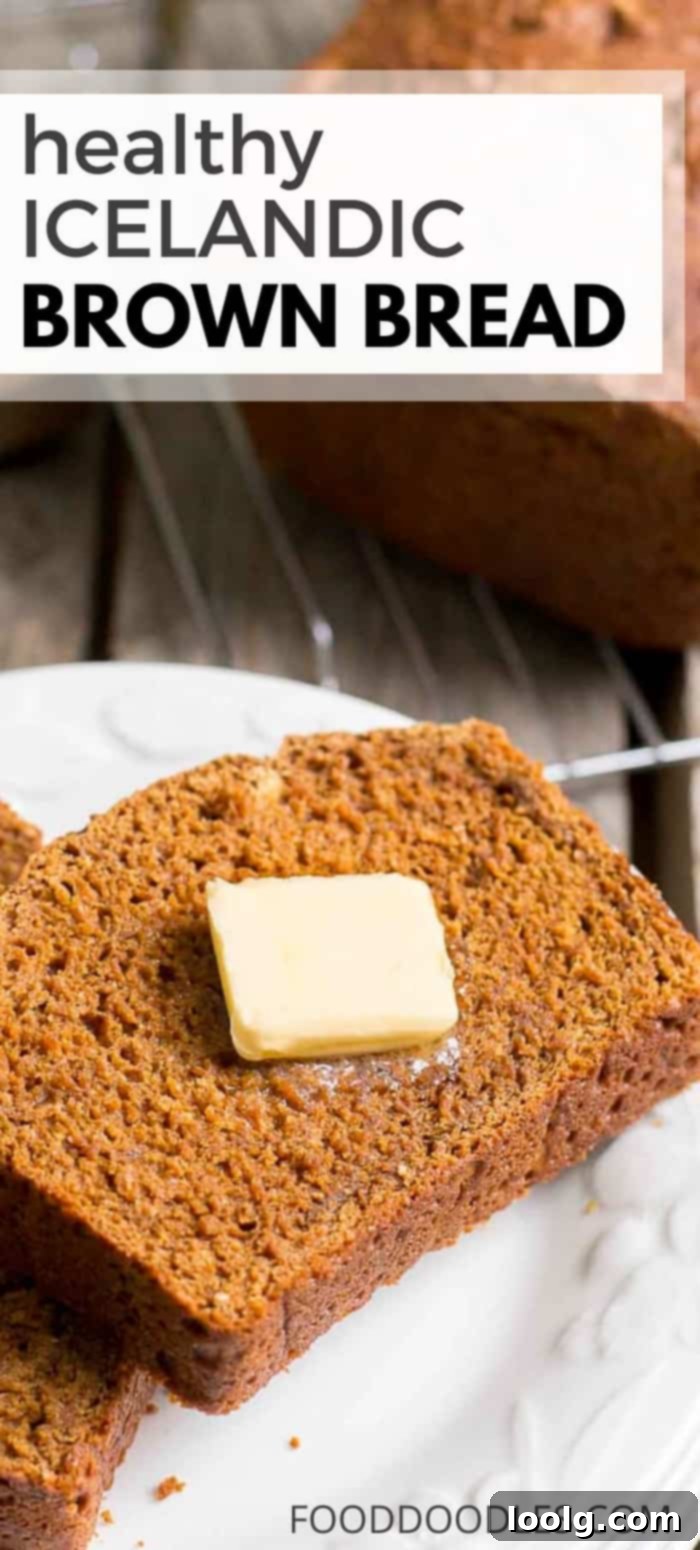
To check for doneness, insert a toothpick into the center of the loaf. If it comes out clean or with only a few moist crumbs attached, your bread is ready. Remove the loaf from the oven. If necessary, run a knife carefully around the edges of the pan to loosen the bread. Immediately turn the loaf out onto a wire cooling rack. It’s crucial to let the bread cool for at least 30 minutes before attempting to slice it. This cooling period allows the internal structure to set properly, preventing it from crumbling when cut. We highly recommend serving this delightful bread warm, with a generous pat of butter. The warmth enhances its unique flavor and makes the butter melt perfectly into each slice.
Essential Ingredients and Their Role
Understanding the role of each ingredient helps in appreciating the nuanced flavor and texture of this Icelandic brown bread.
- Whole Wheat Flour: This is the backbone of the bread, contributing to its dense, hearty texture, rich brown color, and distinctive nutritional profile. It’s packed with fiber, making this quick bread a much healthier alternative to many store-bought options.
- All-Purpose Flour: While whole wheat provides texture and nutrition, a portion of all-purpose flour ensures the bread isn’t overly heavy or crumbly, striking a perfect balance of tenderness and robustness.
- Buttermilk: Beyond contributing moisture, buttermilk is crucial for activating the baking soda, leading to a lighter crumb structure in this quick bread. Its slight acidity also adds a subtle tang that complements the sweetness of the molasses. If you don’t have buttermilk, the simple vinegar/lemon juice and milk substitute works wonderfully.
- Molasses (Not Blackstrap): This is the secret ingredient that gives Icelandic brown bread its signature deep color and unique, earthy sweetness. Using regular molasses (not blackstrap) is important here, as blackstrap can be too bitter and overpowering. The caramel notes of molasses are indispensable to the authentic flavor.
- Brown Sugar: It enhances the overall sweetness and moistness of the bread, creating a harmonious balance with the molasses and the whole wheat flour.
- Baking Soda & Baking Powder: These leavening agents work in tandem with the buttermilk to create lift and airiness without the need for yeast, making this truly a “quick” bread.
- Salt: Essential for balancing and enhancing all the other flavors.
Tips for Baking the Best Icelandic Brown Bread
Achieving the perfect loaf is easy with a few simple considerations:
- Don’t Overmix: When combining wet and dry ingredients, mix just until no streaks of dry flour remain. Overmixing develops gluten, which can result in a tough, chewy bread instead of the desired tender crumb.
- Proper Pan Preparation: Greasing or buttering your loaf pan thoroughly is crucial. This bread is dense and moist, and a well-prepared pan will prevent it from sticking, ensuring a clean release.
- The Gentle Bake: Baking at a lower temperature (300°F/150°C) for a longer period is intentional. It mimics the slow cooking of traditional rúgbrauð, allowing the flavors to meld and the bread to cook evenly all the way through without burning the crust or drying out the interior.
- Cooling is Key: It’s tempting to slice into a warm loaf immediately, but patience is a virtue here! Letting the bread cool on a wire rack for at least 30 minutes (or even longer) allows the internal structure to firm up. This makes for cleaner slices and prevents the bread from crumbling.
- Storage: Store cooled Icelandic brown bread in an airtight container at room temperature for up to 3-4 days to maintain its moisture. It also freezes beautifully for longer storage – simply wrap tightly in plastic wrap, then foil, and freeze for up to 3 months. Thaw at room temperature and warm gently before serving.
Serving Suggestions for Your Delicious Loaf
Icelandic brown bread is incredibly versatile and can be enjoyed in many ways throughout the day:
- Classic with Butter: The most traditional and often the best way to enjoy it is warm, slathered with good quality butter. The simplicity allows the bread’s unique flavor to shine.
- Breakfast Delight: Enjoy it toasted with jam, marmalade, or honey. A smear of cream cheese is also fantastic.
- Savory Pairings: Its hearty flavor makes it a wonderful accompaniment to savory dishes. Try it with smoked salmon, pickled herring, or a selection of Icelandic cheeses. It’s also excellent alongside a robust soup or stew.
- A Unique Snack: A slice or two makes for a satisfying and healthy snack any time of day.
This Icelandic brown bread quick bread recipe offers a taste of traditional Icelandic culture with modern convenience. It’s a healthy, simple, and utterly delicious bread that is sure to become a beloved staple in your home, just as it is in ours. Enjoy the heartwarming aroma and the comforting taste of this wholesome loaf!

Photos on this post were updated January 6, 2018. Here’s what they looked like before: