Fluffy Eggnog Meringues: Your Guide to Perfect, Easy-to-Make Holiday Treats

Embarking on the journey of making meringues for the first time can feel a bit daunting, and even seasoned bakers sometimes find them frustrating. For a dessert that appears deceptively simple, there are quite a few pitfalls that can lead to less-than-perfect results. But don’t let that deter you! With the right guidance and a few essential tips, you can master the art of creating light, airy, and utterly delicious meringues that will impress everyone.
This comprehensive guide is designed to help you bypass common meringue-making mistakes, offering insights that I’ve gathered through my own kitchen trials and errors. Consider these notes your secret weapon to achieving perfectly crisp on the outside, delightfully chewy on the inside, eggnog-flavored meringues every single time. Get ready to transform simple ingredients into a festive, melt-in-your-mouth experience!
Why Eggnog Meringues Are a Must-Try Holiday Dessert
Imagine a dessert that captures the essence of the holidays in every bite: the warm, spicy notes of nutmeg, the comforting sweetness of vanilla, all encased in a cloud-like texture that practically dissolves on your tongue. That’s exactly what these eggnog meringues deliver. They are a festive twist on a classic treat, perfect for holiday gatherings, cozy evenings by the fire, or as a thoughtful homemade gift.
My own little ones are absolutely smitten with these. In fact, during one of my initial test batches, I went a little overboard with the nutmeg – a common mistake when you’re experimenting! Even then, my then three-year-old couldn’t get enough of them; I literally had to gently pry them from her eager hands! And the excitement didn’t stop there. During the photoshoot, my youngest, usually oblivious to my camera and food setups, was pulling herself up on the table and even my tripod, all in an attempt to snatch a meringue. It was quite a sight, and I couldn’t help but wonder what made these so incredibly irresistible to her!
Perhaps it’s the enchanting aroma. There’s something truly magical about the scent of freshly ground nutmeg. I can’t be the only one who finds it so alluring. It reminds me of a simple pleasure: a tiny pinch of nutmeg with a drizzle of maple syrup in warm, unsweetened almond milk. These meringues capture that same comforting, spicy-sweet essence, making them an instant favorite.
Achieving Meringue Perfection: Essential Tips for Success
Meringue making is often perceived as a delicate art, and while precision is key, it’s far from impossible. The secret lies in understanding a few fundamental principles. Firstly, ensure your equipment is impeccably clean and free from any traces of grease or oil. Even a tiny speck can prevent your egg whites from whipping up properly. Secondly, egg whites at room temperature will achieve greater volume and stability when beaten. If you’re short on time, a quick trick is to place your bowl of egg whites over a small pot of simmering water (ensuring the bowl doesn’t touch the water) and stir gently until they are just barely warm to the touch. This can significantly speed up the warming process.
The gradual addition of sugar is another critical step. Incorporating the sugar slowly, a tablespoon or two at a time, allows it to dissolve completely into the egg whites, resulting in a stable, glossy meringue. Testing a small amount between your fingers to ensure there’s no grittiness is a foolproof way to check. Finally, resist the urge to add your flavorings, like vanilla bean seeds and nutmeg, until your egg whites have reached stiff peaks. The natural oils in these ingredients can sometimes interfere with the whipping process if added too early. By following these tried-and-true techniques, you’ll be well on your way to creating beautiful, perfectly textured meringues.
Piping Your Meringues: Tips for Elegant Shapes
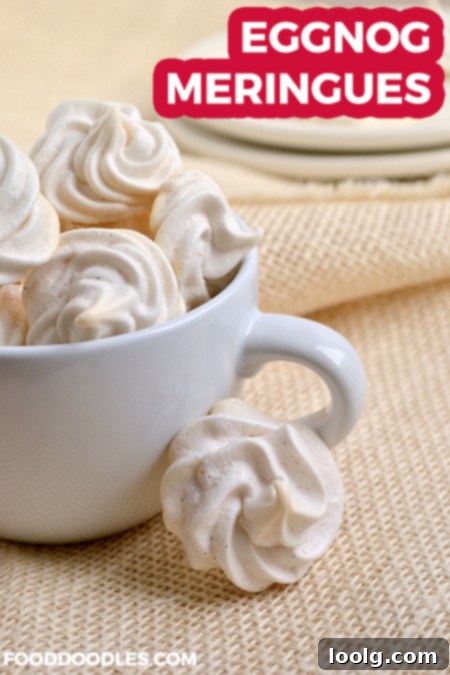
Once your meringue mixture is perfectly stiff and glossy, it’s time for the fun part: piping! For a more professional look, I’d aim to pipe them a little taller next time. I was so overjoyed that my meringue was finally stiff enough to pipe beautifully that I didn’t even think to add a little extra height. Don’t make my mistake! Aim for taller, more elegant swirls or peaks for a truly impressive presentation.
Speaking of piping tools, if you’re like me and don’t always have a dedicated piping bag on hand, a simple Ziploc bag with a piping tip inserted (or even just the corner snipped off) works wonderfully. It’s a fantastic hack for home bakers! And for a truly old-school approach, my grandmother used to make her own piping cones from a square of parchment or wax paper. It’s a clever trick that perhaps I’ll share in detail another time if there’s interest!
Winter Wonderland & Warm Treats
Here in Canada, we finally received a substantial amount of snow! You might expect living in Canada means an abundance of snow every year, but the last few winters have been surprisingly mild, and just last week, we had none. So, I’m absolutely thrilled to have a decent accumulation that looks like it will stick around for a while. This weekend promises to be perfect for sledding! There’s nothing quite like the joy of sledding in fresh snow, followed by coming inside to warm up with a steaming mug of hot chocolate and delicious cookies or, even better, these delightful eggnog meringues. It’s truly the best thing ever, and it certainly brings out the kid at heart in me! These meringues are the ideal companion for such a cozy, wintry scenario.
Making these meringues has become a cherished part of our family’s holiday traditions, and I hope they become a part of yours too. Their delicate texture and festive flavor make them an unforgettable addition to any dessert table. Remember, baking is all about experimenting, learning, and sharing joy. Don’t be afraid to try, and most importantly, have fun in the kitchen!

Eggnog Meringues
Ingredients
- 3 large egg whites room temperature
- 1/2 C granulated sugar processed for a few seconds in a food processor
- large pinch of salt
- large pinch of cream of tartar
- the seeds of 1 vanilla bean
- 1/2 tsp freshly ground nutmeg very lightly packed
Instructions
-
Preheat your oven to 200 degrees Fahrenheit (approximately 93 degrees Celsius). Position an oven rack in the bottom third of your oven. Line a baking sheet with parchment paper, ensuring it lies flat, and set it aside.
-
Carefully separate the egg whites from the yolks, ensuring absolutely no yolk contaminates the whites. Place the egg whites into a meticulously clean glass or stainless steel mixing bowl. Add the pinch of salt and cream of tartar, then beat the mixture using an electric mixer until soft peaks begin to form. Gradually, and slowly, add the granulated sugar, 1-2 tablespoons at a time, beating thoroughly after each addition. This ensures the sugar fully dissolves into the egg whites.
-
Continue beating the egg whites until stiff, glossy peaks form. To verify that all the sugar has dissolved, rub a tiny amount of the meringue between your fingers; it should feel completely smooth, without any grittiness.
-
Once the egg whites have reached stiff peaks and are smooth and beautifully glossy, gently fold in the seeds scraped from the vanilla bean and the freshly grated nutmeg. Beat well for a short moment to fully incorporate these flavors. Transfer the meringue mixture into a prepared piping bag fitted with your desired tip, or use a sturdy Ziploc bag with one corner snipped off.
-
On the parchment-lined baking sheet, pipe the meringue into cookies approximately 1 to 1.5 inches in diameter. You can create small swirls or neat dollops.
-
Place the baking sheet into the preheated oven and bake for 1 hour and 10-15 minutes, or until the meringues are completely dry to the touch. After baking, turn off the oven but leave the meringues inside. Allow them to cool and continue to dry in the cooling oven until it reaches room temperature, or even overnight, for the best crisp texture.
Notes
– If you’re pressed for time and your egg whites aren’t at room temperature, you can gently warm them. Place the bowl containing the egg whites over a small pot of simmering water (make sure the bottom of the bowl does not touch the water). Stir continuously until the egg whites are just barely warm to the touch. This trick helps them whip up faster and with more volume.
– Hold off on adding any flavorings or ‘add-ins’ until your egg whites have been thoroughly beaten to stiff peaks. The natural oils present in ingredients like vanilla extract, nuts, or spices can interfere with the egg whites’ ability to stabilize, hindering them from reaching their full, stiff potential.
– Keep a close eye on your meringues during baking. If you notice them beginning to turn golden on the bottom or the top edges, immediately reduce your oven temperature by 25 degrees Fahrenheit and simply extend the baking time slightly until they are fully dry and crisp.
And for a little behind-the-scenes peek from the photoshoot… I just had to share this adorable outtake! It features pudgy little (and blurry!) baby fingers reaching for the meringues. Sorry, sweet baby girl, no eggnog meringues for you just yet, but maybe someday! Happy baking!