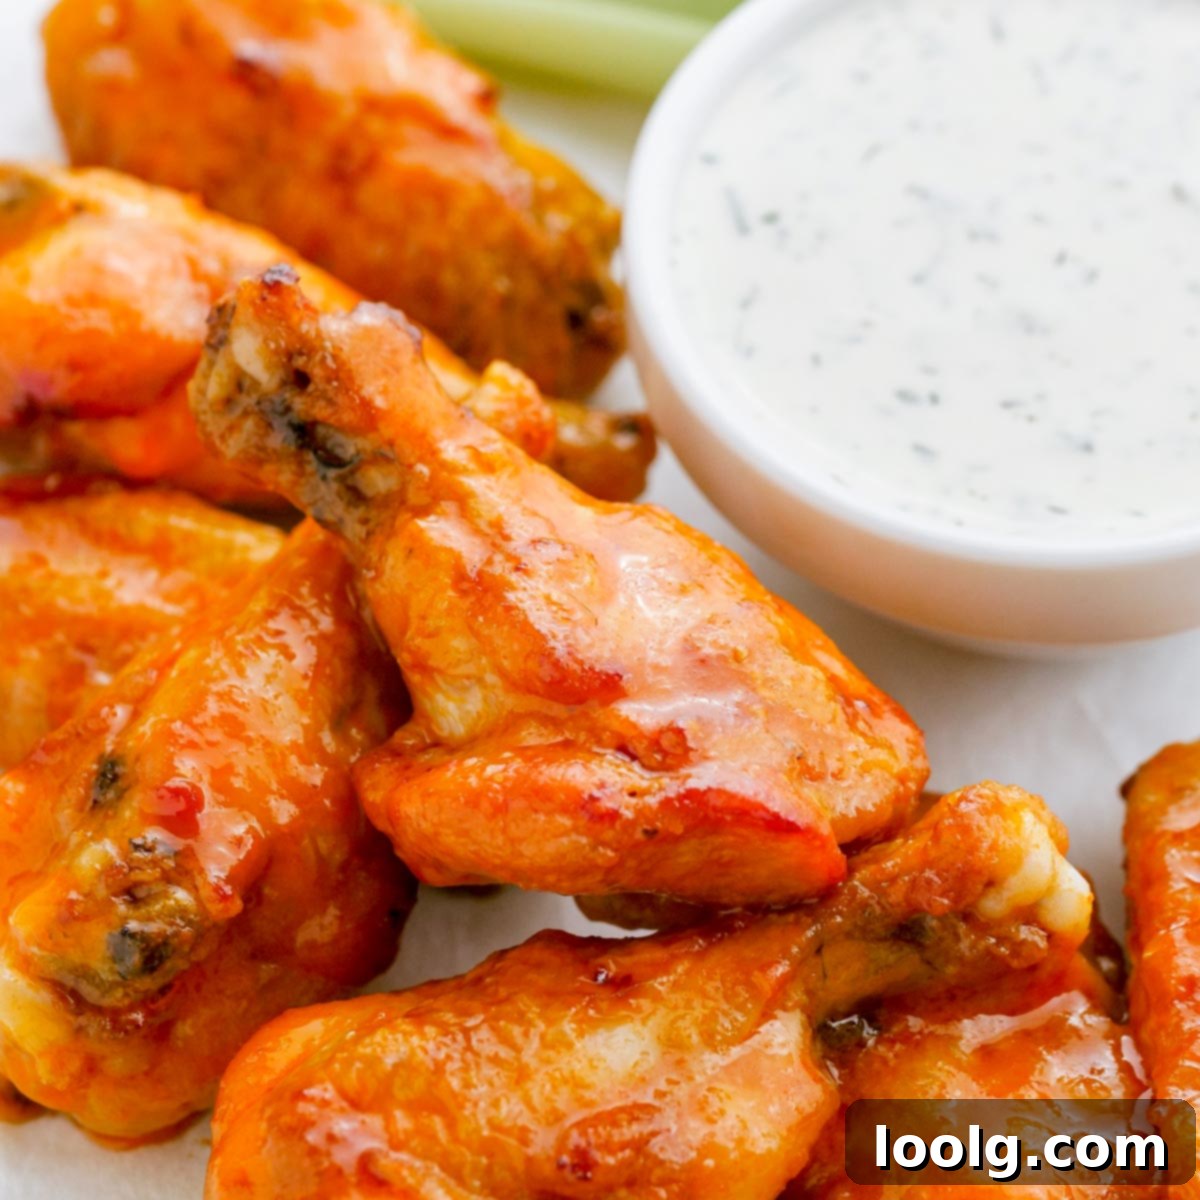
Crispy Air Fryer Frozen Chicken Wings: Your Ultimate Guide to Easy, Flavorful Perfection
Prepare to revolutionize your snack game with these incredibly crispy yet remarkably juicy frozen chicken wings, all made effortlessly in your air fryer. Coated in a rich, buttery, and utterly delicious sauce, these wings are a culinary dream come true. They are unbelievably simple to prepare, making them the perfect hot snack or appetizer for any gathering, game night, or even a quick weeknight meal. The secret to their convenience and minimal fuss lies in using frozen chicken wings, which means less prep time, less mess, and more time enjoying the delicious results!
If you’re hosting a crowd, this recipe is an absolute lifesaver. Simply grab a large bag of your favorite frozen wings, toss them into the air fryer, and let the magic happen. While they cook to golden perfection, you’ll be free to focus on other delectable dips and appetizers, perhaps a batch of Mozzarella Bruschetta. The air fryer handles the main event with ease, leaving you stress-free and ready to impress your guests.
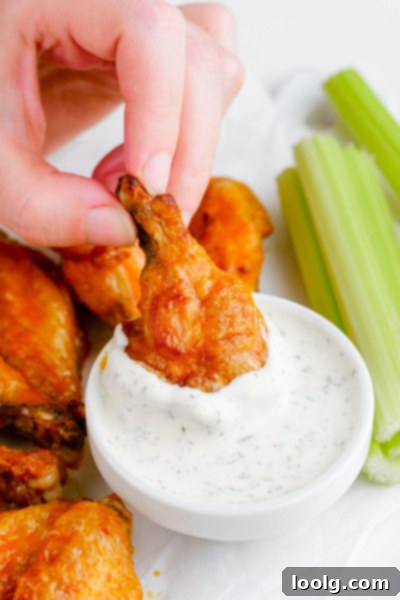
Why Air Fryer Frozen Chicken Wings? The Ultimate Convenience!
There’s a reason the air fryer has become a kitchen superstar, especially when it comes to chicken wings. Forget about lengthy thawing times, messy deep fryers, or heating up your entire kitchen with a hot oven. The air fryer delivers that coveted deep-fried crispiness with a fraction of the oil and effort. It’s a game-changer for busy households and anyone looking for a healthier, faster way to enjoy their favorite comfort foods.
Using frozen wings directly from the freezer is the ultimate hack. There’s no need to plan ahead or spend precious time defrosting. The air fryer’s powerful convection heat works efficiently to cook the wings thoroughly from their frozen state, ensuring they’re tender on the inside and perfectly golden and crunchy on the outside. This method significantly cuts down on prep time, making it ideal for spontaneous cravings or last-minute party preparations.
Simple Ingredients for Maximum Flavor
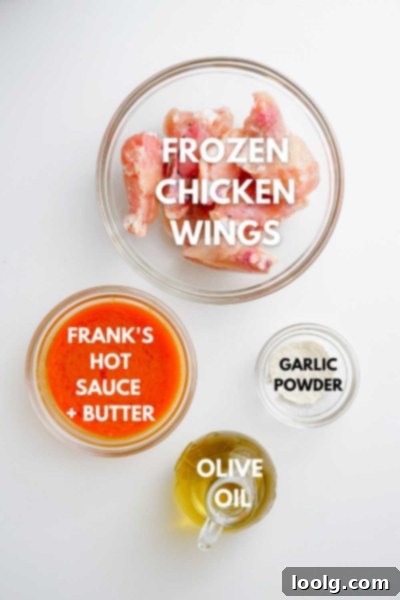
One of the beauties of this recipe is its straightforward ingredient list. You don’t need fancy components to achieve incredible flavor. Here’s what you’ll need to transform those frozen wings into a culinary masterpiece:
- Frozen Chicken Wings: Approximately 1-2 pounds, or about 8-12 pieces, depending on their size. Look for pre-cut “party wings” which typically include drumettes and flats.
- Olive Oil: Just a drizzle, about 1/2 tablespoon, to help the spices adhere and promote extra crispiness. Avocado oil also works wonderfully.
- Garlic Powder: Around 3/4 teaspoon for a savory aromatic kick.
- Salt: About 1/2 teaspoon, or to taste, to enhance all the flavors.
- For the Sauce: A classic buffalo sauce blend of 1/4 cup Frank’s Red Hot Original sauce (or your preferred hot sauce) mixed with 1/4 cup (56 grams) melted unsalted butter. The butter adds a luscious creaminess and mellows the heat for a perfectly balanced flavor.
Step-by-Step: How to Make Crispy Air Fryer Frozen Chicken Wings
Achieving perfectly crispy, juicy wings in your air fryer is surprisingly simple. Follow these steps for an irresistible result:
- Prepare the Air Fryer: Begin by lightly spraying your air fryer basket with olive oil or cooking spray. This prevents sticking and ensures easy cleanup.
- Season the Wings: In a medium bowl, place the frozen chicken wings. Drizzle them with olive oil, ensuring each wing is lightly coated. In a small separate bowl, stir together the garlic powder and salt. Sprinkle this spice mixture evenly over the wings, tossing them well to ensure every piece is thoroughly seasoned.
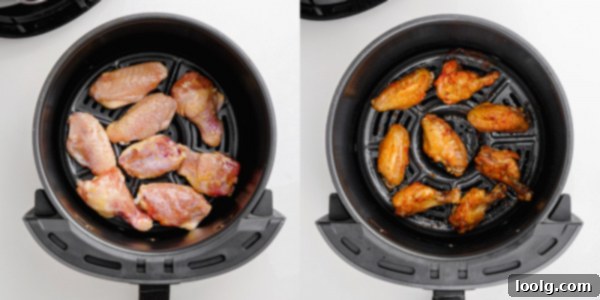
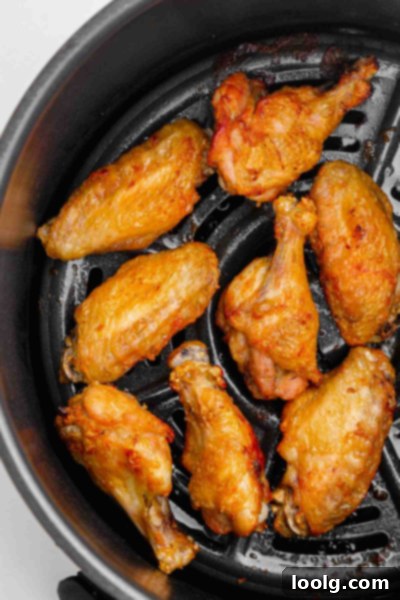
- Arrange in the Basket: Carefully place the seasoned frozen wings in the air fryer basket. It’s crucial to arrange them in a single layer, leaving a little space between each piece. While frozen wings might seem to take up more space initially, they will shrink as they cook, allowing for better air circulation and crisping. For smaller air fryers, you may need to cook in batches to avoid overcrowding.
- Initial Cook (Lower Temperature): Cook the wings at 360°F (180°C) for 10 minutes. This initial phase helps to gently thaw the wings and begin the cooking process without burning the exterior.
- Flip and Increase Heat: After 10 minutes, carefully open the air fryer basket and flip each wing. This ensures even cooking and browning on both sides.
- Second Cook (Higher Temperature for Crispiness): Increase the air fryer temperature to 400°F (205°C). Continue to cook for another 15-22 minutes, shaking the basket vigorously every 5 minutes. This higher temperature and shaking motion are key to achieving that desirable crispy skin. Cook until the internal temperature of the thickest part of the wing reaches 165°F (74°C) and the skin is beautifully golden brown and crisp.
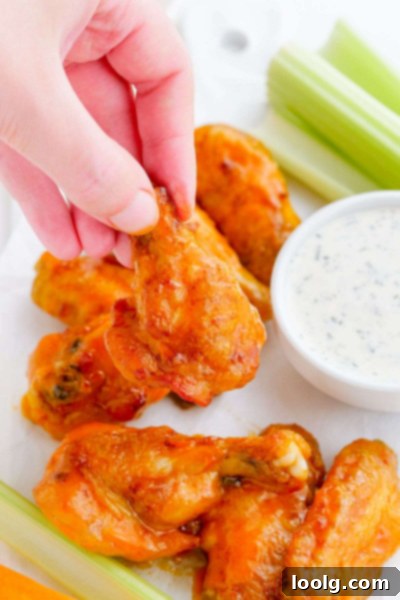
- Sauce and Serve: While the wings are cooking, prepare your sauce by mixing Frank’s Red Hot Original (or your chosen hot sauce) with melted unsalted butter. Once the wings are perfectly crispy, transfer them to a large bowl. Pour the prepared buffalo sauce over the hot wings and toss gently until every piece is gloriously coated.
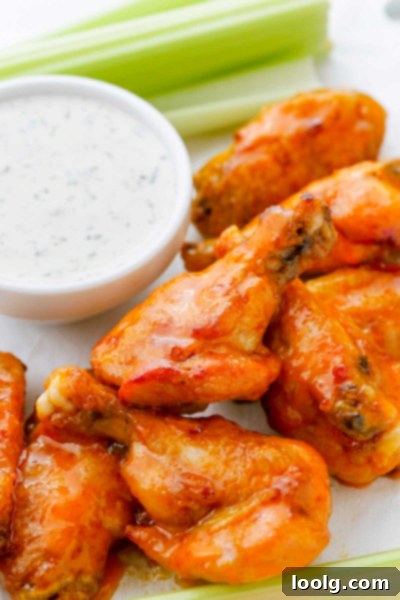
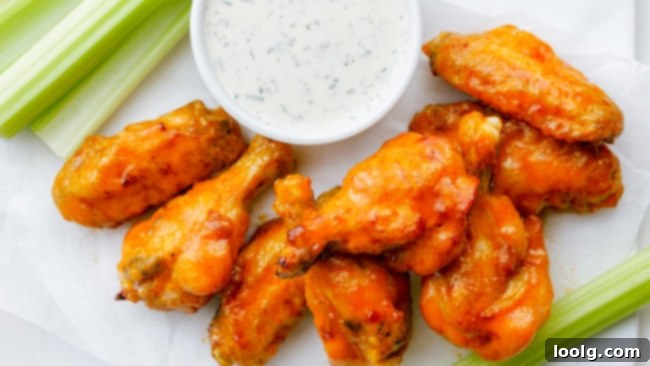
- Plate and Enjoy: Arrange your saucy, crispy wings on a serving platter and serve immediately. Prepare for rave reviews!
Sauce It Up! Exploring the Best Wing Flavors
While a classic Buffalo sauce is a fan favorite, the beauty of air fryer wings lies in their versatility. You can customize the flavor profile to suit any palate! For our recipe, we’ve used Frank’s Red Hot Original mixed with melted butter for that iconic Buffalo taste – it’s buttery, slightly tangy, and has just the right amount of kick. However, feel free to experiment with your favorites:
- Classic Hot Sauces: Beyond Frank’s, consider Sweet Baby Ray’s, Texas Pete, or even a homemade Buffalo Wild Wings copycat sauce. Each offers a slightly different level of heat and tang.
- Sweet & Savory BBQ: A thick, smoky BBQ sauce can transform your wings into a sticky, finger-licking delight. Try different regional BBQ styles, from Kansas City sweet to Carolina tangy.
- Asian-Inspired Glazes: Teriyaki, soy-garlic, gochujang, or a sweet chili glaze can add an exotic and umami-rich twist. These often contain sesame oil, ginger, and garlic for a robust flavor.
- Lemon Pepper: For a dry rub alternative, a generous coating of lemon pepper seasoning offers a bright, zesty, and savory flavor without the wet sauce.
- Garlic Parmesan: A simple mix of melted butter, minced garlic, and grated Parmesan cheese creates a rich, savory coating that’s incredibly addictive.
- Plain & Simple: Sometimes, the perfectly seasoned, crispy skin is all you need! Serve them plain and let your guests choose from a variety of dipping sauces like ranch, blue cheese, honey mustard, or even a vibrant Cilantro-Lime Crema.
Understanding Chicken Wing Anatomy: Drumettes, Flats, and Tips
Have you ever wondered why chicken wings look different depending on where you buy them or which country you’re in? It’s all about the anatomy! In many parts of the USA, frozen chicken wings typically come with two main parts: the drumette (which resembles a tiny drumstick) and the flat (the middle section with two bones). However, if you venture abroad, say to Germany, you might find that “wings” often only include the flat and sometimes the tip (the very end bony piece).
Understanding these distinctions can be helpful for cooking. Drumettes are meatier, while flats offer more crispy skin surface area. The tip is usually discarded or used for stock. If you’re curious to see a visual breakdown of chicken parts, this anatomical guide to chicken can provide a clearer picture. Visuals always help in the kitchen!
Why the Air Fryer is a Game-Changer for Wings
The air fryer has quickly become an indispensable kitchen appliance, and for good reason! When it comes to cooking chicken wings, its benefits are truly outstanding:
- Reduced Cooking Time: Air fryers cook food significantly faster than traditional ovens, thanks to their powerful convection technology. This means your crispy wings are ready in minutes, not hours.
- Healthier Option: Achieve that satisfying crispy texture with far less oil than deep-frying. The air fryer circulates hot air, effectively “frying” the food without submerging it in oil, resulting in a lighter, less greasy product.
- No Kitchen Heat-Up: Unlike an oven that can drastically increase your kitchen’s temperature, especially in warmer months, an air fryer keeps the heat contained, making cooking more comfortable.
- Exceptional Crispiness: This is arguably the biggest selling point for wings! The constant circulation of hot air ensures every surface of the wing gets super crispy, mimicking the texture of deep-fried wings without the fuss.
- Ease of Use & Cleanup: Most air fryer baskets are non-stick and dishwasher-safe, making cleanup a breeze. The entire process is less messy than deep-frying, which often involves oil splatters.
- Energy Efficiency: Air fryers generally use less energy than a full-sized oven for smaller tasks, making them a more eco-friendly and cost-effective cooking method.
Many were hesitant before purchasing an air fryer, but once you experience the convenience and quality of food it produces, you’ll likely become a fervent advocate, just like us! Life made simple is indeed an extraordinary thing.
Mastering the Air Fryer Basket: Tips for Perfect Laying
Proper arrangement of your chicken wings in the air fryer basket is crucial for achieving that desired all-over crispiness. Generally, for most foods, it’s advised to leave plenty of room between pieces to allow for optimal hot air circulation and even cooking. However, with frozen chicken wings, you have a little more flexibility because they tend to shrink quite a bit during the initial cooking phase.
Here’s a strategic approach: For an average air fryer, you might start with about 8-10 frozen wings. Arrange them in as close to a single layer as possible without excessive stacking. As they cook for the first 10 minutes at a lower temperature, they will thaw and reduce in size. This is your cue! When it’s time to increase the heat and flip them over, you’ll find the wings are now the perfect size to easily arrange into a true single layer for the remainder of the cooking process. This ensures maximum surface area exposure to the hot air, leading to superior crispiness.
Important Rule: Never get carried away and stack two or three layers of wings on top of each other throughout the entire cooking process. Even if they shrink, overcrowding will lead to steaming rather than frying, resulting in soggy wings. If you have a small air fryer basket, cooking in batches is always your best bet to guarantee perfectly crispy results every time. Patience in batch cooking pays off!
Pro Tip: Want Your Wings Extra Crispy? Add Baking Powder!
For wings that boast an exceptional, almost shatteringly crisp skin, here’s a professional chef’s secret: add a little baking powder to your spice mix. Just 1 tablespoon of aluminum-free baking powder, combined thoroughly with your garlic powder and salt, can work wonders. After mixing, liberally coat your chicken wings with this blend, ensuring they are evenly covered.
How does it work? Baking powder is slightly alkaline. When it comes into contact with the chicken skin, it raises the pH, which helps to break down the peptide bonds in the proteins. This process effectively draws moisture from the skin to the surface, where it evaporates faster during cooking. The baking powder also creates tiny air bubbles on the skin, resulting in an incredibly airy, crispy, and beautifully browned exterior. It’s like magic for maximizing crunch!
Do I Have to Use Frozen Chicken Wings?
While you certainly can use fresh chicken wings for this recipe, the primary focus and advantage of this method are the convenience and efficiency of using frozen wings directly. Using fresh wings would involve thawing, patting them thoroughly dry to remove excess moisture (which is crucial for crispiness), and potentially more hands-on prep. As a self-proclaimed “lazy cook” sometimes, especially when entertaining a crowd, keeping things as simple and fuss-free as possible is the goal. Frozen wings allow you to bypass those initial steps and get straight to the air frying, without compromising on flavor or texture.
Storing & Reheating Leftovers: Enjoying Wings Beyond Game Day
Let’s be honest, delicious hot and spicy wings are usually devoured in minutes, making leftovers a rare sight! But just in case you find yourself with a few extra pieces, proper storage and reheating are key to enjoying them again.
- Storage: Allow any leftover wings to cool completely. Then, transfer them to an airtight container and store them in the refrigerator. They will stay fresh for 2-3 days.
- Reheating: For best results and to recapture some of that glorious crispiness, avoid the microwave. Instead, reheat your wings in the air fryer or oven.
- Air Fryer Reheating: Preheat your air fryer to 400°F (205°C). Place the wings in a single layer in the basket and cook for 5-10 minutes, shaking the basket halfway through, until they are heated thoroughly and crispy again.
- Oven Reheating: Preheat your oven to 400°F (205°C). Arrange the wings on a baking sheet lined with parchment paper or a wire rack set over a baking sheet. Heat for 10-15 minutes, flipping once, until warmed through and crispy.
- Food Safety: Always ensure leftovers are reheated to an internal temperature of 165°F (74°C).
- Do Not Refreeze: Cooked chicken wings should not be refrozen after thawing and cooking.
- Creative Leftovers: If you’re tired of plain wings, shred the leftover chicken and add it to salads, wraps, quesadillas, or even a spicy chicken dip for a delicious lunch during the week.
To Oil or Not to Oil? Maximizing Flavor and Preventing Stickiness
You might wonder if oil is truly necessary for air frying. While an air fryer uses significantly less oil than deep frying, a minimal amount can be quite beneficial:
- Preventing Stickiness: Lightly spraying the air fryer basket with olive oil or cooking spray helps food not to stick, making for incredibly easy cleanup. It’s a minimal effort for a significant payoff in convenience.
- Spice Adhesion: A thin coating of oil on the wings helps the spices stick to the skin more effectively, ensuring every bite is flavorful.
- Enhanced Crispiness & Flavor: Oil also contributes to browning and can help seal in the chicken’s natural juices, leading to a more tender interior and a crispier exterior. Olive oil or avocado oil are excellent choices for their high smoke points and subtle flavor.
If you prefer to go completely oil-free, you can skip coating the wings with oil and opt for lining the bottom of your air fryer basket with parchment paper designed for air fryers to prevent sticking. You can also pat the wings thoroughly dry after their initial cook and then apply your spices; they might not adhere quite as well, but the wings will still cook and crisp up thanks to the air fryer’s powerful convection.
Can I Use the Oven to Cook the Wings? (Alternative Method)
Absolutely! While the air fryer is our preferred method for speed and crispness, you can certainly achieve delicious results in a conventional oven. It will simply take a bit more time. Here’s how to do it:
- Thaw & Dry: For best results, thaw your frozen wings completely in the refrigerator overnight, or use fresh wings. Once thawed (or if using fresh), it’s crucial to pat them very dry with paper towels. Removing excess moisture is the key to crispy skin in the oven.
- Season & Rest (Optional but Recommended): For ultimate crispiness, combine your spices with 1 tablespoon of baking powder (as detailed in the “Extra Crispy” section). Coat the wings thoroughly with this mixture. For truly exceptional results, let the seasoned wings sit uncovered in the fridge overnight. This further dries out the skin, guaranteeing an extra level of crunch.
- Prepare for Baking: To avoid soggy wings, you must allow for air circulation. Place the wings on an oven-safe wire rack set over a baking sheet. Line the baking sheet with aluminum foil or parchment paper for easy cleanup. Avoid placing wings directly on a flat baking dish or pan, as they’ll steam rather than crisp.
- Preheat Oven: Preheat your oven to 425°F (218°C).
- Bake: Bake the wings for approximately 25-35 minutes, flipping them halfway through. Continue baking until the skin is golden brown and crispy, and the internal temperature reaches 165°F (74°C).
- Sauce & Serve: Toss the hot, crispy oven-baked wings with your favorite sauce and serve immediately.
For another delicious oven-baked option, you could also try these Salt and Pepper Chicken Wings.
What to Serve with Your Perfect Chicken Wings
Crispy chicken wings are a versatile dish that pairs well with a variety of sides, whether you’re serving them as an appetizer or a main course. Here are some classic and creative ideas to round out your meal:
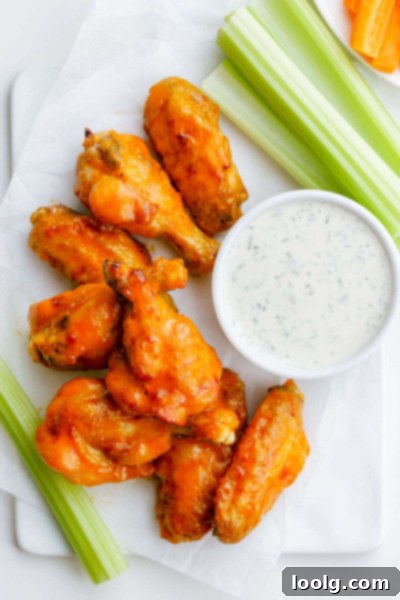
- Classic Veggies & Dips: Fresh-cut celery and carrot sticks are the standard accompaniment, offering a refreshing crunch. Pair them with a creamy blue cheese dressing or a tangy ranch dip. A vibrant Cilantro-Lime Crema offers a zesty twist.
- Fries & Potatoes: Nothing beats the comfort of a side of fries! Consider making Garlic Fries or Carrot Fries in your air fryer for a healthier alternative. Crispy Air Fryer Tater Tots or a hearty Air Fryer Baked Potato are also excellent choices.
- Salads & Slaws: A light, crisp coleslaw or a fresh green salad can balance the richness of the wings. A zesty pasta salad or potato salad also makes a great companion for a casual meal.
- Other Wing Flavors & Recipes: If you’re looking to expand your wing repertoire, explore different flavor profiles like these Soy Garlic Chicken Wings or even Buttermilk Brined Grilled Chicken Wings for a unique taste.
- Hearty Sides: For a more substantial meal, serve your wings with corn on the cob, mac and cheese, or rice pilaf.
Maintaining Your Air Fryer: Easy Cleaning Tips
To ensure your air fryer continues to deliver perfectly crispy results and stays in top condition, regular cleaning is essential. It’s best practice to clean your air fryer after every use!
- Unplug and Cool: Always ensure your air fryer is unplugged and has completely cooled down before you begin cleaning.
- Wash Removable Parts: The basket and drawer are typically removable. Wash them with warm, soapy water using a non-abrasive sponge. For stubborn stuck-on food, let them soak for a bit before scrubbing. Many baskets are dishwasher-safe, but check your model’s manual.
- Wipe Down the Interior: Use a damp cloth or sponge with a little dish soap to wipe down the interior of the appliance. Pay attention to the heating element, gently wiping away any grease or food splatters. Avoid excessive water inside the unit.
- Clean the Exterior: Wipe the exterior with a damp cloth to remove any fingerprints or splashes.
- Deep Cleaning: As often as needed, typically every few uses, perform a deeper clean. You can use a paste of baking soda and water on tough stains, letting it sit before gently scrubbing.
Pro Tip for Less Mess: If you’re concerned about a mess or sticky sauces, line the bottom of your air fryer basket with air fryer-specific parchment paper. This can dramatically reduce cleanup time. While you might be tempted to use aluminum foil, we generally don’t recommend it. Aluminum foil can potentially damage the non-stick coating of your air fryer basket, interfere with proper air circulation, or even leach aluminum into your food, especially with acidic ingredients. Stick to parchment paper or a little elbow grease, and remember to clean your air fryer regularly!
Discover More Air Fryer Delights!
The air fryer is a versatile appliance capable of cooking so much more than just chicken wings. If you’re enjoying the convenience and delicious results, you might love these other air fryer recipes:
- Air Fryer BBQ Chicken
- Garlic Fries
- Tater Tots
- Carrot Fries
- Air Fryer Baked Potato
- Fish Tacos
- Turkey Burgers
- You can even make Air Fryer Chocolate Chip Cookies! If you need a Paleo version, no problem, these Paleo Cookies are perfect every time!
If you try these crispy air fryer chicken wings or any other fantastic recipe you discover on our site, we’d absolutely love to see your photos and hear about your cooking experience! Be sure to tag 📸 and follow #fooddoodlesrecipes so we can find your culinary creations easily. You can also connect with us on Instagram, Facebook, Twitter, and Pinterest. Happy cooking!
Recipe: Frozen Chicken Wings in the Air Fryer
Author: Erin Dooner
Course: Appetizer
Cuisine: American
Servings: 4 people (approx. 8 wings)
Prep Time: 5 mins
Cook Time: 32 mins
Ingredients:
For the wings:
- 8 frozen chicken wings
- 1/2 tablespoon olive oil
- 3/4 teaspoon garlic powder
- 1/2 teaspoon salt
For the sauce:
- 1/4 cup Frank’s Red Hot Original (or similar hot sauce)
- 1/4 cup (56 grams) melted unsalted butter
Instructions:
- Spray the air fryer basket with olive oil or cooking spray.
- Place the frozen chicken wings in a bowl and coat them evenly with olive oil.
- In a small bowl, stir together the garlic powder and salt. Sprinkle this seasoning over the chicken wings and toss to coat thoroughly.
- Arrange the wings in the air fryer basket in a single layer, ensuring they are not touching for optimal crispiness.
- Cook at 360°F (180°C) for 10 minutes. Then, carefully flip all the wings.
- Increase the heat to 400°F (205°C) and continue to cook for another 15-22 minutes. Shake the basket every 5 minutes until the skin is golden brown and extra crispy, and the internal temperature reaches 165°F (74°C).
- While the wings are hot, transfer them to a large bowl. Pour the prepared buffalo sauce (hot sauce mixed with melted butter) over them and toss until every wing is fully coated. Serve immediately and enjoy!
Tried this recipe? Tag me today! Mention @easywholesome or tag #easywholesome!
