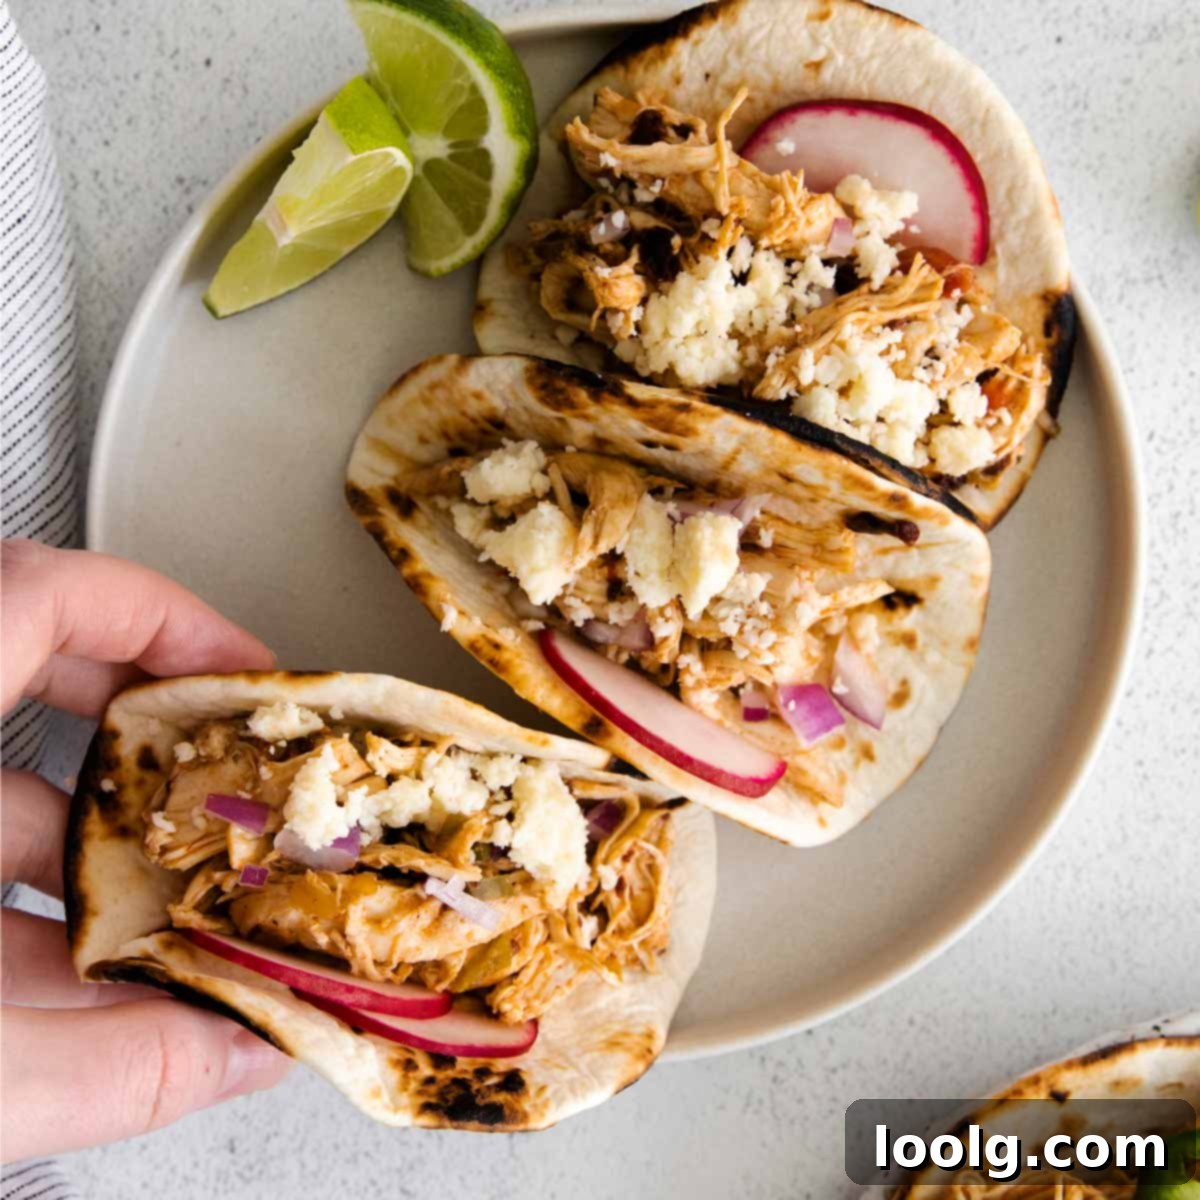
Effortlessly Delicious: Instant Pot Shredded Chicken Tacos for Quick & Flavorful Weeknight Meals
Transform your ordinary taco night into an extraordinary culinary experience with these incredibly easy Instant Pot shredded chicken tacos! They’re astonishingly quick to prepare, perfectly seasoned, and offer a fantastic way to serve a wholesome and satisfying meal in under 30 minutes. Whether you’re a seasoned chef or new to pressure cooking, this recipe promises tender, juicy chicken every time, making it a staple for busy weeknights or casual gatherings.
One of the best features of this recipe is its flexibility: you can use either fresh or frozen chicken breasts. Simply combine a few essential ingredients in your Instant Pot, press a button, and let the magic happen. Before you know it, a delicious dinner is ready to be devoured!
Much like our popular Air Fryer Fish Tacos, this dish delivers an amazing meal that’s both simple to execute and remarkably healthy. It’s a delightful deviation from your typical everyday dinner, bringing vibrant flavors and minimal fuss to your table.
Cooking for a large crowd? No problem! The Instant Pot handles varying quantities with ease, consistently producing moist and tender shredded chicken in the same amount of time. You might even find yourself spending more time preparing your favorite toppings than actually cooking the chicken!
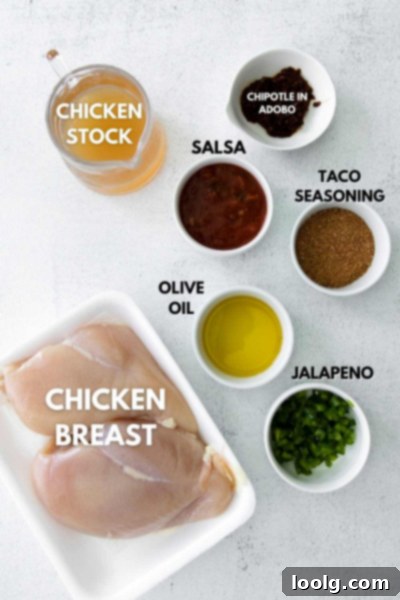
Essential Ingredients for Your Instant Pot Shredded Chicken Tacos
Crafting the perfect Instant Pot shredded chicken requires a few key components that work together to create incredible flavor and texture. Here’s a breakdown of what you’ll need, along with some helpful notes:
- Chicken Stock: This vital liquid ensures your chicken breasts remain incredibly moist and juicy throughout the pressure cooking process. It also contributes to the overall savory base of the dish. You can use homemade or store-bought, low-sodium for better control over seasoning.
- Salsa: A crucial ingredient that infuses the chicken with a burst of vibrant flavor while it cooks. Choose your favorite type – mild for a family-friendly meal, or a spicier variety if you prefer a kick. The salsa also adds moisture and a slight acidity that tenderizes the chicken.
- Boneless, Skinless Chicken Breasts: We recommend boneless, skinless chicken breasts for ease of shredding and a lean protein option. However, if you prefer a richer flavor or have them on hand, boneless, skinless chicken thighs can also be used with excellent results. Ensure they are of similar size for even cooking.
- Olive Oil: A touch of olive oil not only adds a subtle richness to the chicken but also acts as a binder, helping the taco seasoning adhere beautifully to the meat for maximum flavor distribution.
- Taco Seasoning: This is where the classic taco flavor truly comes alive. You can opt for a convenient store-bought taco seasoning blend or create your own homemade version for a personalized touch. We’ll discuss homemade options in more detail below.
- Jalapeño and/or Chipotle in Adobo (Optional): For those who enjoy a bit of heat and smoky depth, adding a diced jalapeño will provide a fresh, spicy kick. Chipotle peppers in adobo sauce, on the other hand, offer a deeper, smokier heat that is absolutely delicious. You can include both or skip them entirely if they’re not readily available or if you prefer a milder flavor profile.
Expert Tips for Perfect Instant Pot Shredded Chicken
- Understanding Pressure Cooker Timing: When using any pressure cooker, remember to factor in the time it takes for the unit to come up to pressure. This crucial period is *not* included in the stated cook time. For this recipe, while the actual cook time is 12 minutes, you’ll need to allow an additional 5-7 minutes for the Instant Pot to pressurize, depending on the size and thickness of your chicken breasts. This ensures proper cooking and tender results.
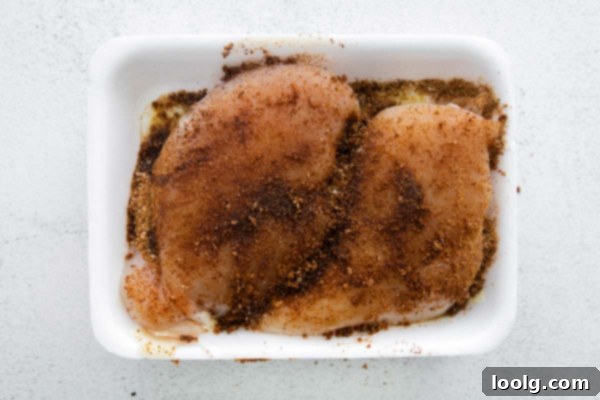
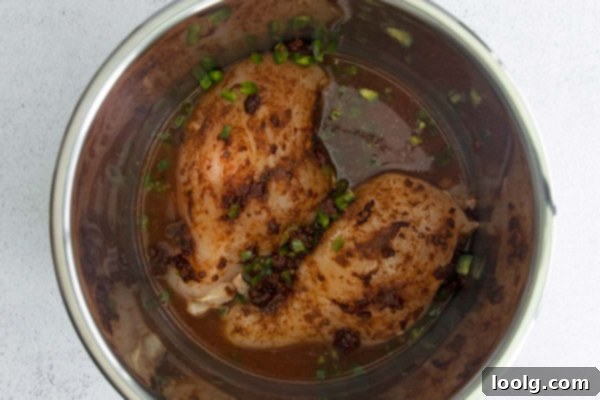
- Strategic Broth Placement: To preserve the integrity of your seasoning, always pour the chicken stock and salsa around the chicken breasts rather than directly over them. This prevents washing off all that delicious taco seasoning you just applied, ensuring every bite is bursting with flavor.
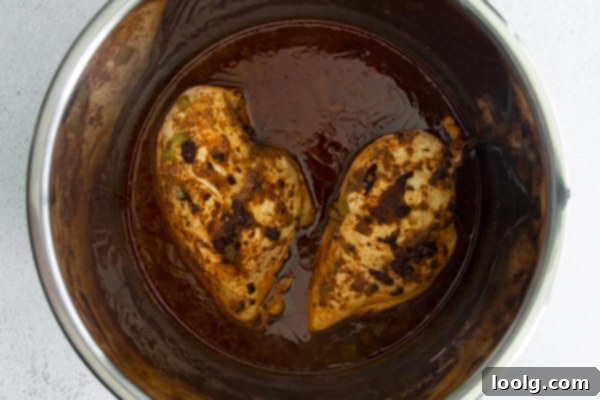
- The Art of Natural Pressure Release: For the most incredibly tender and moist shredded chicken, a natural pressure release (NPR) is highly recommended. To do this, simply let the Instant Pot sit undisturbed after the cooking cycle finishes. It will gradually release pressure over 5 to 10 minutes. This slow release allows the chicken to reabsorb its juices, resulting in a more succulent texture.
- Patience with the Lid: During a natural pressure release, the floating valve will slowly lower. Never attempt to force open the lid until the pressure has fully dissipated and the valve has dropped completely. Forcing it open can be dangerous due to trapped pressure. Wait until the lid can be opened easily and safely.
- Safe Steam Release: Whether you’re performing a quick release or waiting for a natural release, always exercise caution when steam is escaping from the Instant Pot. A burst of hot steam can rise very quickly. We suggest using oven mitts or the handle of a wooden spoon to safely move the vent to the venting position, protecting your hands from potential burns.
- Doubling the Recipe? No Extra Liquid Needed!: One of the beauties of pressure cooking is its efficiency. If you decide to double or even triple this recipe (e.g., from 1 pound to 5 pounds of chicken), there’s no need to increase the amount of liquid (chicken stock and salsa) in the Instant Pot. The pressure will build sufficiently with the initial liquid, ensuring consistent cooking.
- Uniformity is Key: For the best and most consistent results, try to use chicken breasts that are similar in size and thickness. If you use pieces of varying sizes, you risk having some chicken overcooked and dry, while others might remain underdone.
Mastering the Art of Shredding Chicken
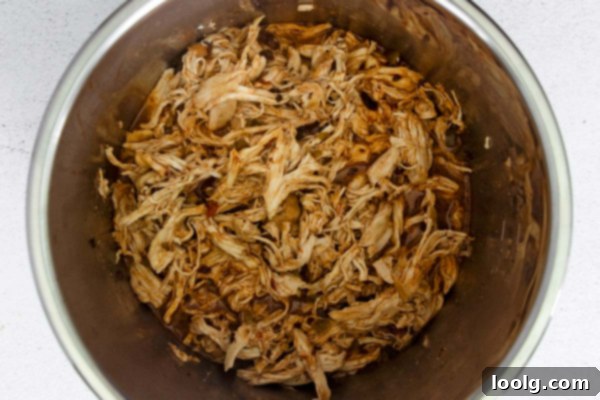
Once your chicken has been perfectly slow-cooked or pressure-cooked, it becomes remarkably easy to pull apart into delightful shreds. The meat will naturally have a “grain” or pattern, which indicates where it will separate effortlessly when tender.
While pulling the chicken breasts apart with your hands is certainly an option, and quite satisfying, there are several other effective methods you might consider, especially if you’re preparing a larger batch:
- By Hand: This is the simplest and most direct method. Ensure the cooked chicken is cool enough to handle comfortably, but still warm. Place the chicken on a clean cutting board or plate and use your hands to pull the meat apart into your desired shredded pieces. This method gives you excellent control over the size and texture of the shreds.
- Two Forks: An equally simple method that keeps your hands clean. Place the cooked chicken breasts on a sturdy cutting board. Insert two forks into the center of a chicken breast, then pull them apart in opposite directions. Repeat this action until you achieve your desired size of shredded pieces. This technique is particularly good for smaller batches or if you prefer slightly larger, chunkier shreds.
- Hand Mixer: If you’re tackling more than two chicken breasts, a hand mixer can be a fantastic energy-saver. Place the cooked chicken in a deep bowl (to prevent splatter). Use the hand mixer on a low speed to gently break apart the chicken. It works surprisingly quickly to achieve evenly shredded chicken, perfect for stuffing numerous taco shells.
- Stand Mixer: For large quantities, such as when cooking for a crowd, a stand mixer is the ultimate tool. Fit your stand mixer with the paddle attachment, add the cooked chicken to the bowl, and set it to low speed. The chicken will be perfectly shredded in about 15 to 20 seconds. While cleanup might take a little more effort, the speed and efficiency are unparalleled for bulk shredding.
The inherent advantage of using boneless, skinless chicken breasts for this recipe is the absence of skin, bones, or excess fat, which streamlines the shredding process, making it incredibly quick and mess-free.
Building Your Perfect Tacos: Beyond the Chicken
The beauty of tacos lies in their versatility – you can customize them exactly to your liking! The foundation, of course, is the tortilla, and you have several delightful options:
- Soft Flour Tortillas: A classic choice, known for their pliable texture and mild flavor, providing a soft embrace for your shredded chicken.
- Soft Corn Tortillas: For an authentic Mexican touch, corn tortillas offer a distinct flavor and slightly chewier texture. Lightly warm them on a griddle before serving to enhance their aroma and flexibility.
- Crispy Taco Shells: If you love that satisfying crunch, crispy taco shells are the way to go, offering a textural contrast to the tender chicken.
If you’re feeling adventurous and want to make your own flour tortillas, try these fantastic Vegan Tortillas from our other blog. They are wonderfully soft, incredibly pliable, and surprisingly easy to make right at home! Plus, they freeze beautifully, and you likely already have all the ingredients in your pantry. For those needing a gluten-free alternative, these super bendy Gluten-free Tortillas are an excellent choice, ensuring everyone can enjoy taco night!
Looking for delightful vegetarian accompaniments or alternative fillings? Our Vegan Fajitas, packed with savory portobello mushrooms, vibrant bell peppers, and sweet caramelized onions, are a fantastic option. Or consider these simple yet delicious air fryer peppers and onions as a topping. And if you’re not strictly vegetarian, but love the fajita concept, these Instant Pot Chicken Fajitas offer another quick and flavorful pressure cooker meal!
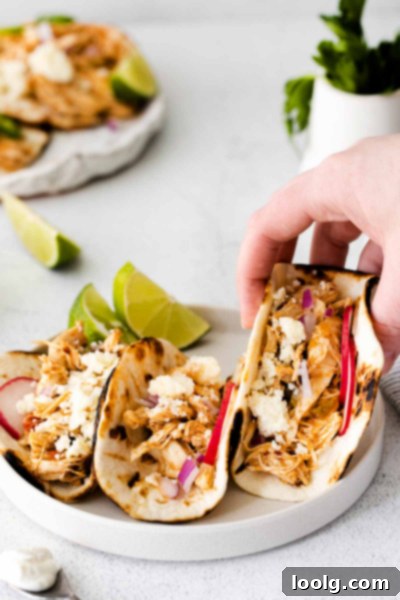
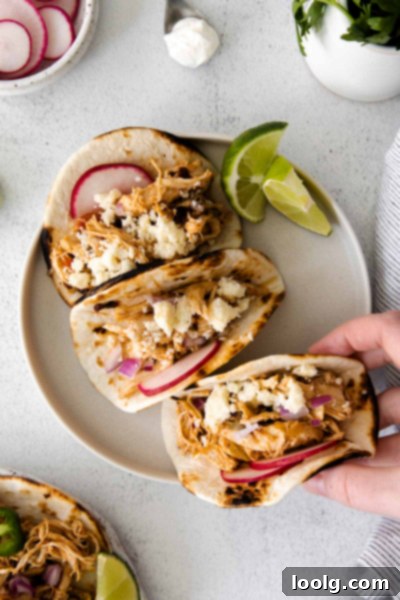
Once you’ve chosen and prepared your base, it’s time for the fun part: generously stuffing your tortillas with the succulent shredded chicken and piling on your favorite toppings. Perhaps a dollop of fresh Cilantro Pesto for a unique twist?
The Ultimate Taco Toppings Bar
No taco is complete without a generous array of fresh and flavorful toppings! This is your chance to get creative and customize each taco to perfection. Here are some of my go-to choices:
- Cheese: I personally love a sharp cheddar cheese for its robust flavor and creamy melt, but the world of cheese is your oyster! Monterey Jack, Colby, or a traditional white cheese like salty and creamy cotija are excellent choices. Shredded Mozzarella can offer a milder flavor with abundant creaminess. Feel free to use a blend or whatever your heart desires – or, for the traditionalist, no cheese at all!
- Sour Cream or Greek Yogurt: A cooling dollop of sour cream or a healthier alternative like plain Greek yogurt provides a creamy contrast to the spicy chicken and fresh vegetables.
- Diced Tomatoes: Fresh, juicy tomatoes add a burst of sweetness and acidity.
- Black Olives: Sliced black olives contribute a briny, savory note.
- Crisp Lettuce: Shredded iceberg or romaine lettuce adds a refreshing crunch and vibrant color.
- Raw Onion: A finely diced raw onion (red or white) offers a sharp, pungent bite that balances the other flavors.
- Roasted Diced Green Chilis: If I have them on hand, a spoonful of roasted green chilis adds a mild, smoky flavor that I absolutely adore.
- Guacamole or Sliced Avocado: Creamy, rich guacamole or simple slices of fresh avocado are a must for most taco lovers, adding healthy fats and a smooth texture.
To further enhance the flavor, you can always add more of your favorite salsa as a topping. Alternatively, try making your own light and zesty avocado dressing to drizzle generously over your tacos for an extra layer of deliciousness.
When hosting a gathering, setting up a “taco bar” with a diverse selection of toppings is always a hit. This way, everyone can personalize their tacos exactly as they like, ensuring a fun and engaging dining experience!
Choosing the Perfect Salsa for Your Chicken
The salsa you incorporate into your Instant Pot chicken recipe can significantly influence the final flavor profile, ranging from subtle to boldly spicy. The choice is entirely yours!
Personally, I tend to lean towards a milder salsa when cooking for my child, but I occasionally enjoy dialing up the heat for myself. If you plan to include jalapeño or chipotle peppers in adobo, a milder salsa might be a good choice to prevent the dish from becoming overwhelmingly spicy.
Here are a few salsa recommendations to consider:
- Tenayo Salsa: Known for its all-natural, non-GMO ingredients, with no added preservatives, vinegar, or sugar. It’s available in original or chipotle flavor and can be found online and at major retailers like Walmart Supercenters.
- Newman’s Own Organics Medium Salsa: Frequently ranked among the healthier options on the market, this salsa is widely accessible at stores such as Costco, Target, and Walmart Supercenters.
- Kylitos Roasted Salsa: A personal favorite, offering a rich, roasted flavor profile. You can typically find Kylitos at Albertsons, Kroger, United Supermarkets, Market Street, and Walmart.
For those who love a spicy, homemade option, try this amazing Salsa Tatemada, which offers a robust, charred flavor. And if you’re looking for something a little different yet still spicy, these Spicy Shrimp Tacos (featuring a mango habanero salsa) could inspire your next culinary adventure!
Customizing Your Taco Seasonings
While a good quality store-bought taco seasoning blend provides excellent flavor and convenience, don’t hesitate to customize or even create your own! It’s an easy way to control the sodium levels and tailor the spice profile to your family’s preferences.
Most commercial taco seasonings are typically a blend of common spices, including chili powder, paprika, ground cumin, onion powder, garlic powder, a touch of cayenne pepper for heat, salt, black pepper, and sometimes crushed red pepper flakes. Experimenting with different proportions of these ingredients can lead to your signature taco blend.
If you prefer not to use a pre-made taco seasoning at all, you have plenty of options to infuse your chicken with delicious flavor. Consider adding a few whole peppercorns directly to the Instant Pot, or incorporating dried chili peppers for a more intense heat. Other fantastic spices that complement chicken tacos include coriander powder, which offers a warm, citrusy note, or authentic Mexican oregano, which has a more earthy and less minty flavor than common oregano. The goal is to use any combination of spices you know your family will enjoy.
Don’t forget to explore adding roasted green chilis for a unique smoky and mild spicy element, or a pinch of extra Mexican oregano for an authentic flavor boost!
Storing Your Leftover Shredded Chicken
Proper storage is key to enjoying your delicious shredded chicken for days to come. Any leftover cooked chicken should be transferred to an airtight container and refrigerated promptly. It will maintain its quality and freshness for up to 3 days. This makes it perfect for meal prep, allowing you to quickly assemble tacos or other dishes throughout the week.
Freezing Shredded Chicken for Future Meals
If you find yourself with more shredded chicken than you anticipate consuming within three days, freezing is an excellent option! It helps preserve the chicken’s quality and flavor for much longer.
Once the shredded chicken has cooled completely, portion it into sealable freezer bags or airtight containers. Label and date each package clearly to keep track of its freshness. When stored correctly, frozen shredded chicken will remain in excellent condition for approximately 4 months.
To make reheating easier and to prevent waste, we recommend portioning the chicken into amounts you expect to use for a single meal. This way, you can grab just what you need without thawing and refreezing large quantities.
For optimal preservation and to prevent freezer burn, vacuum sealing your food is ideal. However, if you don’t have a vacuum sealer, there’s a clever hack that achieves a similar effect: you can still seal the chicken in a freezer bag, but use a pot of water to help remove excess air before sealing. Watch this quick video to learn how this simple trick can significantly reduce air in your freezer bags, almost as effectively as a vacuum sealer!
Instant Pot Capacity: How Much Chicken Can You Cook?
Understanding your Instant Pot’s capacity is important for efficient cooking. For this particular recipe, a single pound of boneless chicken breasts, typically about 2 individual breasts, will comfortably feed a family of four. As a general guideline, one pound of boneless chicken yields approximately 2 ½ cups of delicious shredded chicken.
If you own a 6-Quart Instant Pot Duo, like mine, you can easily fit three standard-sized chicken breasts without any issue.
For larger quantities, such as when cooking for a bigger family or meal prepping, you can layer the chicken breasts inside the pot. If you’re using fresh chicken breasts, you can stack them on top of each other, crisscrossing them for optimal contact with the liquid and even cooking. When working with frozen chicken breasts, it’s best to arrange them side by side rather than stacked, if possible, to allow better heat circulation around each piece.
To ensure uniform cooking when layering fresh chicken, make sure to cross the pieces rather than stacking them all in the same direction. This helps heat distribute more evenly. Additionally, remember to season each individual piece separately before stacking them in the pot. This guarantees that every part of the chicken is perfectly seasoned throughout, not just the outer layers.
While Instant Pots are powerful, it’s generally not recommended to cook more than 4 pounds of chicken at a time in a standard 6-quart model. Keep in mind that increasing the quantity of chicken will extend the time required for the Instant Pot to come up to pressure, although the actual cooking time under pressure usually remains the same.
Quantity vs. Cook Time: A Pressure Cooking Principle
This is a common question, and the answer might surprise you: no, you typically do not need to add more cooking time if you add more chicken breasts to your Instant Pot, provided you stay within its capacity. This is one of the fantastic advantages of pressure cooking!
Pressure cooking works by trapping steam, which creates a high-pressure environment that raises the boiling point of water and speeds up the cooking process. In this sealed, high-pressure environment, food cooks evenly regardless of quantity (within reason). The cooking time is primarily determined by the size and thickness of the individual pieces of food, not the total volume. So, whether you’re cooking 4, 6, or even 8 chicken breasts (as long as they fit without exceeding the fill line), the required cooking time under pressure remains consistent to ensure the food is fully cooked through to the center.
Can Bone-In Chicken Breasts Be Used?
Technically, yes, you can cook bone-in chicken breasts in an Instant Pot. However, for a recipe specifically calling for shredded chicken, using boneless chicken breasts is significantly easier and highly recommended!
The primary reason for this recommendation is the additional effort involved. If you use bone-in chicken, you would first need to cook it, then carefully debone it before you can begin the shredding process. This adds extra time and steps to your meal preparation, which defeats the purpose of the Instant Pot’s quick and convenient nature for this particular dish.
That being said, if bone-in chicken breasts are what you have on hand, by all means, use them up! Just be prepared for the extra step of removing the bones once the chicken is cooked and tender.
The Instant Pot Advantage: Cooking Frozen Chicken Breasts
We’ve all been there: forgetting to take chicken breasts out of the freezer to thaw in advance. It’s a common kitchen predicament! But here’s the truly great news – with your Instant Pot, it simply doesn’t matter one bit! You can cook frozen chicken breasts directly, making it a lifesaver for last-minute meal planning.
For the best results, simply follow the same cooking directions as you would for fresh chicken breasts. The ideal scenario is to use individually frozen chicken breasts, which cook more evenly. If your chicken breasts are frozen together in a solid block, you’ll need to make a slight adjustment to the cooking time, as a thick frozen block will take longer to heat through compared to individual pieces.
If you’re cooking a frozen block of chicken, as a general rule, for every ounce over 16 ounces (1 pound), add approximately 3 minutes of cook time. A digital kitchen scale can be helpful here for accurate measurement. The most crucial factor is ensuring the chicken reaches an internal temperature of 165°F (74°C) at its thickest part to guarantee it’s fully cooked and safe to eat. If you check the temperature and it’s not quite there, simply return it to the Instant Pot and pressurize it again for a few more minutes. Determining the exact additional time for frozen blocks can be tricky due to varying sizes, so always rely on an instant-read thermometer for accuracy.
Reheating and Re-moistening Shredded Chicken
Reheating shredded chicken is straightforward, and you have several convenient options: the microwave, stovetop, or oven. To ensure your chicken remains wonderfully moist, it’s always best to add a splash of chicken stock or broth during the reheating process.
- In the Microwave: Place the shredded chicken in a microwave-safe container. To lock in moisture, cover it with a damp paper towel. Microwave in 1-minute increments, stirring after each minute, for up to 5 minutes, or until heated through. Once hot, let it rest for a minute, remove the paper towel, and enjoy your perfectly moist chicken.
- On the Stovetop: In a skillet, gently warm a small amount of chicken broth over medium heat – avoid bringing it to a rolling boil. Add the shredded chicken to the skillet, ensuring it’s well-coated with the broth. You can reheat chicken directly from frozen or defrosted. Stir occasionally as it cooks until it reaches the safe internal temperature of 165°F (74°C).
- Using an Oven: For reheating in the oven, place the shredded chicken in an oven-safe dish. Pour in just enough chicken broth to barely cover the meat. Cover the dish tightly with aluminum foil to trap moisture. Bake at 425°F (218°C) for approximately 20 minutes, or until the internal temperature reaches 165°F (74°C). Stirring the meat once or twice during baking can help ensure even reheating. If you’re reheating frozen shredded chicken in the oven, it’s highly recommended to defrost it overnight in the fridge first for the best results.

Why the Instant Pot is a Kitchen Game-Changer
Embracing the Instant Pot for creating quick, easy, and wholesome meals is an absolute revelation in the kitchen. It truly transforms the way you approach cooking, making healthy eating more accessible and less time-consuming.
The beauty of the Instant Pot lies in its simplicity: you simply add your ingredients, set the timer, and then it’s completely hands-off! This allows you more freedom to attend to other tasks, relax, or simply sip on a delicious beverage, perhaps even a refreshing Cherry Margarita. 😉
Gone are the days of constantly monitoring a hot stove, fretting over liquid levels, or worrying about spills and boil-overs. The Instant Pot significantly cuts down the actual cooking time required to get a perfect dinner on the table as quickly as possible. This efficiency is especially noticeable with dishes that typically take a long time, like a succulent Instant Pot air fryer rotisserie chicken!
Beyond its cooking prowess, the Instant Pot is also incredibly easy to clean, often with just a quick wash of the inner pot, making post-dinner cleanup a snap!
If you’ve fallen in love with your Instant Pot as much as I have, be sure to explore our other fantastic Instant Pot recipes for more culinary inspiration.
More Instant Pot Recipes You’ll Love!
Instant Pot Colcannon Soup: A comforting blend of Yukon gold potatoes and nutrient-rich green leafy kale, perfect for a hearty meal.
Instant Pot Broccoli: A super quick and vibrant green side dish that adds a healthy touch to any weeknight family dinner.
Instant Pot Turkey Breast: Not just for Thanksgiving! This makes a fantastic dinner and provides quick, delicious turkey sandwiches throughout the week.
Instant Pot Turkey Soup with Noodles: An easy, wholesome soup that’s perfect for utilizing leftover turkey and creating a comforting meal.
Instant Pot Tortellini Soup: A delightful and delicious twist on everyday meals, bringing flavor and ease to your table.
Shredded Chicken without an Instant Pot: The Stovetop Method
Don’t have an Instant Pot yet? No need to worry! People were mastering shredded chicken long before the advent of pressure cookers. You can easily achieve tender, flavorful shredded chicken right on your stovetop.
Begin by preparing your chicken with the same seasoning directions as outlined for the Instant Pot method. In a sturdy stockpot or Dutch oven, place your seasoned chicken breasts. Add enough chicken broth and salsa to just barely cover the chicken. Bring the liquid to a gentle simmer over medium heat, ensuring it never reaches a vigorous, hard boil. A gentle simmer is key to tender chicken.
As the chicken cooks, the liquid will naturally reduce. If you notice the chicken starting to become exposed and risk drying out, add a little more liquid at a time, just enough to keep the breasts submerged. Remember, we’re not making soup, so add sparingly. Continue to simmer for approximately 30 minutes, or until the chicken is fork-tender and has reached the appropriate internal temperature of 165°F (74°C).
Once cooked, remove the chicken from the pot, allow it to cool slightly, then shred it using one of the methods described above. Now you’re ready to prepare your delicious tacos! If you happen to have any leftover shredded chicken, it’s fantastic in these flavorful chicken Street Tacos!
Pulled Chicken vs. Shredded Chicken: What’s the Difference?
To be entirely honest, in many culinary contexts, there isn’t a significant functional difference between “pulled chicken” and “shredded chicken.” Both terms generally refer to meat that has been cooked until exceptionally tender and then separated into smaller strands or pieces.
However, observing how different meats behave during cooking can highlight a subtle distinction. Take pork, for instance. When slow-cooked (as in recipes like these Crockpot Shredded Chicken Tacos), it reaches a point where it literally falls off the bone, allowing it to be “pulled” apart with minimal effort. This is primarily due to the breakdown of abundant connective tissue during the prolonged cooking process.
White meat, such as chicken breast, is leaner and contains less connective tissue. While it still becomes very tender when cooked properly, it doesn’t always “fall apart” as easily as pork shoulder might. Instead, it tends to separate into distinct “shreds” that might require a little more active effort to pull apart. So, “shredding” can sometimes imply a slightly more deliberate action compared to the almost effortless “pulling” of super-tender meat, but fundamentally, they achieve the same result: meat in smaller, separable pieces.
That being said, in common parlance, particularly in the US, the distinction can often imply cooking method and flavor profile. “Pulled chicken” often refers to chicken that has been barbecued or smoked at a low and slow temperature, typically featuring a dry rub or being slathered in BBQ sauce. “Shredded chicken,” on the other hand, usually denotes chicken that has been cooked by baking, stewing, or pressure cooking, and then separated after the cooking process, without necessarily implying a BBQ flavor profile.
Ultimately, when it comes to serving these delicious chicken tacos, whether you call them “shredded chicken tacos” or “pulled chicken tacos,” the fantastic taste will remain the same. So feel free to use whichever term you prefer! 😉
Perfect Pairings: What to Serve with Chicken Tacos
Elevating your chicken taco experience is all about choosing the right accompaniments! And when it comes to a festive meal like tacos, what goes better than margaritas?
If you’re in the mood for something tropical and refreshing, serving a Frozen Pineapple Margarita is an excellent choice. Kick off your meal with a bowl of crispy tortilla chips alongside a vibrant Mango Habanero Salsa for a delightful sweet and spicy start.
For those who enjoy a twist on the traditional, a unique Gin Margarita offers an intriguing herbal note. Or, for a more classic and robust option, this Texas Margarita would be a wonderfully authentic choice to complement your tacos.
And don’t forget to explore our extensive collection of simply amazing sides here, which includes many options that would perfectly pair with your Instant Pot Shredded Chicken Tacos!
I would absolutely love to hear from you if you make these incredible Instant Pot Shredded Chicken Tacos! Please leave a comment below to share your experience, or share your creations with the world by tagging #fooddoodlesrecipes on social media so I can be sure to see them. Enjoy every delicious bite!
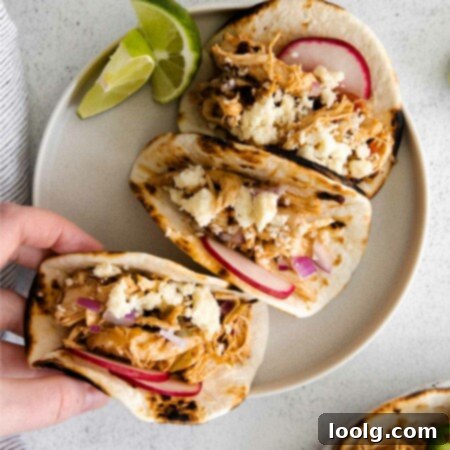
Instant Pot Shredded Chicken Tacos
Ingredients
- ½ cup chicken stock
- ¼ cup salsa
- 1 pound boneless skinless chicken breasts about 2 breasts
- 1 tablespoon olive oil
- 2 tablespoons taco seasoning
- 1 diced jalapeno optional
- chipotle in adobo optional
Instructions
-
Add chicken stock and salsa to the Instant Pot.
-
Drizzle olive oil on chicken breasts and sprinkle taco seasoning and rub to cover the chicken.
-
Place chicken in Instant Pot and add jalapeno or chipotle pepper (if using).
-
Attach the lid in sealing position, set to Pressure Cook-Manual for 12 minutes.
-
When time is up, allow pressure to naturally release for 10 minutes. Then release the remaining pressure by moving the vent to the venting position.
-
Shred chicken, fill the tortilla, add your favorite toppings and serve.
-
Let leftovers cool, and refrigerate in an airtight container for up to three days.
Notes
- With any pressure cooker recipe, always allow extra time for the cooker to come up to pressure. This time is not included in the actual cook time. So for this recipe, we have 12 minutes of cook time and about 10 minutes to naturally release the pressure. On average it takes anywhere between 5 to 7 minutes to come to pressure, but the time is dependent on the size and thickness of the chicken breasts.
- If you decide to double the recipe, there is no need to add more liquid to the Instant Pot. You will only need the measurements listed in the recipe whether you’re cooking 1 pound or 5 pounds.
- Always try to use chicken breasts of similar size and thickness. If one is larger than the other, you’ll get one overdone and one underdone chicken breast.
