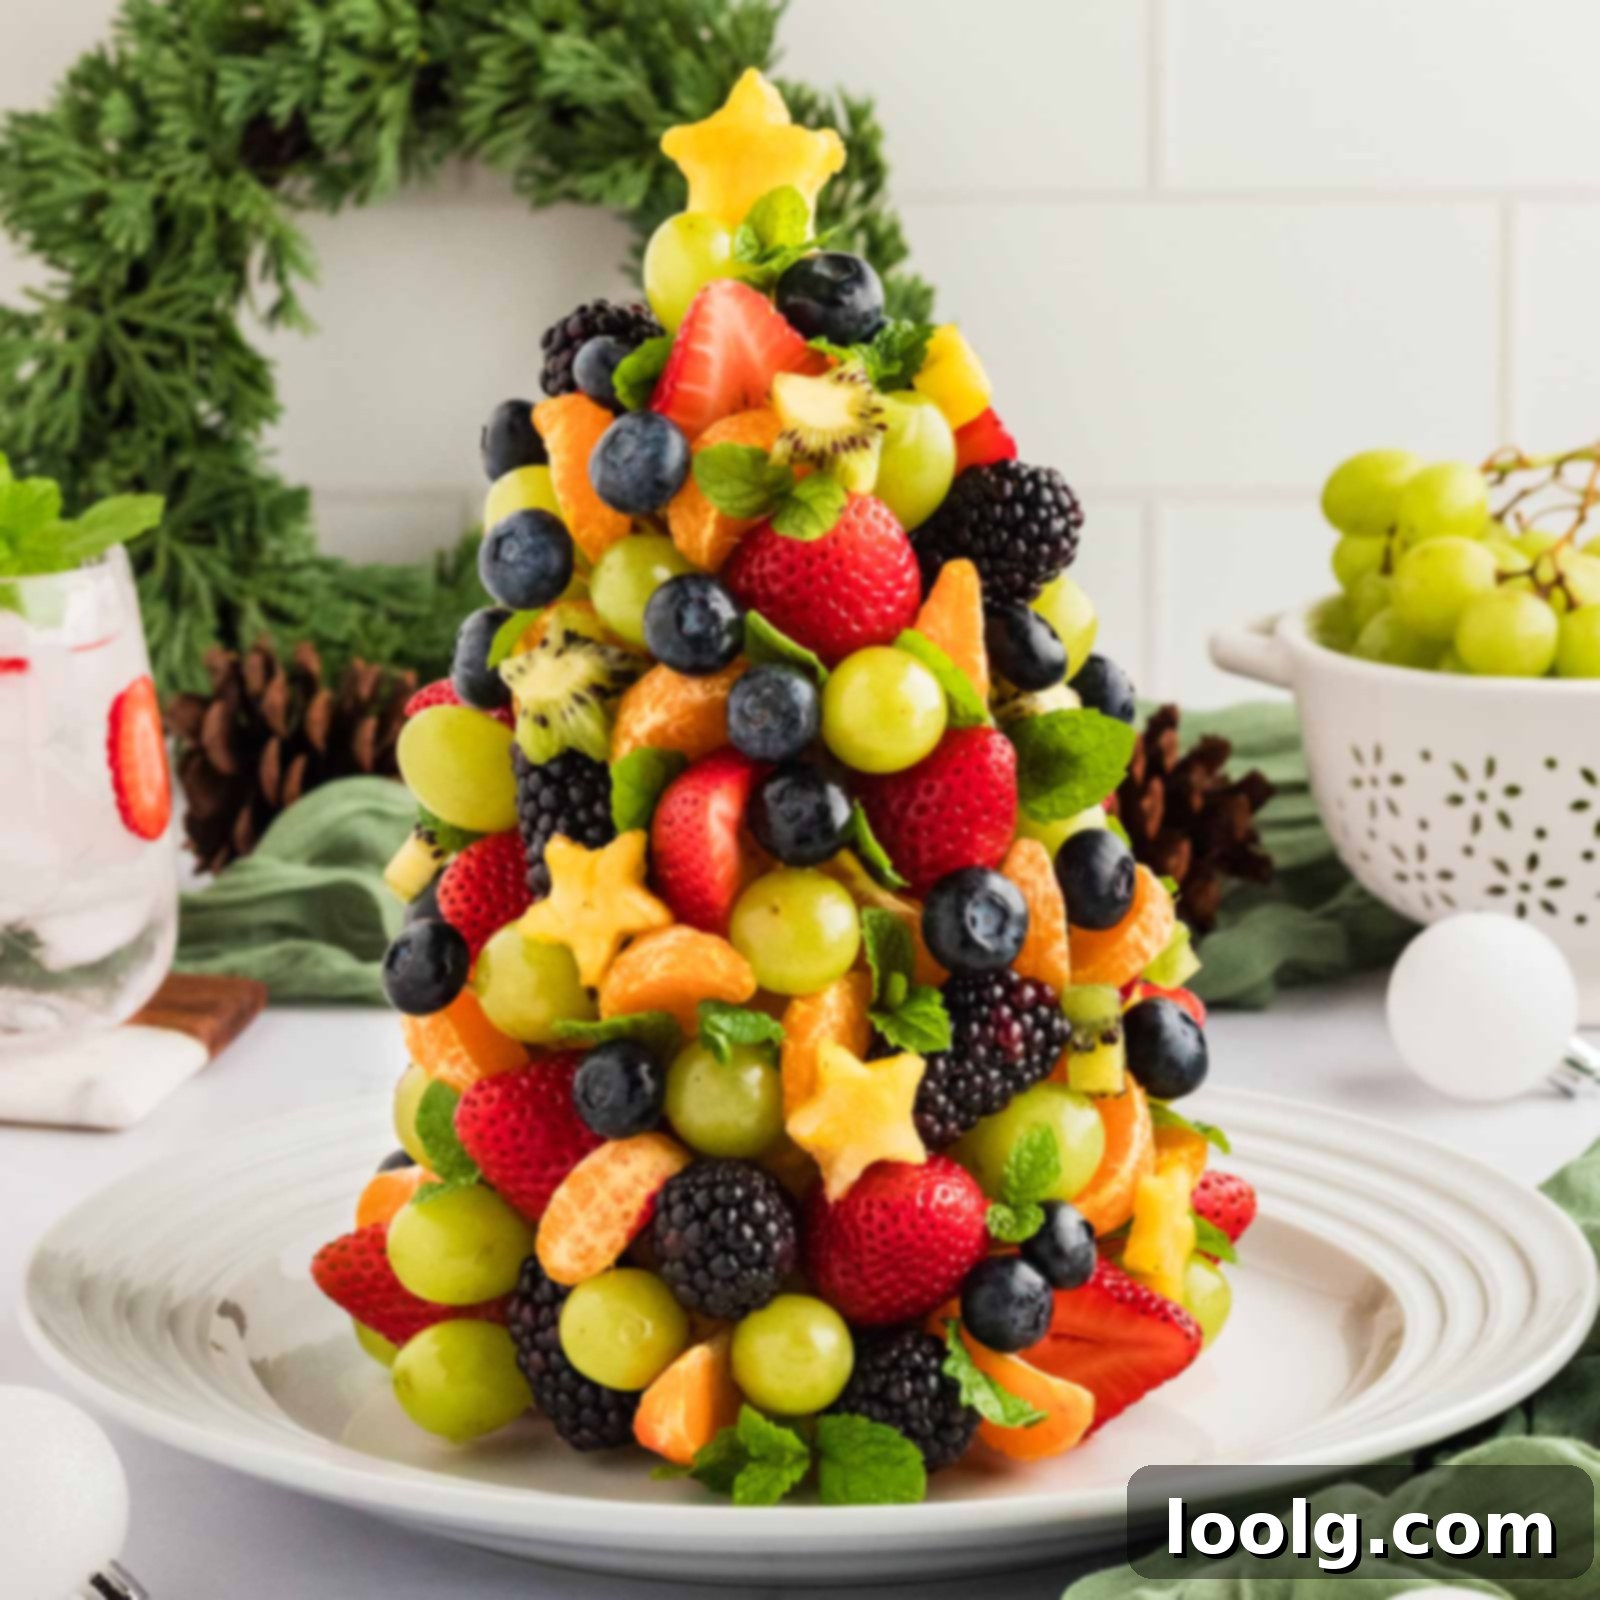
Festive Fruit Christmas Tree: A Healthy & Stunning Holiday Centerpiece
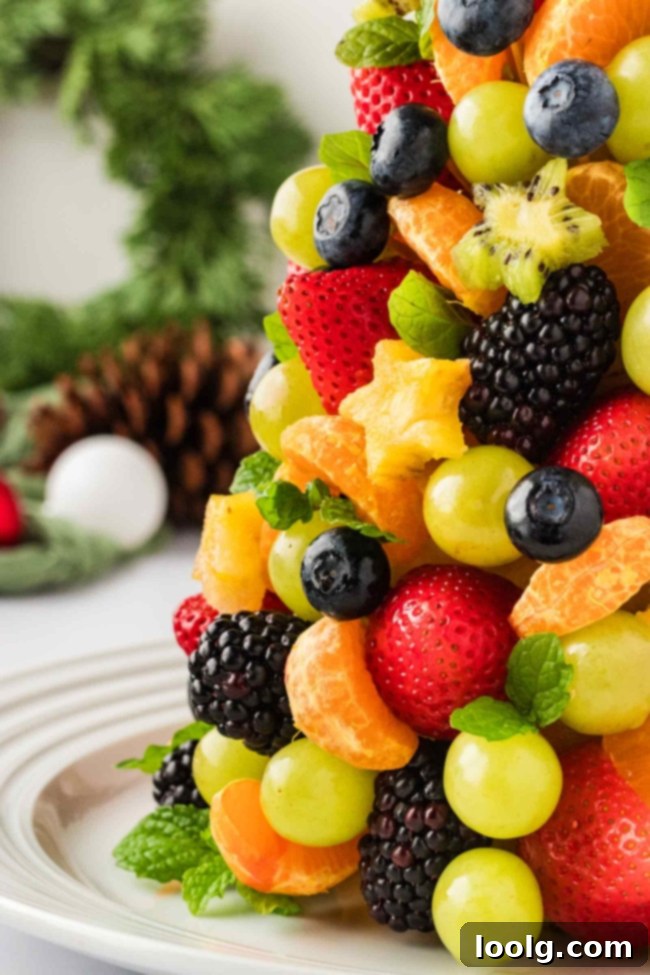
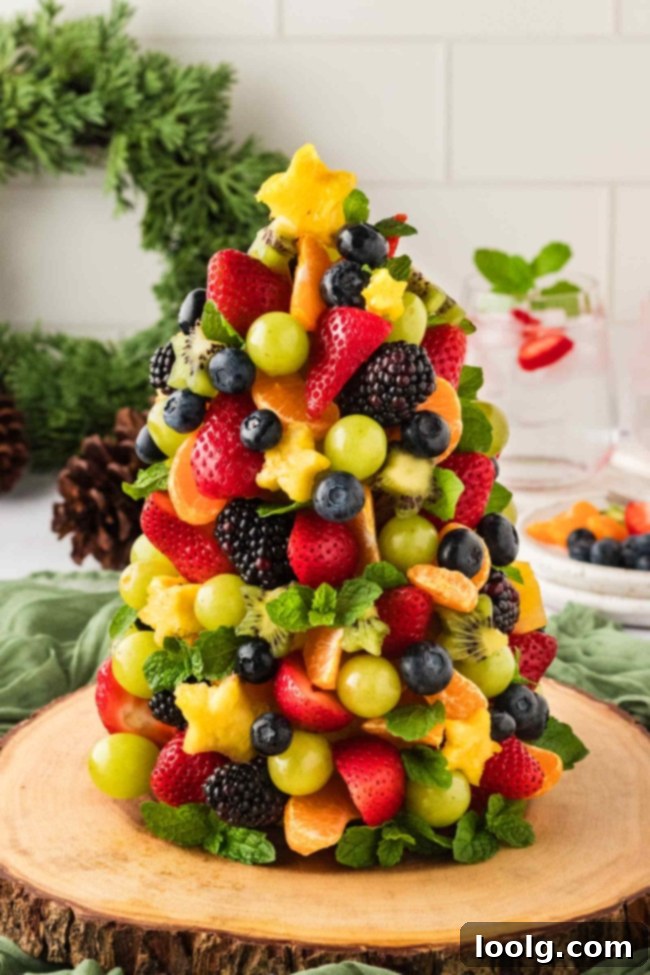
The holiday season is a time for joy, celebration, and, of course, delicious food! While traditional treats often lean towards the indulgent, our festive fruit Christmas tree offers a vibrant, healthy, and absolutely stunning alternative that will captivate guests of all ages. This edible masterpiece is not just a beautiful centerpiece; it’s a guilt-free pleasure, brimming with fresh, nutrient-rich fruits. Its inherent simplicity and natural goodness make it wonderfully inclusive for any holiday gathering, as it’s naturally free from gluten, dairy, and many common allergens. This ensures everyone, from the littlest elves to the most seasoned adults, can enjoy a delightful and wholesome snack.
Imagine the smiles on children’s faces as they spot this colorful, playful tree gracing your holiday table. Its whimsical design encourages healthy eating in the most fun and engaging way, making it a brilliant addition to kids’ parties, school events, or even just a festive family breakfast. Whether you’re hosting an elegant Christmas brunch, planning a lively get-together, or simply seeking a creative fruit platter to add a touch of seasonal cheer, this radiant fruit tree brings both visual appeal and delectable flavors to your celebrations. It’s an unforgettable way to brighten any holiday spread, offering a refreshing contrast to the usual heavy desserts.
As someone who has been navigating a rather restrictive diet lately to support gut healing, and will continue to do so for the next few months, finding genuinely delicious and fun treats for Christmas can be a challenge. This fruit Christmas tree stands out as the perfect solution. It’s the one delightful indulgence I can genuinely look forward to, proving that festive doesn’t have to mean sacrificing health or flavor.
You might be wondering how I manage to keep posting new recipes when I can’t taste everything myself right now. The truth is, I’m not developing new recipes currently. I have hundreds of tried-and-tested recipes, complete with stunning photos, waiting in my backlog, some dating back to 2019! This kind of archive builds up when you’re deeply passionate about recipe development and food photography but sometimes fall behind on the writing and publishing side. Rest assured, every recipe shared here has been thoroughly tested and loved!
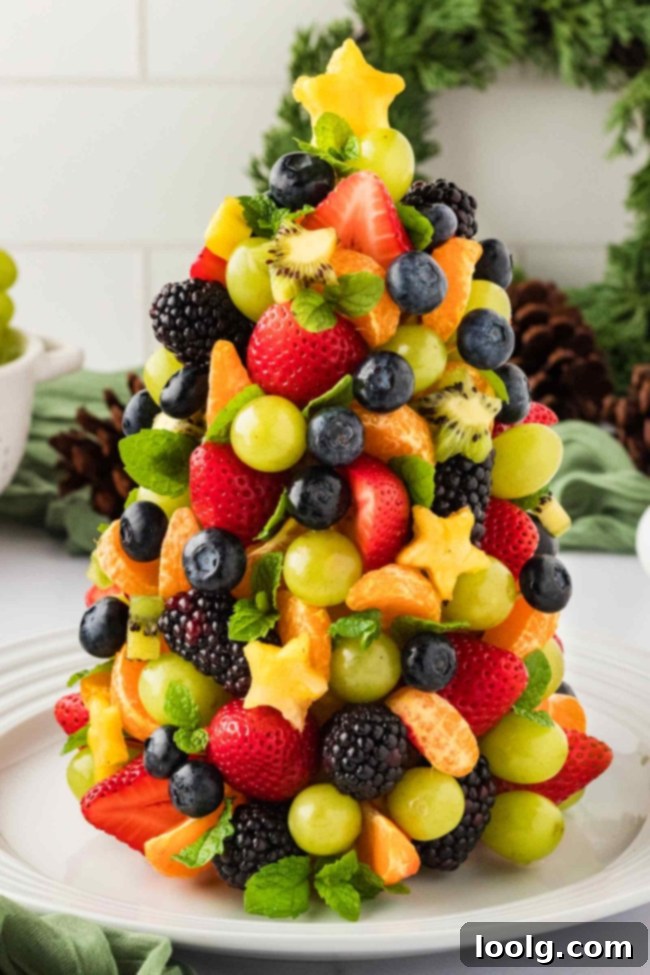
Essential Ingredients for Your Fruit Christmas Tree
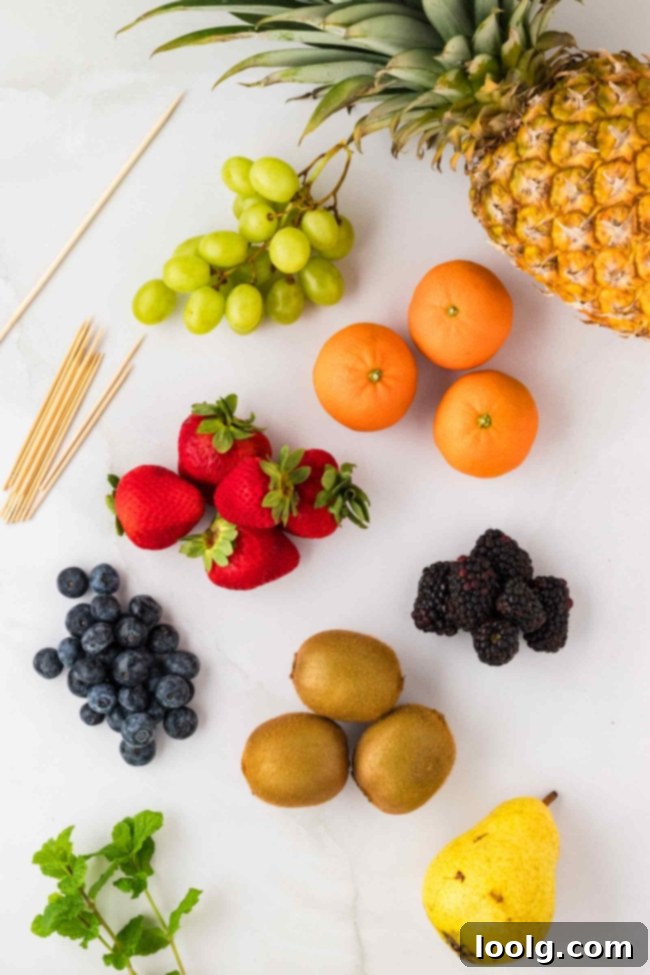
Creating this spectacular fruit Christmas tree requires a thoughtful selection of fresh, firm fruits and a few simple tools for assembly. The beauty lies in the contrast of colors, textures, and flavors, all contributing to a truly delightful edible display. Here’s a detailed look at what you’ll need and why each component is vital for building a sturdy, beautiful, and delicious tree.
- Pineapple: This is the absolute cornerstone of your fruit tree. A medium to large pineapple provides a broad, stable base and a cone-like shape, which is essential for giving your tree its characteristic form. Its firm flesh is perfect for holding toothpicks securely. There truly is no alternative for the structural integrity and natural sweetness it brings to the base.
- Pear: Positioned at the very top of the pineapple base, the pear extends the height and provides a crucial anchor for the star topper. Choose a firm, ripe pear that can be easily impaled by a skewer and will hold its shape. Its slightly softer texture, compared to pineapple, also makes it easier to attach smaller fruits around its circumference.
- Fresh Blackberries: These small, deep purple gems add an exquisite touch of sophistication and depth to your tree. While they can be a bit pricier, their rich color and slightly tart flavor provide a wonderful contrast to the sweeter fruits, breaking up the greens and reds beautifully. Their slightly irregular shape also adds interesting texture.
- Fresh Strawberries: Indispensable for their vibrant red hue, strawberries immediately evoke the spirit of Christmas. You can use them whole, halve them, or even quarter them, depending on the size of the berries and how densely you want to cover your tree. Their juicy sweetness is always a crowd-pleaser. If strawberries are not available or if you prefer, raspberries can be a good substitute, but the bright, bold red of strawberries truly enhances the holiday theme.
- Kiwi: When sliced and cut into small star shapes, kiwi provides a brilliant burst of green, perfect for decorating your tree with festive “ornaments.” Its tart and refreshing flavor complements the other fruits. If a kiwi star cutter isn’t strong enough for pineapple, kiwi itself is much easier to work with. Alternatively, firm mango or honeydew melon can also be cut into stars for a similar effect, offering different colors and flavors.
- Clementines: Peeled and segmented, these cheerful orange sections add a pop of sunny color and a delightful citrusy sweetness. Their individual segments are easy to attach and can fill in gaps effectively, contributing a pleasant tanginess and aroma.
- Green Grapes: Perfect for filling in any bare spots and adding a fresh, lush green backdrop, green grapes are a versatile and refreshing choice. Their spherical shape and crisp texture provide a lovely contrast to other fruits. Opt for seedless varieties for ease of eating.
- Blueberries: These tiny, dark blue berries are excellent for scattering around the tree to fill in smaller gaps and add subtle pops of color. Their small size makes them incredibly versatile for detailed decoration, and their sweet-tart flavor is always welcome.
- Fresh Mint Leaves: More than just a garnish, mint leaves offer a fragrant, vibrant green accent that enhances the tree’s overall freshness and festive appeal. Strategically placed, they can also cleverly conceal any visible pineapple base or toothpicks, making the tree look even more magical.
- Toothpicks and a Large Skewer: These are your essential construction tools. The large skewer provides the central support for connecting the pear to the pineapple, while countless toothpicks are used to securely attach all the individual fruit pieces to the base, ensuring your tree remains sturdy and magnificent throughout your event.
For those looking to explore variations, consider a tropical-themed tree by incorporating chunks of ripe mango, papaya, or even vibrant dragon fruit. The colors and exotic flavors will transport your guests to a warmer climate. Alternatively, for a truly classic Christmas aesthetic, create a color-coordinated tree using only green and red fruits, such as emerald green grapes, kiwi slices, and brilliant red strawberries. This minimalist approach can be equally striking and elegant.
How to Assemble Your Edible Masterpiece
The idea of assembling a fruit Christmas tree might seem daunting or intricate at first glance, but I assure you, it’s surprisingly straightforward and incredibly rewarding. The core principle involves strategically layering and attaching fruits to a sturdy base to gradually build that iconic conical tree shape. It’s more of an art project than a complex cooking endeavor, making it a fun activity for the whole family.
The key to a successful tree lies in building a strong foundation and then decorating systematically. Begin by using larger, more substantial fruits to create the initial layers and structure, ensuring they are firmly anchored. Once the main shape is established, you can then progressively fill in the gaps with smaller, more delicate fruits, aiming for a lush, full, and polished appearance. Don’t forget the decorative touches! Fresh mint leaves and artfully cut fruit stars elevate the tree’s festive appeal, transforming it into a true showstopper. However, if time is of the essence, you can certainly simplify these garnishes without compromising the overall effect.
I would love to claim credit for such a brilliant and innovative idea, but honesty compels me to acknowledge its original source. This wonderful concept was first brought to light by the creative minds behind the blog Live. Learn. Love. Eat., a blog that, unfortunately, is no longer active. Nevertheless, it’s important to give credit where credit is due, as their ingenious creation continues to inspire festive, healthy celebrations!
Tips for a Perfect Fruit Christmas Tree
To ensure your fruit Christmas tree stands tall, vibrant, and delicious throughout your holiday celebration, keep these expert tips in mind. A little planning and attention to detail go a long way in creating a truly impressive edible centerpiece:
- Choose Firm, Fresh Fruit: This is paramount for structural integrity and visual appeal. Select fruits that are ripe but firm to the touch. Avoid overly soft, bruised, or soggy fruits, as they will not hold their shape on the toothpicks and can quickly make your tree look less appealing. Frozen or canned fruits are an absolute no-go, as their high water content will cause them to soften and break down rapidly once thawed or exposed to air.
- Cookie Cutter Versatility: If your star-shaped cookie cutter struggles to cut through the denser pineapple, don’t fret! Kiwi is a fantastic and much easier alternative for creating those festive stars. Its softer flesh yields perfect shapes with minimal effort. You can also use slices of firm mango or even carambola (star fruit) for naturally star-shaped pieces.
- Use a Decorative Platter: Not only does a beautiful platter enhance the presentation of your finished tree, but it also serves a practical purpose. It will catch any drips of juice from the fruits, keeping your table clean, and makes the entire display much easier to transport and serve. Choose a platter large enough to comfortably accommodate the base of your pineapple and any surrounding overflow.
- Assemble Close to Serving Time: Fresh fruit is at its peak when recently cut. To maintain the vibrant colors, crisp textures, and optimal flavor of your fruit Christmas tree, aim to assemble it as close to your event as possible. Ideally, within 2-4 hours before serving, to prevent browning or wilting, particularly for more delicate fruits.
- Vary Fruit Placement for Visual Interest: When attaching fruits, avoid grouping too many of the same color or size together. Distribute colors and shapes evenly across the tree to create a balanced and dynamic visual effect. Imagine you’re decorating a real Christmas tree, scattering ornaments harmoniously.
- Don’t Overload Toothpicks: While you want a full-looking tree, avoid jamming too many fruits onto a single toothpick. This can cause the toothpick to break or the fruit to fall off. Use just enough to secure each piece firmly.
- Consider a Lemon Juice Wash: For fruits prone to browning, like sliced apples or pears (if you decide to incorporate them), a quick dip in lemon or lime juice can help prevent oxidation and keep them looking fresh longer.
Troubleshooting Common Issues
Even with careful planning, sometimes little challenges pop up during assembly. Don’t worry, these simple fixes will help you overcome any hurdles and ensure your fruit Christmas tree stands perfectly:
- Tree Won’t Stand Upright: The stability of your base is crucial. Before assembling, double-check that both the bottom of your pineapple and the pear are cut perfectly flat, providing a stable, level surface. If the tree still feels wobbly, you can secure the pineapple base to your serving platter using a few extra skewers inserted through the bottom of the pineapple into the platter itself (if suitable for piercing, or by attaching a small, sturdy base like a piece of cardboard underneath the pineapple for extra width and then pinning to that). A wider, heavier platter can also add overall stability.
- Fruit Won’t Stick: Some fruits, like grapes or very ripe strawberries, can be a bit slippery. The trick is in the angle of insertion. Instead of pushing toothpicks straight in, try inserting them at a slight upward or downward angle. This provides a better grip and ensures the fruit stays securely attached. For softer fruits, make sure the toothpick pierces deep enough to provide stability without going all the way through and splitting the fruit.
- Gaps in the Tree: Don’t let bare spots detract from your tree’s lush appearance! This is where smaller fruits and garnishes truly shine. Use blueberries, smaller grape clusters, or even extra clementine segments to strategically fill in any visible spaces. Fresh mint leaves are also excellent for covering any particularly stubborn gaps or areas where the pineapple base might be showing through, adding a final touch of decorative elegance.
Making Ahead, Storing, and Freezing Your Fruit Christmas Tree
While the fruit Christmas tree is a showstopper, it’s important to manage expectations regarding its make-ahead capabilities. Unlike some dishes that improve with time, fresh fruit platters, including this festive tree, a Fruit Turkey, or a Rainbow Fruit Platter, are best enjoyed as fresh as possible. This is the one inherent drawback, but it’s entirely understandable – nobody wants to serve or eat dried-out, discolored, or mushy fruit!
- Preparing Fruit in Advance: You can get a head start by washing, thoroughly drying, and preparing most of your fruits up to one day in advance. This includes slicing kiwis, segmenting clementines, and hulling strawberries. Store each type of prepared fruit in separate airtight containers in the refrigerator. For fruits prone to browning, like pears or apples (if you choose to add them), a quick toss in a little lemon juice before storing can help maintain their freshness. Berries should be stored in a single layer to prevent crushing.
- Assembling the Base Ahead: The pineapple and pear base can be assembled a few hours before your event. Once constructed, cover it tightly with plastic wrap to prevent the pineapple from drying out and store it in the refrigerator. This gives you a solid foundation ready for decoration.
- Fully Assembled Tree Storage: For the freshest and most vibrant display, the entire fruit Christmas tree is best assembled no more than 2-4 hours before serving. Once built, cover the entire tree loosely but securely with plastic wrap to minimize air exposure and prevent drying. Place it in the refrigerator until it’s time to unveil your masterpiece. Ensure there’s enough space in your fridge to accommodate its size without squishing it.
Creative Ways to Use Leftovers
Even after the holiday festivities, any leftover fruit from your magnificent Christmas tree doesn’t have to go to waste! There are numerous creative and delicious ways to repurpose these vibrant fruits, ensuring every piece is enjoyed:
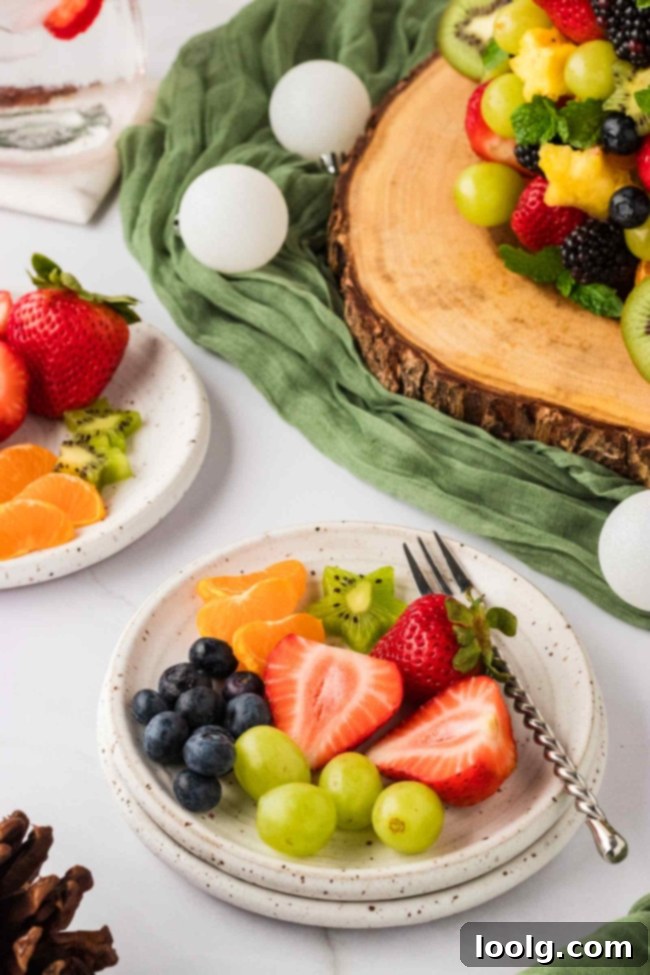
- Whip Up a Refreshing Fruit Salad: The simplest and most obvious solution! Combine all the leftover fruit pieces in a bowl. For an added touch, you can drizzle with a little honey, a squeeze of fresh lime juice, or a sprinkle of cinnamon or nutmeg for a festive twist. This makes a wonderful light dessert, a healthy breakfast topping, or a refreshing side dish.
- Blend a Nutritious Smoothie: Leftover fruit is perfect for smoothies! Toss all the remaining fruit into a blender. Add some yogurt (dairy or plant-based), milk, coconut water, or even a handful of spinach for an extra boost of nutrients. You can also add a scoop of protein powder or some chia seeds for a thicker, more filling drink.
- Create a Versatile Fruit Topping: Finely chop the leftover fruit and transform it into a delightful topping. It’s fantastic for enhancing breakfast staples like pancakes, waffles, French toast, or a warm bowl of Chia Seed Oatmeal. It also makes a wonderful accompaniment to plain yogurt or even a scoop of vanilla ice cream for a lighter dessert.
- Freeze for Future Delights: Don’t want to use it right away? Prepare the fruit for freezing! Lay the pieces in a single layer on a baking sheet lined with parchment paper, freeze until solid, then transfer to an airtight freezer bag or container. Frozen fruit is a savior for future smoothies, baking projects (like fruit muffins or tarts), or even a quick compote for breakfast.
- Make Homemade Popsicles: A fun and healthy treat for kids and adults alike! Puree the leftover fruit with a splash of juice (apple, orange, or pineapple) or a dollop of yogurt. Pour the mixture into popsicle molds and freeze until solid. These are perfect for a refreshing snack on a warmer day or when you need a little healthy pick-me-up.
- Infused Water: Add some of the leftover fruit, especially mint leaves, berries, and citrus segments, to a pitcher of cold water. Let it infuse for a few hours in the refrigerator for a naturally flavored, hydrating drink.
- Mini Fruit Skewers: If you have enough sturdy pieces, thread them onto small skewers for individual fruit snacks.
I truly hope this festive fruit Christmas tree brings joy, health, and a burst of vibrant color to your holiday celebrations! If you decide to give it a try, please share your experience and thoughts in the comments below. Your feedback is always appreciated. Happy holidays!
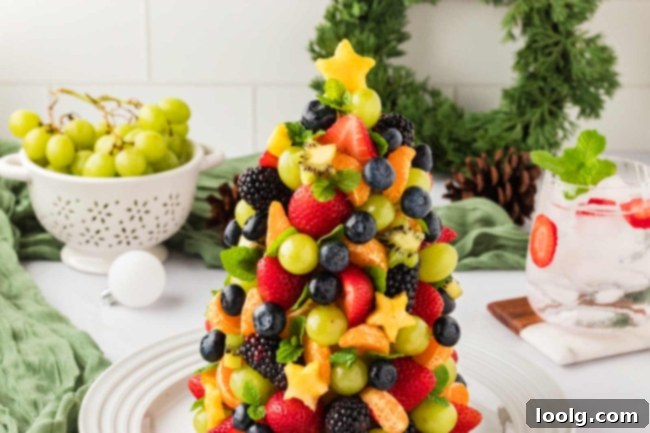
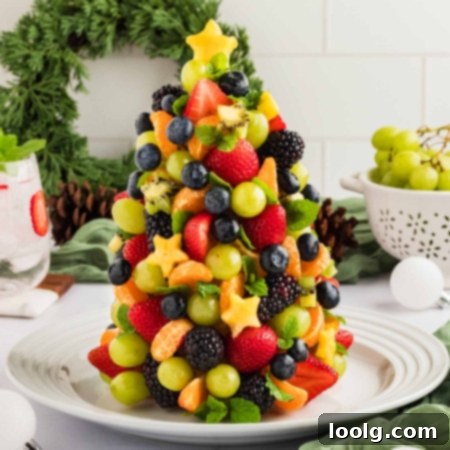
Fruit Christmas Tree
Ingredients
- 1 small or medium pineapple
- 1 pear
- fresh blackberries small pack
- fresh strawberries small pack – kept whole or cut into halves or fourths – whatever makes sense for the size you buy
- 3 kiwi cut into small stars with cookie cutter
- 3 fresh clementines peeled and segmented
- green grapes small pack
- fresh blueberries small pack
- fresh mint
- toothpicks
- large skewer
Instructions
-
Wash and pat dry all the fruit with paper towels.
-
Cut the very top and bottom off the pineapple.
-
Then, cut a slice off the top, from which you’ll use a cookie cutter to cut out the star for the top of the tree. Cut the star and set it aside. Try to cut a nice cone shape by making cuts around the sides.
-
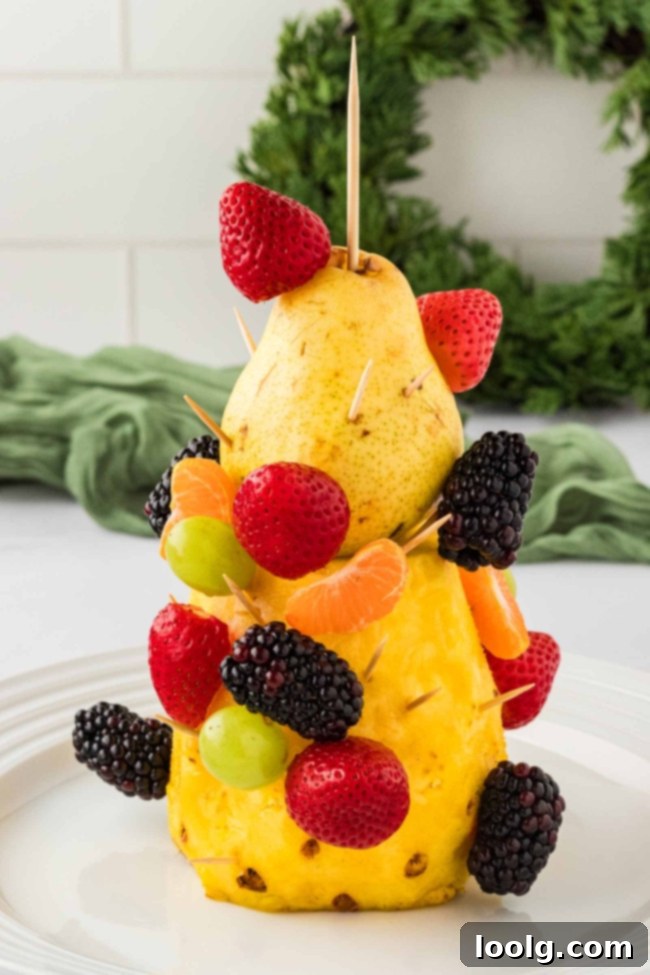
Cut the bottom of the pear so that it stands upright. Attach the pear to the top of the pineapple using a skewer.
-
Stick the toothpick into the top of the pear and then stick the pineapple star on the toothpick to secure it to the pear.
-
Use a star cookie cutter on the pineapple cut-offs.
-
Begin by adding the larger pieces of fruit first, such as the strawberries, clementine segments, and green grapes. Attach them to the tree using toothpicks, spreading them out evenly around the tree.
-
Next, add the blackberries, blueberries, and small pineapple and kiwi stars to fill in the gaps.
-
Add mint leaves here and there. They’re especially good for hiding any spots where you can see the pineapple base.
-
Add the pineapple star to the top.
-
If there’s any left over fruit after serving, store in an airtight container for up to 2 days.
Notes
