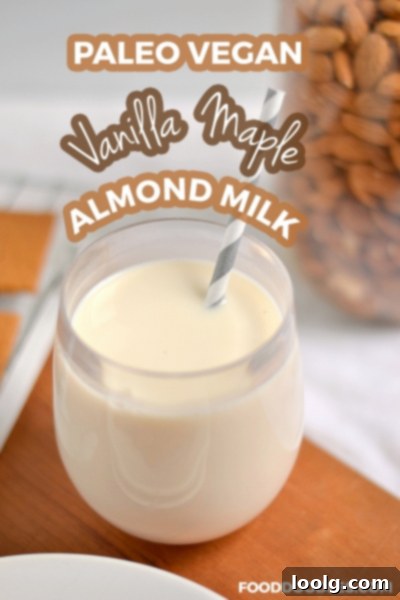
Crafting Delicious Vanilla Maple Almond Milk Without a High-Speed Blender
Embarking on a journey to healthier eating often leads us to explore homemade alternatives for everyday staples. One such popular choice is nut milk, particularly almond milk. Many assume that crafting creamy, delicious almond milk at home requires a hefty investment in a high-speed blender like a Vitamix or Blendtec. But what if we told you that’s not the case? What if you could achieve luscious, flavorful homemade almond milk using equipment you likely already own? This guide is designed to empower you to create your very own Vanilla Maple Almond Milk, even without a top-tier, full-sized blender. Get ready to discover a simple, cost-effective, and incredibly rewarding process!

Today, we’re diving into a remarkably simple yet incredibly satisfying recipe that defies the common perception of homemade almond milk. While the foundational concept of blending and straining nuts isn’t entirely new—I even drew inspiration from excellent resources like The Kitchn when first exploring this idea—my primary goal here is to demonstrate a specific technique that bypasses the need for expensive, high-powered kitchen appliances. This article is tailored for individuals who, like me, might not possess a large, robust blender or a food processor that reliably contains liquids without leakage.
Many of us find ourselves in a similar predicament: we appreciate the convenience and efficiency of smaller appliances, such as a Magic Bullet, but haven’t yet committed to the significant investment required for a premium, full-sized blender. The allure of a Vitamix or Blendtec is undeniable, promising silky-smooth textures and unparalleled performance. However, for some, the steep price tag remains a barrier. Until I personally decide whether such an investment is justified, I’ve committed to maximizing the potential of the tools already available in my kitchen. This exploration led to a delightful discovery that I’m eager to share, proving that delicious results don’t always demand top-of-the-line gear. If you do own one of these high-end blenders, I’d still love to hear your thoughts and experiences!
Why Homemade Almond Milk is a Game-Changer
Let’s talk about why making your own almond milk at home is an absolute game-changer. From the very first sip, you’ll understand why this small effort yields such a massive reward. Homemade almond milk is simply incredible! Its rich, velvety texture and fresh, vibrant taste are far superior to most store-bought varieties. There’s a profound difference in creaminess and a pure flavor profile that store-bought versions, often laden with stabilizers and emulsifiers, simply cannot replicate.
Beyond the undeniable taste advantage, one of the most compelling reasons to go DIY is ingredient control. When you make your own almond milk, you eliminate all the “weird ingredients”—thickeners, preservatives, and artificial flavors—that are commonly found in processed boxed milks. This recipe for Vanilla Maple Almond Milk is a testament to simplicity, featuring only natural, wholesome components. While it’s true that homemade nut milk has a shorter shelf life, typically lasting up to two days in the refrigerator, it becomes a delightful special treat, a luxurious addition to your morning coffee, cereal, or smoothie. For longer-term convenience, keeping some boxed milk on hand is still a practical option, but for unparalleled freshness and flavor, homemade is the undisputed champion.
Another fantastic aspect of making your own almond milk is the valuable byproduct: almond pulp. It feels wasteful to discard this nutrient-rich fiber, and thankfully, you don’t have to! I’ve been experimenting with various ways to repurpose it. After straining, I often stick the pulp in my dehydrator to dry it out, which makes it perfect for future use as a type of almond meal. You can transform it into gluten-free crackers, add it to smoothies for extra fiber, incorporate it into baked goods like muffins or bread, or even use it as a base for energy bites. It’s an excellent way to minimize waste and add nutritional value to other dishes, truly embracing a zero-waste kitchen approach.
A Quick Detour: Our Favorite Homemade Graham Crackers
Before we fully immerse ourselves back into the delightful world of homemade almond milk, I wanted to quickly mention another beloved recipe that I recently revisited and re-photographed. You might catch a glimpse of them in one of the images above – my fantastic 100% Whole Wheat Graham Crackers! This recipe holds a special place in our hearts and on this site, as we prepare them so frequently. They are genuinely one of our absolute favorite healthy snacks and a wonderfully versatile ingredient for various desserts.
These homemade graham crackers are incredibly adaptable. I’ve used them as the perfect foundation for my No-Bake Greek Yogurt Cheesecake and to create the delightful crust for these irresistible Chocolate Covered Cheesecake Popsicles. A fantastic bonus for those with dietary considerations is that these crackers are naturally vegan. This means you can easily create a delicious vegan graham cracker crust by simply using coconut oil, opening up a world of possibilities for plant-based desserts.
Over time, I’ve refined my method for making these graham crackers even simpler and quicker. Instead of flouring my rolling pin and work surface, I now roll the dough directly onto a baking mat or parchment paper. I place a sheet of plastic wrap over the dough, which prevents any sticking to the rolling pin and ensures a smooth, even roll every time. Once rolled to the desired thickness, I trim the edges – saving those scraps to be re-rolled with the next batch, ensuring no waste. I then cut the dough into neat squares and place them directly into the oven to bake.
After baking for the appropriate time, I like to gently re-slice along the score marks while they’re still warm. This ensures that once cooled, they will break apart cleanly and effortlessly. Then, I simply slide the entire baking mat or parchment paper onto a cooling rack, allowing the crackers to cool completely. This streamlined process makes homemade graham crackers incredibly simple and fast to prepare, which is why they’ve become such a staple in our home. For those looking to reduce sugar intake, I once accidentally omitted the granulated sugar entirely, and the crackers turned out wonderfully as a less sweet, wholesome treat. It’s a versatile recipe that you can truly make your own!
The Secret Weapon: Making Almond Milk with an Immersion Blender
Now, let’s steer our focus back to the star of today’s show: homemade almond milk! You might be thinking, “Didn’t you say no *high-speed* blender?” And indeed, I did! While I technically employed a blending device, the true magic lies in the *type* of blender I used—an immersion blender! For years, I had yearned to make my own nut milk, but the thought of investing in yet another bulky kitchen appliance held me back. I was initially skeptical about whether an immersion blender could achieve the necessary creaminess, but I was determined to give it a shot. And to my absolute delight, it worked perfectly!
This revelation opens up a world of possibilities for those with limited kitchen space or budget. An immersion blender, often overlooked for tasks beyond soups and sauces, proved to be an excellent tool for this recipe. Its compact size and ease of cleaning make it a fantastic alternative to traditional blenders. For those with other compact appliances, a similar approach can be successful: a Magic Bullet-style blender would undoubtedly yield great results, provided you work in smaller batches to avoid overloading the motor. Even a mini food processor or a standard food processor can be utilized effectively, though with a slight modification to the process.
My personal experience with food processors, particularly when dealing with liquids, has been that they can be prone to leakage, creating quite a mess. To circumvent this, I recommend starting with just enough water to allow the almonds to blend into a thick paste. Once you’ve achieved a smooth, creamy consistency with no large almond pieces remaining, you can then gradually stir in the remaining water to reach your desired thinness before straining. This two-step approach ensures a mess-free process and consistently excellent results. For those curious, the specific model I rely on is this versatile immersion blender (complete with its handy attachments), and I honestly couldn’t be happier with its performance. It’s a true kitchen workhorse!
Beyond Almonds: Exploring Other Nut Milks and Flavorings
This discovery truly feels like unlocking a whole new culinary realm! The ease and satisfaction of making homemade almond milk have been absolutely thrilling. It’s not just about almond milk, either; this technique readily extends to crafting other delightful nut milks. Imagine fresh cashew milk, hazelnut milk, or even a blend of different nuts – the possibilities are truly exciting. The ability to control the freshness and ingredients of your plant-based milk is liberating, and I encourage you to experiment beyond almonds once you’ve mastered this recipe.
The versatility doesn’t stop at the type of nut; the flavoring possibilities are also wonderfully endless! For this particular recipe, we’ve embraced the comforting combination of vanilla and maple, which creates a subtly sweet and aromatic beverage perfect for any occasion. However, feel free to unleash your creativity! Instead of maple syrup, you could easily sweeten your almond milk with a couple of pitted dates for a more caramel-like sweetness and added fiber. Beyond vanilla, a pantry full of spices awaits your experimentation. Consider a pinch of cinnamon, nutmeg, or cardamom for a warming, spiced nut milk. A touch of cocoa powder could transform it into a rich chocolate milk, or a dash of turmeric and ginger could create a golden milk elixir.
Picture this: a chilly winter evening, snow falling softly outside, and you’re curled up with a warm glass of freshly made almond milk, infused with a hint of honey and cinnamon. Paired with a cozy bowl of this keto oatmeal, it sounds like the epitome of comfort and warmth, doesn’t it? The simple act of creating something so wholesome and delicious in your own kitchen is incredibly rewarding. So go ahead, experiment with flavors, make it your own, and savor every nourishing drop. Enjoy the process, and most importantly, enjoy your fantastic homemade vanilla maple almond milk!

Easy Vanilla Maple Almond Milk (No Blender Needed!)
Ingredients
- 1 C raw almonds soaked in water overnight and drained
- 2 C water
- 2 tbsp pure maple syrup
- half of a small vanilla bean seeds scraped out or 1/2 – 1 tsp real vanilla
Instructions
-
Soak almonds overnight in at least twice as much water. After soaking rinse and drain before placing in a large bowl(or a large measuring cup works well) with the 2 cups of fresh water.
-
Using an immersion blender blend until creamy and no large pieces of almond remain. Add the maple syrup and vanilla bean seeds or vanilla extract and blend again until smooth. When done blending pour mixture through a fine sieve lined with cheesecloth to remove all the almond pieces. Squeeze any remaining milk out and store in a jar or other suitable container in the fridge for up to 2 days.
