Easy & Delicious American Flag Independence Day Cake: A Fluffy Lemon Masterpiece (Gluten-Free Option Included!)
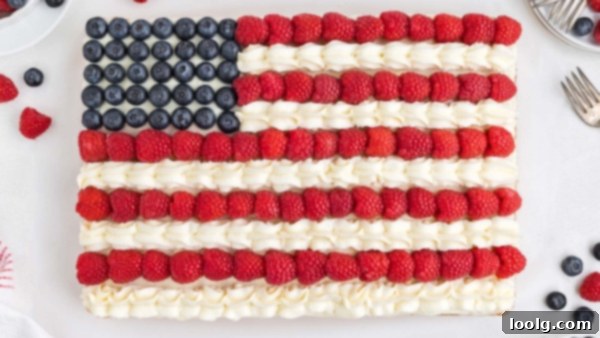
Prepare to impress your guests this patriotic season with a stunning American flag cake that’s surprisingly simple to create! This delightful Independence Day cake features a light and airy lemon-infused base, a flavor that can be effortlessly customized to orange, almond, or coconut to suit any palate. What’s more, it’s incredibly versatile, accommodating traditional all-purpose flour, wholesome white whole wheat flour, or even gluten-free alternatives like King Arthur Flour Gluten-free Measure for Measure or Bob’s Red Mill Gluten-free 1-to-1 Baking Flour. We’ve personally tested these options to ensure a perfect bake every time, making this recipe accessible to everyone.
While this recipe might be a last-minute savior for upcoming celebrations like Memorial Day, it’s truly perfect for any occasion that calls for a touch of American pride. Of course, the Fourth of July is the prime time to showcase this festive dessert, a true “Independence Day cake” in every sense! Its vibrant red, white, and blue design, crafted from fresh berries and creamy frosting, makes it a centerpiece that’s as delicious as it is beautiful.
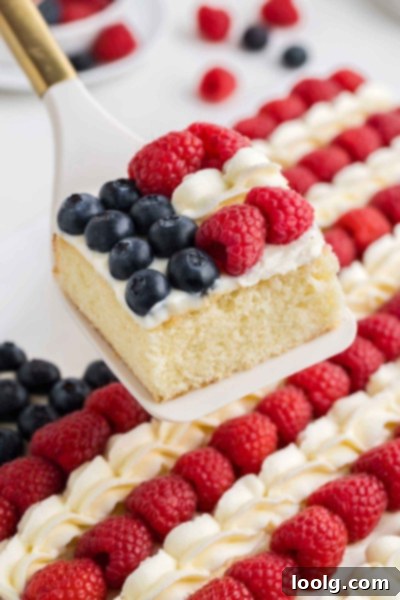
The foundation of this incredible cake is a carefully adapted version of the renowned King Arthur Flour vanilla cake recipe, which I’ve successfully utilized in other beloved creations such as my Christmas Tree Cake, Vintage Heart Cake, and Snowman Cupcakes. Through a few strategic adjustments, I’ve managed to reduce the sugar content, delivering a cake that’s still wonderfully sweet and satisfying without being overly rich. The addition of bright lemon extract and fragrant lemon zest infuses the cake with a refreshing burst of flavor that truly sets it apart.
If lemon isn’t your preferred flavor profile, don’t worry! I’ve included four fantastic alternative flavor suggestions later in this guide, ensuring there’s an option for every taste bud. This truly is my all-time favorite non-chocolate cake recipe, consistently delivering a tender crumb and delightful sweetness that you won’t even realize has less sugar.
For those interested in exploring the origins of this wonderful base, you can find King Arthur Baking’s original recipe here. Below, you’ll also find a helpful video demonstrating the cake batter preparation (please note, this is not me in the video!).
Prefer a Chocolate Cake Base?
If your heart truly yearns for a rich chocolate cake base to anchor your patriotic flag design, you’re in luck! You can easily adapt my Healthy Chocolate Cake Recipe for this purpose. Simply prepare it and bake it in a standard 9″x13″ pan. For those not concerned with a healthier option, feel free to substitute all-purpose flour and granulated sugar as desired; these modifications are already outlined in the chocolate cake recipe itself.
It’s important to note that the bake time for a chocolate cake in a 9″x13″ pan can vary considerably. This variation largely depends on the specific combination of sugar, eggs, and flour you choose to use. To ensure a perfectly baked, moist chocolate cake without overdoing it, I strongly recommend beginning to check for doneness at the 20-minute mark. After that, continue checking every 3 minutes. The ideal indicator is a toothpick inserted into the center of the cake; it should emerge with a few moist crumbs clinging to it, but absolutely no raw liquid batter. Resist the urge to wait until the toothpick comes out completely clean, as this usually signifies an overbaked and dry cake. I’ve personally tested this chocolate cake base for our flag cake, and it turned out beautifully, making for a delicious and equally festive alternative.
Essential Ingredients for Your Patriotic Masterpiece
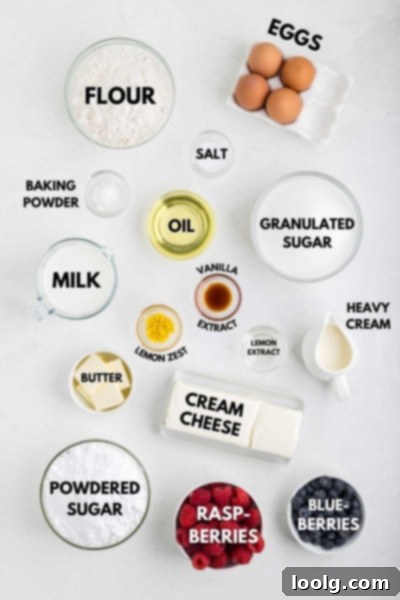
Creating this stunning American flag cake requires a few key ingredients for both the fluffy cake base and the delectable cream cheese frosting, along with fresh berries for decoration. Let’s break down each component to ensure you have everything you need for success.
For the Cake:
- Flour: The beauty of this recipe lies in its adaptability. You can achieve fantastic results with traditional all-purpose flour, or opt for white whole wheat flour for a slightly healthier twist. For our gluten-free friends, I’ve had exceptional success with King Arthur Flour Gluten-free Measure for Measure Flour and Bob’s Red Mill Gluten-free 1-to-1 Baking Flour. I’ll delve deeper into my preferred gluten-free options and their subtle differences at the conclusion of this post.
- Baking Powder + Salt: These leavening agents are crucial for the cake’s light and fluffy texture. It’s vital to use baking powder, not baking soda, as the two react differently and will impact the cake’s rise and taste.
- Eggs: This recipe specifically calls for four large eggs (approximately 50 grams each, out of the shell) at room temperature. The process of beating the eggs vigorously with sugar is fundamental to incorporating air into the batter, which is key to achieving that wonderfully airy cake crumb. Unfortunately, substituting with an egg replacer will not yield the same light and fluffy result; when I’ve tried using multiple egg replacers in cakes, the outcome is often gummy and rubbery. Four eggs are simply too many for most replacers to handle effectively.
- Granulated Sugar: This ingredient plays a critical role in both the sweetness and the structural integrity of the cake. For this recipe, there’s no substitute for granulated sugar. Its interaction with the eggs during beating contributes to the cake’s tender texture.
- Flavor Extracts (Lemon/Orange/Coconut/Almond + Vanilla): This is where you can truly personalize your cake’s flavor. For a pure vanilla cake, simply use all vanilla extract. For the bright lemon cake featured here, a mix of lemon and vanilla extract is perfect. If you’re aiming for an orange cake, remember to use orange extract, not orange juice. The small amount of extract required means orange juice wouldn’t significantly impact the taste, and adding enough juice to make a difference would negatively affect the cake’s delicate structure. For coconut or almond variations, you may choose to omit the zest, though I haven’t experimented with that combination myself – perhaps it’s delicious! Almond extract paired with raspberries and blueberries creates an especially fantastic flavor combination. While lemon remains my personal favorite, the almond extract version is a very close second!
- Milk: Feel free to use any type of milk you prefer for this recipe. Even canned full-fat coconut milk can be used, provided you thin it down to a consistency similar to regular dairy milk. Just be aware that using coconut milk might impart a subtle coconut flavor to your cake.
- Oil: It’s essential to select an oil that remains liquid at room temperature, such as vegetable oil, canola oil, or a light olive oil. Keep in mind that olive oil has a distinct flavor profile, which could be noticeable in the final cake. Choose a neutral-tasting oil for the purest cake flavor.
- Butter: For those seeking a dairy-free version of the cake base (though remember, the frosting is not dairy-free unless specified), you can easily substitute additional oil for the butter. Simply use a total of 1/2 cup plus 1 tablespoon of oil in place of the specified butter and oil combination. I’ve tried this, and it works wonderfully. However, I do find that the cake’s flavor is slightly richer and more nuanced when made with butter.
- Lemon Zest: If you’re using lemon extract, incorporating fresh lemon zest is highly recommended. The zest adds a vibrant, aromatic depth of lemon flavor that the extract alone cannot fully provide. Similarly, if you choose orange extract, use fresh orange zest for the best results.
For the Frosting:
To create the perfect creamy topping for your patriotic cake, in addition to vanilla extract and a pinch of salt (which are often included in the cake ingredient list but also necessary for the frosting), you’ll need:
- Cream Cheese: This is the star ingredient for a classic cream cheese frosting. No substitutions are possible if you desire that signature tangy, rich flavor and texture. The same holds true for the other frosting ingredients listed below, as they work in harmony to create the desired consistency and taste.
- Powdered Sugar: Also known as confectioners’ sugar, this fine powder ensures a smooth, lump-free frosting. If your powdered sugar is particularly lumpy, a quick sift or a blitz in a high-speed blender can transform it back into a light, powdery state, preventing grittiness in your frosting.
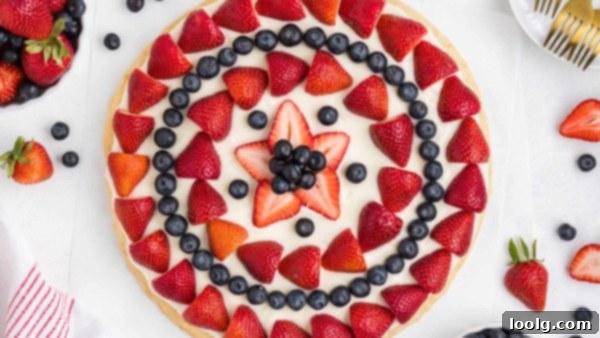
- Heavy Cream: This addition is key to achieving a lighter, airier cream cheese frosting, which is particularly delightful for this cake. While many traditional cream cheese frostings rely solely on butter, cream cheese, and powdered sugar, I opted for this lighter version because of the significant amount of frosting that’s piped between the raspberries for the flag design. This exact topping was also a hit in my recent 4th of July Fruit Pizza, proving its versatility and appeal!
If the idea of making this impressive cake from scratch seems a bit daunting, that fruit pizza is an excellent, super quick, and easy alternative. Its only “decorating” requirement is arranging the berries!
To Decorate the Cake:
- Raspberries: For a visually impactful flag, you’ll need approximately 65 raspberries if you plan for five rows, or about 70 for six rows. To give you a better idea of quantity, 1 cup typically holds around 23 raspberries, weighing about 125 grams (4.4 oz). Therefore, for five rows, you’ll need roughly 353 grams (12.4 oz) of raspberries, and for six rows, about 380 grams (13.4 oz). If you’re aiming for five rows and are considering a 12-oz container, I highly recommend opting for an 18-oz container instead. Most containers have a few imperfect or smushed berries, and having extra ensures you have plenty of pristine berries for your flag.
- Blueberries: You’ll only need about 35 blueberries to create the “star” section of the flag. For me, this amounted to roughly 3/4 cup or 100 grams (3.5 oz). When selecting blueberries, it’s best to avoid exceptionally large ones, as they can make the blue section appear disproportionately big. Medium-sized blueberries work perfectly for this design.
Have any leftover fruit after decorating? Don’t let it go to waste! These delightful Fruit Tartlets are an ideal way to use them up and would make another fantastic, festive treat for your July 4th celebration or any summer gathering.
Prefer a Cake Mix? No Problem!
For those times when baking from scratch isn’t an option or you’re short on time, using a high-quality cake mix is a perfectly acceptable shortcut. Most cake mixes provide clear instructions for baking in a standard 9″x13″ pan, which is exactly what you need for this American flag design. Simply follow the preparation and baking guidelines on your chosen cake mix box.
Once your cake mix base is baked and cooled, you can rejoin this recipe for the delicious cream cheese frosting and detailed instructions on how to assemble and decorate your patriotic flag cake. This approach allows you to save time on the baking process without sacrificing the fun and festive decoration!
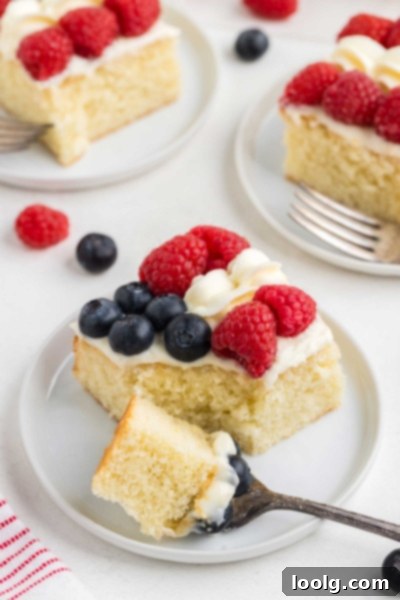
How to Make This Exceptional Cake
While this recipe might require a few more minutes of attention compared to a simple one-bowl cake, the minimal extra effort is undeniably worth it. The resulting cake boasts an unparalleled flavor and texture that truly stands out. This is particularly true for those who adhere to a gluten-free diet; in my extensive baking journey, I have yet to discover a more delicious and reliable gluten-free lemon cake recipe. It took me a full 13 years of blogging to finally share a gluten-free cake recipe, simply because none of the others I tested met my high standards for taste and texture!
The comprehensive recipe with step-by-step instructions is provided at the bottom of this post, but here’s a concise overview to guide you through the process and explain some of the key techniques:
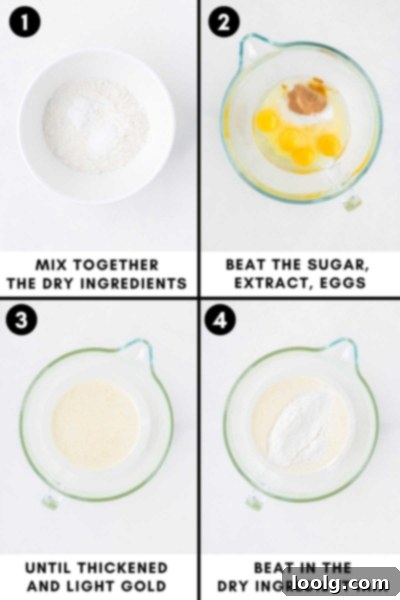
Two steps that might seem like minor additions but are crucial for the cake’s ultimate success are heating the milk and thoroughly beating the sugar and eggs. This initial beating of eggs and sugar for about 2 minutes (or 5 minutes with a paddle attachment) is vital for incorporating air, which contributes significantly to the cake’s airy and tender crumb. Scalding the milk, which involves gently heating it until tiny bubbles appear around the edges (reaching 180-185°F or 82-85°C), serves a specific purpose in traditional baking. It helps to denature whey proteins, which can sometimes interfere with gluten development and inhibit the rise of yeast doughs and certain cakes. While this is well-understood in wheat-based baking, its importance in gluten-free recipes can seem less obvious.
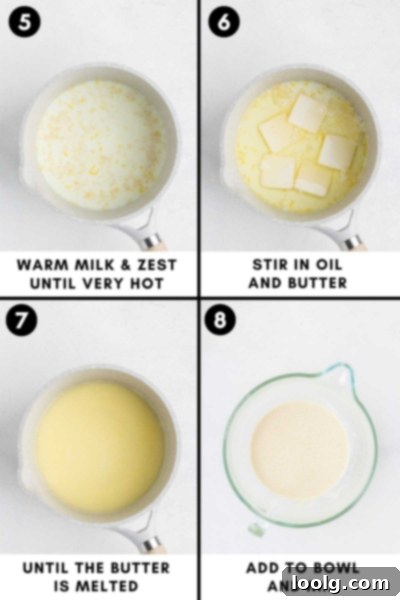
Interestingly, even when I prepare this cake with cashew milk and gluten-free flour, I’ve observed a noticeable difference. I once experimented by skipping the scalding step, questioning its necessity given the absence of gluten and traditional whey protein. However, the resulting cake was distinctly less airy and fluffy. The exact scientific reason for this phenomenon in gluten-free baking still eludes me, and I’d be very grateful for any insights from experienced bakers or food scientists who might have an explanation! What is clear, however, is that these seemingly small steps are integral to achieving the desired light and tender texture in both traditional and gluten-free versions of this patriotic cake.
 The Lightened-Up Cream Cheese Frosting
As previously mentioned, the frosting for this American flag cake is a delightful lightened-up cream cheese version. It provides the perfect balance of sweetness and tang without being overly heavy, allowing the flavors of the cake and fresh berries to shine. Of course, if you prefer a more traditional, denser cream cheese frosting, you are welcome to use your favorite recipe. The key is to ensure it complements the cake and holds its shape for decoration.
If your plan is to pipe the frosting onto the cake, as I did for the beautiful white stripes, it is absolutely essential that your frosting is firm enough to maintain its piped shape. A runny or too-soft frosting will not hold the intricate design. Chilling your mixing bowl and beaters before making the frosting, and ensuring your cream cheese is well-drained (especially if you’re outside North America where cream cheese tends to be softer), are excellent steps to achieve that perfect piping consistency.
How to Decorate a Festive American Flag Cake
Decorating this Independence Day cake to resemble the American flag is simpler than it appears, and there are options for every skill level. If you’re feeling less inclined to meticulously pipe frosting between the raspberries, there’s an equally charming alternative that still creates a beautiful patriotic display.
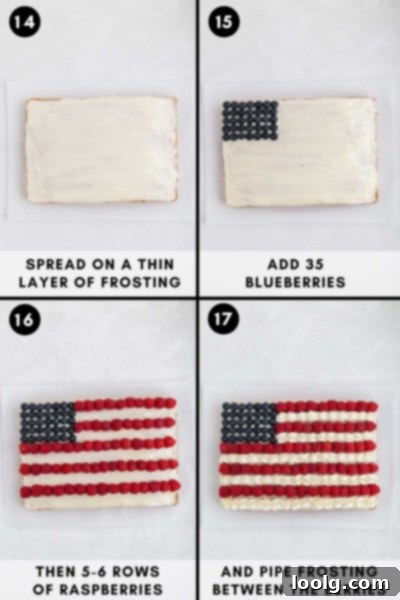
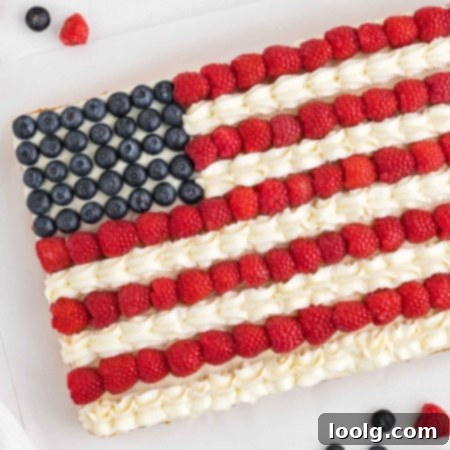
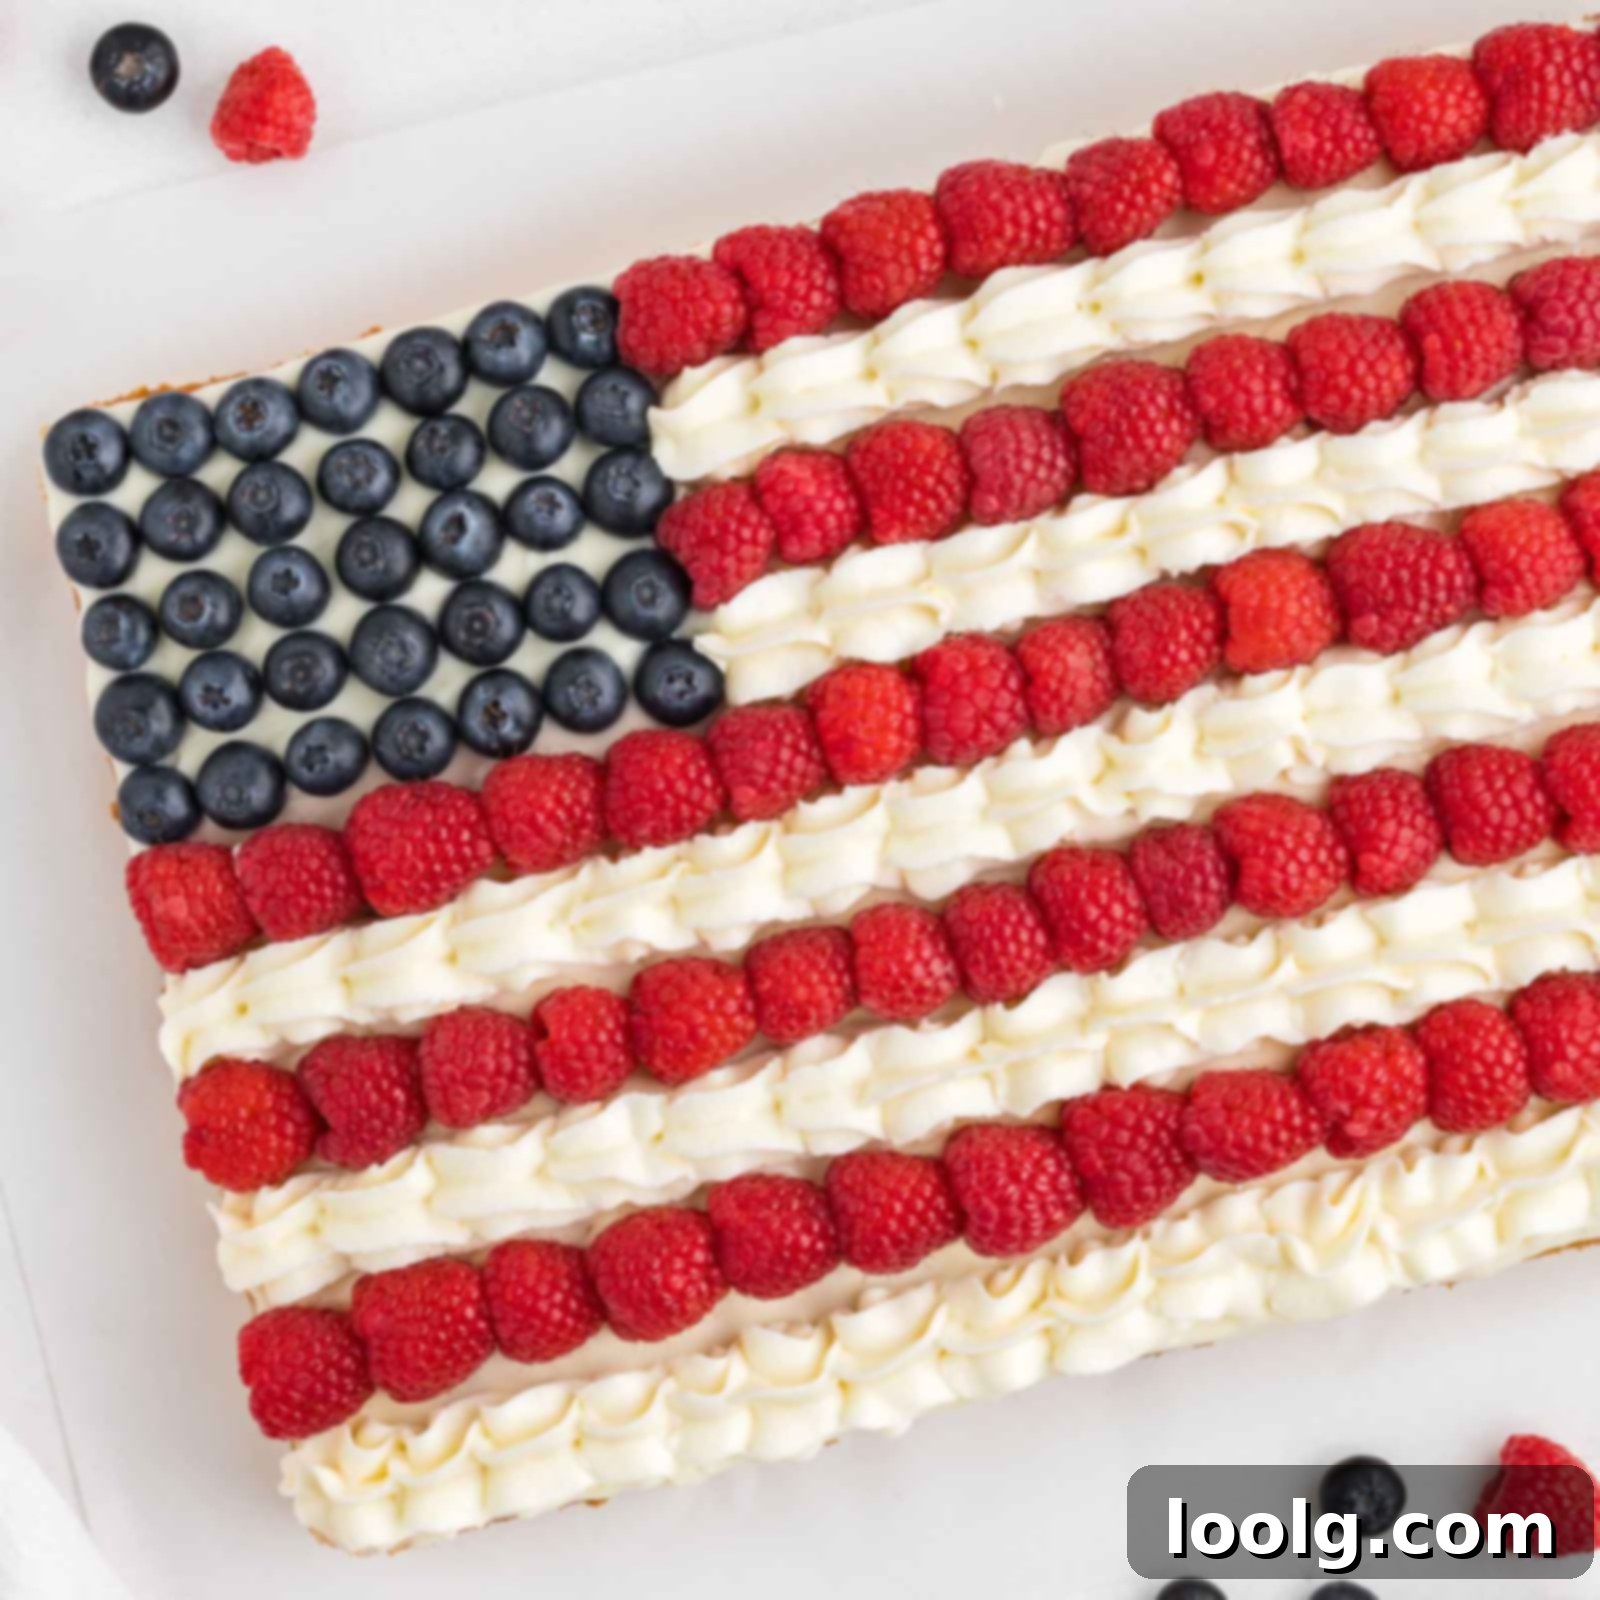
Instead of applying a thin layer of frosting and then piping more, you can simply spread all of the cream cheese frosting evenly across the entire surface of the cooled cake. Once the frosting is spread, you can then carefully arrange your fresh blueberries in the upper left corner to form the blue field, and your raspberries in rows to create the red stripes. This method yields a lovely US flag design that is still impressive and delicious, proving that elegant presentation doesn’t always require intricate piping. You can get a visual of this simplified approach in step 16 (or step 3.3 for the decorating steps) of the full recipe below. I believe it still looks quite nice and is a fantastic option for a quicker decoration!
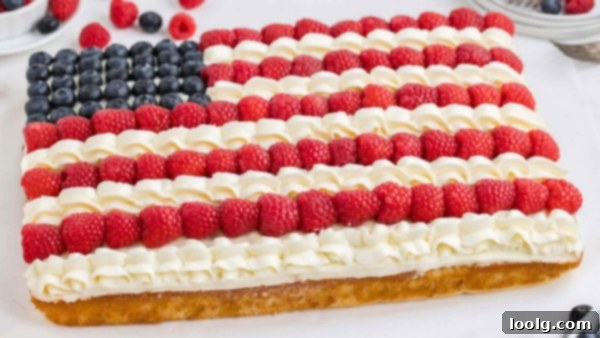
However, for those who appreciate the visual appeal of crisp white lines contrasting with the red raspberries, I personally feel the cake looks even better with some of that luscious white frosting carefully piped between the rows of berries. It adds an extra layer of visual definition and texture to the flag design.
Tips for Piping the Frosting
To achieve the beautiful, defined white stripes between the red raspberry rows, I used a Wilton tip 1M. This star tip creates a lovely, ruffled effect that adds to the cake’s festive appearance. Piping might seem intimidating, but it’s a skill that becomes easier with practice, and even slight imperfections add to the charm of a homemade dessert.
To help you visualize the technique, here’s a helpful video demonstrating piping with this type of tip. The video is cued to start at the exact border style I employed for this cake, so you don’t need to watch the entire tutorial to grasp the specific technique required for creating your flag stripes.
Addressing the Flag Design: “Your Flag is All Wrong! It Needs 7 Red Rows!”
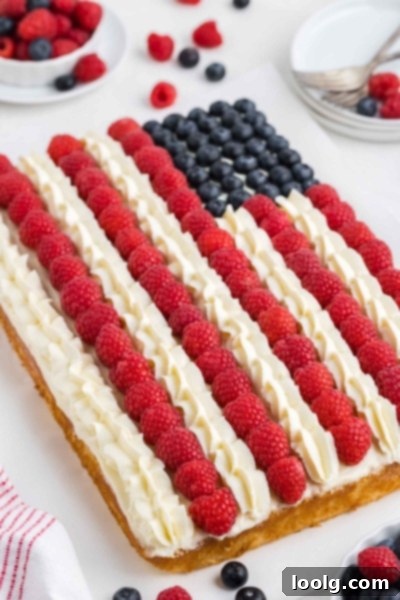
Indeed, a true American flag features seven red stripes. However, when working with a standard 9″x13″ cake pan, fitting all seven perfectly spaced red rows can be a bit of a challenge due to the pan’s dimensions and the size of the berries. If you happen to possess a uniquely sized pan that comfortably accommodates seven rows, by all means, you should absolutely make seven! The more patriotic, the better.
For most standard pans, achieving six rows instead of five is more feasible, especially if you opt to keep the cake within its pan for support. The sides of the pan can help keep the bottom rows neatly in place. However, to fit six rows, you might find yourself needing to slightly “squish” the raspberry rows closer together, particularly in the section below the blueberries. This could potentially make the design appear a little less neat. Another clever solution is to use a smaller piping tip for the white frosting between the rows. A finer line of frosting will allow more space for additional berry rows, making it easier to incorporate that sixth (or even seventh) red stripe for a more authentic flag representation.
Making Your Independence Day Cake in Advance
Planning ahead for your celebration? This Independence Day cake can be prepared in stages, which is a huge time-saver. You can bake the cake layers, allow them to cool completely, and then tightly wrap the cake pan with plastic wrap. An unfrosted cake is quite forgiving and can be stored at room temperature for up to two days, or kept refrigerated for up to three days without compromising its freshness or texture.
For even longer storage, the unfrosted cake freezes exceptionally well for up to three months. Simply wrap it securely in plastic wrap and then aluminum foil to prevent freezer burn. However, I strongly advise against freezing the cream cheese frosting used in this recipe. While traditional cream cheese frosting often freezes acceptably, the inclusion of whipped heavy cream in this particular lightened-up version complicates things. Whipped cream generally doesn’t freeze and thaw well; it tends to lose its airy texture and can become grainy or watery upon defrosting. To ensure the best quality, always prepare the frosting fresh on the day you plan to decorate and serve your patriotic cake.
How to Store and Transport Your Flag Cake
Once decorated, this festive American flag cake with its cream cheese frosting and fresh berries should be kept refrigerated until you are ready to serve it. This ensures both food safety and maintains the integrity of the frosting and fruit. If you’re planning to bring your cake to an outdoor picnic or gathering, it can generally withstand being out for a few hours, provided the weather isn’t excessively hot and humid. Cream cheese frosting, by its nature, is not the most heat-stable option for scorching summer days, so exercise caution.
I haven’t personally conducted extensive experiments on how long this specific cake holds up in intense heat, but as a general rule, if the temperature is high, it’s best to transport your cake in a cooler with ice packs. Keep it chilled and bring it out only when it’s time for dessert to ensure it remains pristine and delicious. For worry-free transportation, especially to keep those beautiful berries from shifting or falling off, always transport the decorated cake in its original pan. The sides of the pan provide essential support, guaranteeing your flag design arrives intact!
Looking for other fun and easy treats for July 4th or summer gatherings? These Strawberry Cheesecake Parfaits look like a fantastic choice – simply add some blueberries to achieve that perfect red, white, and blue theme! For a lighter, healthier option, my friends at Salted Plains offer these delicious Gluten-Free Cherry Crumble Bars!
The Ultimate Gluten-Free Version: My Top Picks for Flour
While my photographer used all-purpose flour for the stunning visuals you see here, and I’ve certainly tested the recipe with it, my personal preference, especially when baking this cake for myself, is always to use King Arthur Flour Gluten-free Measure for Measure Flour. With this specific blend, the appearance, taste, and texture of the gluten-free cake are virtually identical to its wheat-based counterpart. My long and arduous quest for the perfect gluten-free vanilla (or in this case, lemon) cake is officially over! This cake is simply perfect, which is high praise coming from someone who almost exclusively favors chocolate over vanilla desserts.
The journey to find a truly excellent gluten-free cake recipe can be fraught with disappointment. Many gluten-free cakes might taste decent right out of the oven but often become dense, crumbly, or develop an odd, gummy texture as they cool or sit throughout the day. Others present textural issues from the very first bite. I cannot overstate the number of frustrating and underwhelming recipes I encountered before discovering the magic of this King Arthur flour and technique. There are indeed a lot of subpar gluten-free cake recipes out there, but this isn’t one of them! It’s a game-changer for gluten-free baking enthusiasts.
The only other brand of gluten-free flour blend I’ve thoroughly tested this cake with is Bob’s Red Mill 1-to-1 Gluten-free Baking Flour. The results are still very good, but there are some subtle differences worth noting.
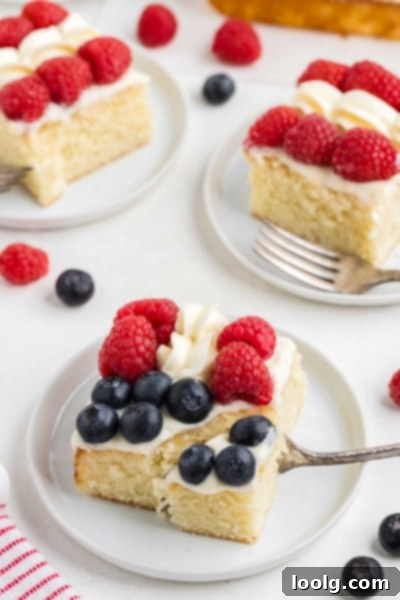
When made with King Arthur Flour, the cake tends to be a little taller and noticeably fluffier. The cake prepared with Bob’s Red Mill, on the other hand, is a bit denser. However, it’s crucial to understand that this isn’t a rubbery or unpleasantly heavy kind of dense. It’s certainly not dense like a cake made with almond paste, such as my Cranberry Almond Cake; perhaps “less fluffy” is a more accurate descriptor. Another minor difference is that the edges of the cake made with Bob’s Red Mill flour aren’t quite as perfectly neat and defined, but this is a purely aesthetic point that becomes entirely irrelevant once the cake is frosted and decorated. Functionally, it’s still a delicious option.
One final distinction I observed with the Bob’s Red Mill version was that it took slightly longer to cook through in the very center, which made determining its doneness a touch more challenging. For guaranteed success and ease of baking, I truly cannot recommend King Arthur or Bob’s Red Mill highly enough. These blends are specifically formulated as 1:1 replacements for all-purpose flour, meaning you don’t need to adjust other ingredients in the recipe.
I haven’t experimented with other gluten-free brands, so I cannot confidently say whether they would yield comparable results. To avoid any potential disappointment with your festive creation, sticking to King Arthur or Bob’s Red Mill is your safest bet. If you do venture to try another brand, please share your findings in the comments below! Your valuable feedback would be incredibly helpful, and I’ll be sure to update this post with your tips to benefit other bakers.
It’s also important to note that flours like almond flour, coconut flour, or any other substitutes not specifically designed as a 1:1 replacement for all-purpose flour simply will not work in this recipe. Their unique properties and absorption rates require entirely different formulations, and using them here would lead to an unfavorable outcome.
That’s everything you need to know to create this absolutely delightful and impressive Independence Day cake! I sincerely hope you enjoy baking and sharing it with your loved ones this patriotic season. It’s a recipe truly worth celebrating. 🎉
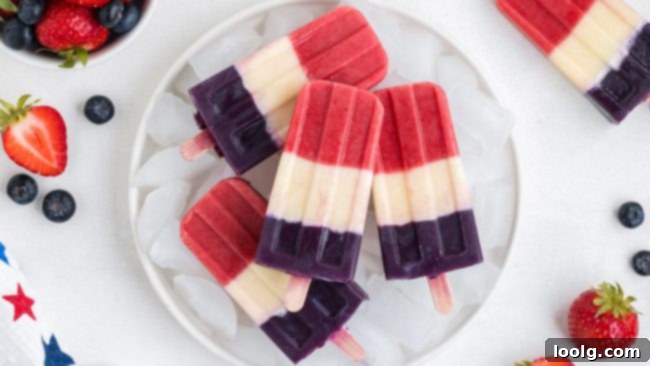
And for those seeking a sweet treat completely free of refined sugar, don’t forget to check out the refreshing Red, White and Blue Popsicles I shared over on my other blog – perfect for a healthy and festive cool-down!
Independence Day Cake
Ingredients
For the cake:
- 2 cups (240 grams) all-purpose flour or for gluten-free, King Arthur Flour Gluten-free Measure for Measure Flour
- 1 1/4 teaspoons salt
- 2 teaspoons baking powder
- 4 large 50 grams each, out of shell eggs, room temperature
- 1 3/4 cups (350 grams) granulated sugar
- 2 teaspoons lemon extract
- 1 teaspoon vanilla extract
- 1 cup (236 ml) whole milk
- 2 tablespoons lemon zest
- 1/4 cup (56 grams) unsalted butter, cut into pats
- 1/3 cup (67 grams) canola or vegetable oil
For the frosting:
- 12 ounces (340 grams) cream cheese see notes if you live outside of North America
- 2 cups (240 grams) powdered sugar
- 1/2 teaspoon vanilla extract
- pinch of salt
- 1/2 cup (118 ml) heavy cream
For decorating:
- 6 oz (170 grams) blueberries see notes
- 18 oz (510 grams) raspberries see notes
Instructions
Make the cake:
-
Place the rack in the center of the oven. Preheat the oven to 325°F (163 °C) with a rack in the center of the oven. Line a 9”x13” pan with a piece of parchment paper.
-
In a medium mixing bowl, stir together the flour, salt, and baking powder. Set aside.
-
In a large mixing bowl with an electric hand mixer or a stand mixer with a whisk attachment, beat the eggs, sugar, vanilla extract, and lemon extract at medium-high speed for about 2 minutes until it’s thickened and a light gold color. Should your stand mixer not have a whisk attachment, then beat the mixture for 5 minutes using the paddle attachment.
-
Beat in the dry ingredients on low speed just until combined. Use a silicon spatula to scrape the bottom and sides of the bowl and mix briefly to incorporate.
-
In a small saucepan, heat the milk and lemon zest over medium heat. You shouldn’t let it boil. When you see tiny bubbles start to appear around the edge of the saucepan, it’s ready. The temperature will be 180-185 °F (82-85 °C). Remove the pan from the heat and stir in the butter and oil until the butter has melted.
-
Slowly stir the milk mixture into the batter at low speed and mix until totally combined.
-
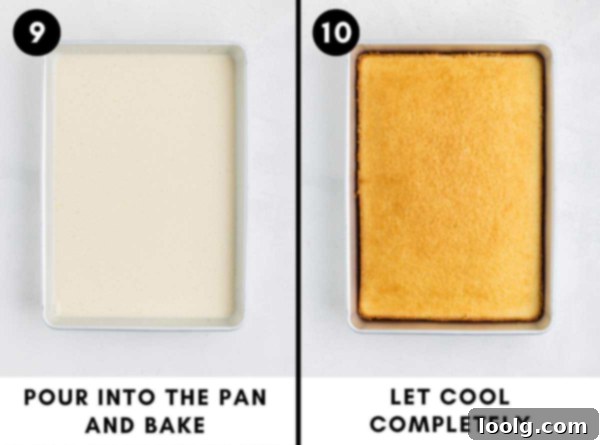
Bake the cake for 33-40 minutes or until the edges are pulling away from the sides of the pan, a toothpick inserted into the center comes out clean, and the top feels set. A digital thermometer inserted into the center of the cakes should read 205 °F.
-
Remove from the oven and place on a wire rack to cool completely, about 2 hours (if decorating the cake right away – read the section below). You can bake, cool and tightly cover the cake pan with plastic wrap. The unfrosted cake can sit at room temp for 2 days, or you can refrigerate it for up to 3 days. You can also freeze the unfrosted cake for up to 3 months. But I don’t recommend freezing the frosting.
One hour before beginning with the rest of the cake:
-
Place your mixer beaters and mixing bowl in the fridge for 1 hour before making the frosting.
-
Also, rinse and lay the berries out on paper towels so that they’ll dry. Place some paper towels on top, as well, to really soak up any water. This will prevent the frosting from getting runny.
Make the frosting:
-
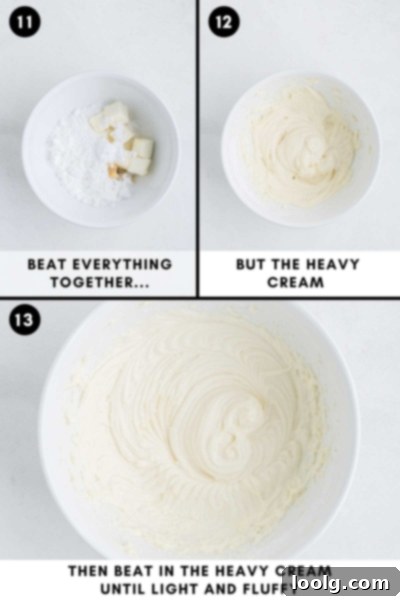
In a large mixing bowl, beat the cream cheese, powdered sugar, vanilla, and salt using an electric hand mixer or stand mixer at medium speed until completely combined.
-
While still mixing, now on low, gradually add the heavy cream.
-
Once it’s well incorporated, turn the speed to high and beat until stiff peaks form – about 3 to 5 minutes.
Decorate (preferably day of serving):
-
Spread 1 1/4 cups (258 grams) of frosting over the cake, adding another 2 tablespoons or so to the upper left section, where the blueberry section will go. It’s a very thin layer of frosting that goes under the fruit, and additional frosting isn’t going to be piped onto the blueberry section, so that area gets a little more frosting.
-
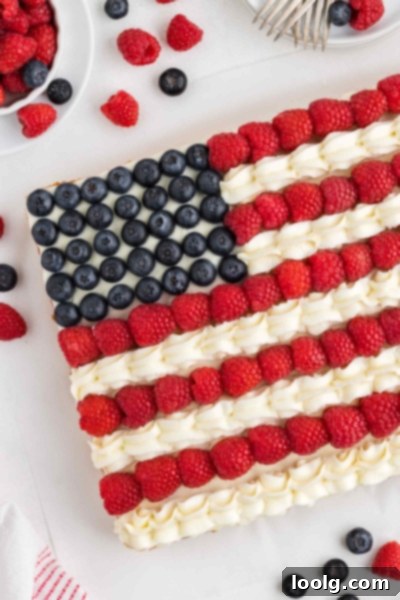
Use the berries to create a US flag design on top of the cake. In the upper left corner, make a 7×5 section of blueberries.
-
Create 5 red rows of raspberries. I put them on their sides and shoved the next raspberry a bit inside of the other to create a more solid red line.
-
Use Wilton tip 1M to pipe the frosting between the red rows of raspberries.
How to store:
-
You should keep the decorated cake refrigerated until ready to serve.
Notes
- You need 65 raspberries if making 5 rows of raspberries or 70 if you want 6 rows. 1 cup = 23 raspberries / 125 grams / 4.4oz. That means you need about 353 grams / 12.4oz of raspberries for 5 rows or 380 grams / 13.4oz for 6 rows. If you only want 5 rows and you’re tempted to get a 12-oz container – you usually get a few ugly or smushed berries per container, so an 18-oz container is really best.
- You only need 35 blueberries. For me, this was 3/4 cup or 100 grams / 3.5oz. It’s better not to choose huge blueberries, as then the blue section is too large. I used medium-sized blueberries.
- If you’re located outside the US or Canada, you most likely have the spreadable cream cheese that’s meant for toast. Place 450 grams of cream cheese in the center of a clean tea towel or cheesecloth (not just a paper towel), and gently squeeze out the excess liquid until you have 340 grams of cream cheese.
 The Lightened-Up Cream Cheese Frosting