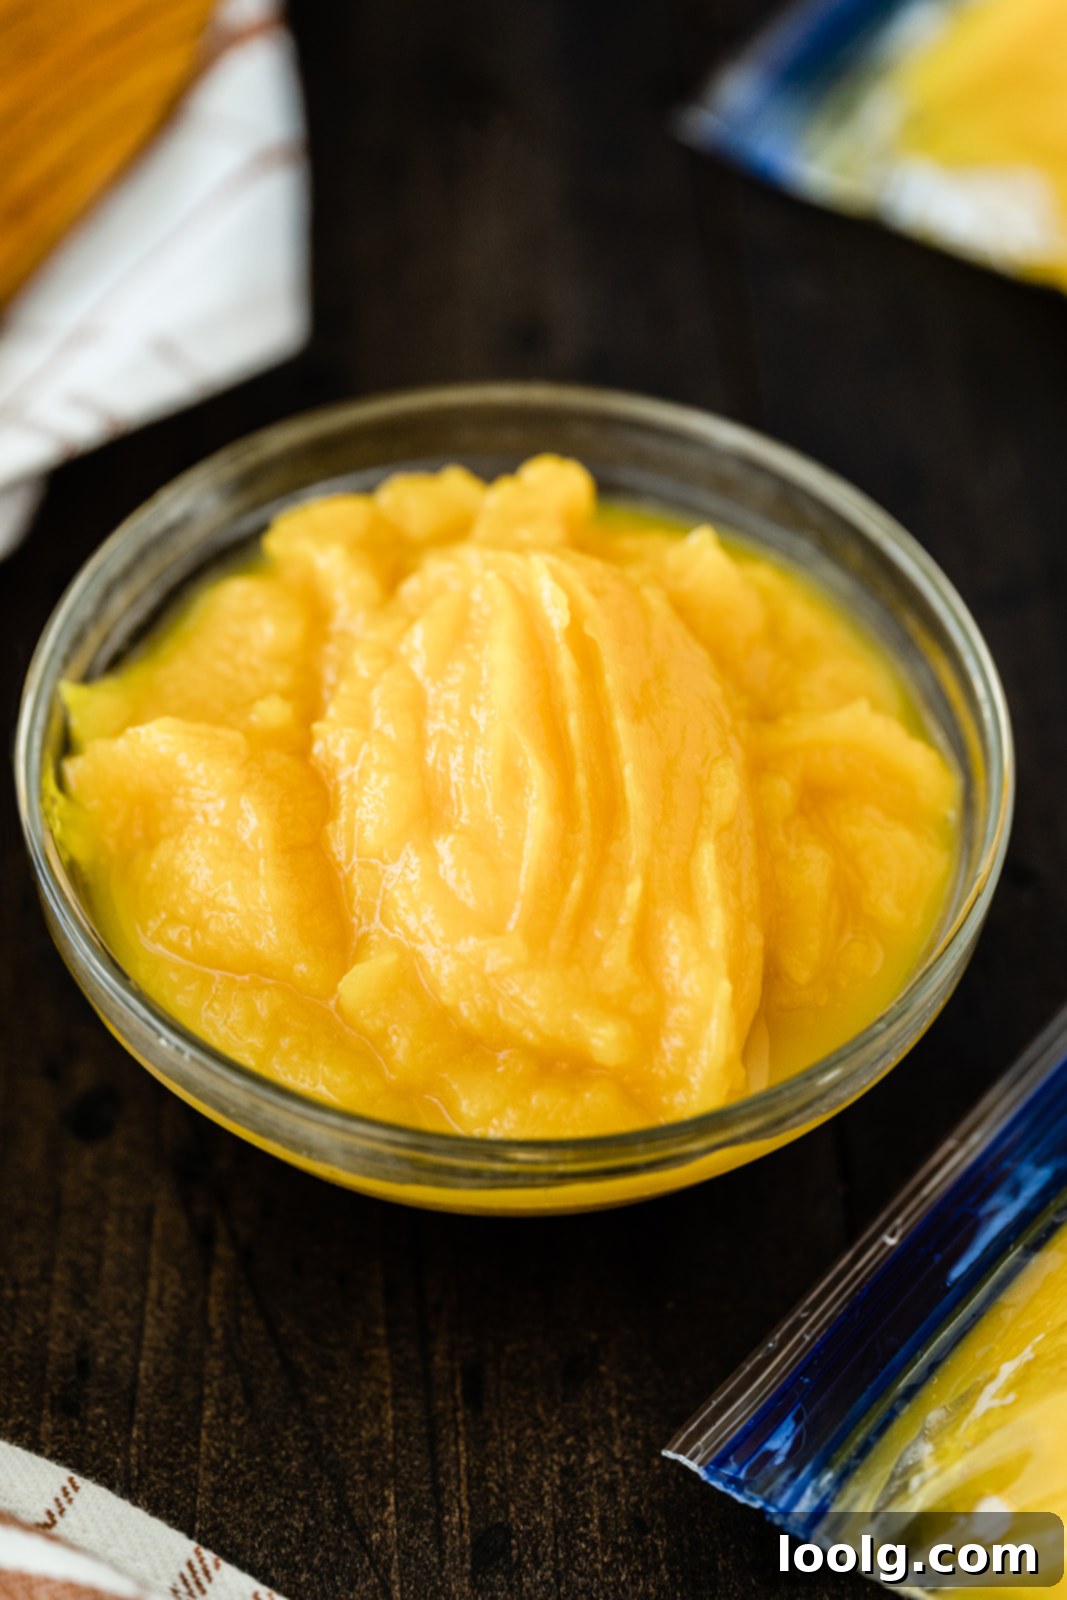
Homemade Pumpkin Puree: The Ultimate Guide to Perfectly Thick & Flavorful Puree (No More Watery Results!)
Are you ready to elevate your autumn baking and cooking with the rich, authentic taste of homemade pumpkin puree? Forget the can – while convenient, canned pumpkin puree sometimes falls short in flavor and often raises concerns about additives and packaging chemicals. This comprehensive guide will show you how to make silky-smooth, perfectly thick pumpkin puree from scratch, ensuring your pumpkin recipes, especially baked goods, turn out flawless every time. We’ll even reveal the simple trick to avoid the dreaded watery puree!
Many home bakers find themselves consistently reaching for canned pumpkin puree, particularly for delicate recipes like pies and cakes. The main reason? Homemade versions can often be significantly more watery than their store-bought counterparts. This excess moisture can wreak havoc on a recipe’s balance, leading to soggy crusts, dense cakes, and generally disappointing results. As someone who values precision in baking, I understand that extra liquid can be a significant source of anxiety.
However, the desire for a homemade alternative is completely understandable. Concerns about BPA (bisphenol A) and other chemicals used in can linings, even “BPA-free” alternatives, are valid. Scientific studies have suggested that some BPA-free plastics and linings might pose their own risks, making the idea of fresh, natural ingredients even more appealing. Making your own pumpkin puree gives you complete control over what goes into your food, ensuring a pure and wholesome product.
This recipe is designed for everyone: whether you’ve been hesitant to try making your own puree or you’ve attempted it before only to end up with a watery mess. We’re going to tackle those common issues head-on, guaranteeing a superior result that will transform your fall cooking. Once you master this method, you’ll be surprised at how simple and rewarding it is!
And if you’re looking to complete your homemade autumn pantry, don’t forget to whip up some fresh Pumpkin Pie Spice to complement your puree. It’s the perfect aromatic blend for classic treats like Pumpkin Spice Energy Bites and indulgent desserts such as Pumpkin Sheet Cake.
Why Make Your Own Pumpkin Puree? The Benefits of Freshness
Beyond avoiding BPA and other potential chemicals, making your own pumpkin puree offers a host of advantages that elevate your culinary creations:
- Superior Flavor: Freshly roasted pumpkin simply tastes better. It has a deeper, more nuanced, and naturally sweeter flavor compared to the often bland or metallic notes found in canned versions. This enhanced flavor translates directly into more delicious pumpkin pies, muffins, soups, and lattes.
- Texture Control: This recipe specifically addresses the common issue of watery puree, allowing you to achieve the perfect consistency for any recipe. You can make it as thick or slightly thinner as you desire, which is crucial for baking precision.
- No Additives or Preservatives: When you make it yourself, you know exactly what’s in it: just pumpkin! Canned varieties can sometimes contain added salt, sugar, or preservatives that you might not want in your healthy, homemade dishes.
- Cost-Effective: Especially during harvest season, fresh pumpkins can be surprisingly affordable. I recently purchased six sugar pumpkins for under $10 from a local fruit stand, yielding a substantial amount of puree for a fraction of the cost of multiple cans.
- Seasonal Enjoyment: There’s a certain satisfaction in using seasonal produce and transforming it into a versatile ingredient. It connects you more deeply with the food you eat and the rhythms of the seasons.
- Nutritional Value: Pumpkins are packed with vitamins, minerals, and antioxidants, including Vitamin A, Vitamin C, potassium, and fiber. Enjoying it fresh ensures you’re getting all those wonderful nutrients at their peak.
Choosing the Right Pumpkin for Puree
The first step to a successful homemade pumpkin puree is selecting the correct type of pumpkin. Not all pumpkins are created equal when it comes to culinary use!
- Sugar Pumpkins (Baking Pumpkins): These are your best bet in North America. They are smaller than carving pumpkins, typically weighing between 2-8 pounds, and have a denser, sweeter flesh with less water content. This makes them ideal for a smoother, richer puree.
- Hokkaido Pumpkin (Red Kuri Squash): If you live outside of North America, particularly in Europe or Asia, Hokkaido pumpkins are an excellent alternative. Also known as Red Kuri squash, they have a vibrant orange-red skin and a sweet, nutty flavor, similar to sugar pumpkins. Their flesh is firm and produces a wonderfully smooth puree.
- Butternut Squash: A fantastic and widely available substitute. Butternut squash produces a creamy, slightly sweet puree that can be used interchangeably with pumpkin in most recipes. The main difference is its tougher skin, which typically needs to be removed before pureeing (though as we’ll discuss, some pumpkin skins are edible).
- Other Winter Squashes: Varieties like acorn squash, kabocha squash, or even delicata squash can also be used, though their flavor and texture might vary slightly. Always choose firm, unblemished squash for the best results.
Avoid using large carving pumpkins. While festive, their flesh is stringy, watery, and lacks the sweetness and density needed for a good puree, resulting in a thin and flavorless product.

Step-by-Step Guide to Perfect Pumpkin Puree
Preparation: Cleaning and Cutting
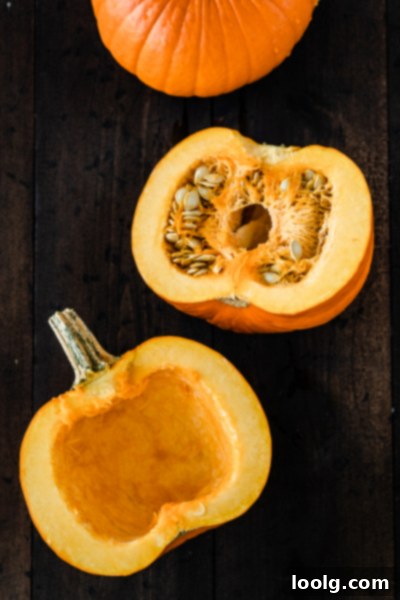
Begin by thoroughly washing the exterior of your pumpkins. This is important even if you plan to remove the skin, as it prevents dirt and bacteria from transferring to the flesh during cutting. Next, carefully remove the stem. I sometimes forget this step for photos, but it makes cutting easier! With a large, sharp knife, slice each pumpkin in half. Be cautious as pumpkins can be tough. A helpful tip is to pierce the pumpkin with the knife and then rock the knife back and forth to cut through. Once halved, use a sturdy spoon to scoop out all the seeds and stringy bits. Don’t discard the seeds! You can rinse them, toss with a little oil and salt, and roast them for a delicious, healthy snack.
Roasting for Flavor and Texture
Place the pumpkin halves, cut side down, on a sturdy baking sheet. This orientation helps to steam the pumpkin flesh while it roasts, resulting in a softer texture. Pour about half an inch of water into the bottom of the baking sheet – enough to come up about halfway on the edge of the pan. This creates a steamy environment that aids in softening the pumpkin and prevents it from drying out.
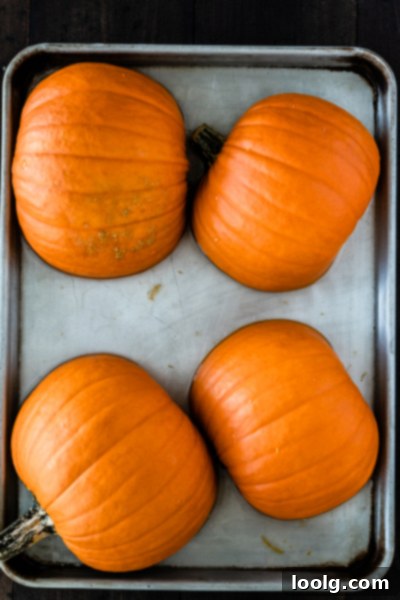
Bake the pumpkins in a preheated oven at 350 °F (175 °C) for approximately an hour, or until the flesh is incredibly soft and easily pierced with a fork. The exact baking time will vary depending on the size and density of your pumpkins. Smaller sugar pumpkins might be ready in 45-50 minutes, while larger ones could take up to 75 minutes. You want them to be very tender, almost falling apart, to ensure a smooth puree.
To Peel or Not to Peel: The Pumpkin Skin Question
A common question is whether pumpkin skin is edible. The answer is yes, it is safe to eat and is actually quite nutritious! The skin of sugar pumpkins and Hokkaido pumpkins becomes soft enough during roasting that it can be pureed along with the flesh. Including the skin adds extra fiber and a slightly richer, less sweet flavor to your puree. If you choose to leave the skin on, ensure you remove any bruised or blemished areas beforehand.
However, the skin of butternut squash is much tougher and should always be separated from the flesh after roasting. For other less common pumpkin or squash varieties, a quick online search can confirm whether their skins soften sufficiently for consumption. The image above shows a pumpkin with a top-left blemish; areas like this should be trimmed off, regardless of whether you keep the rest of the skin on.
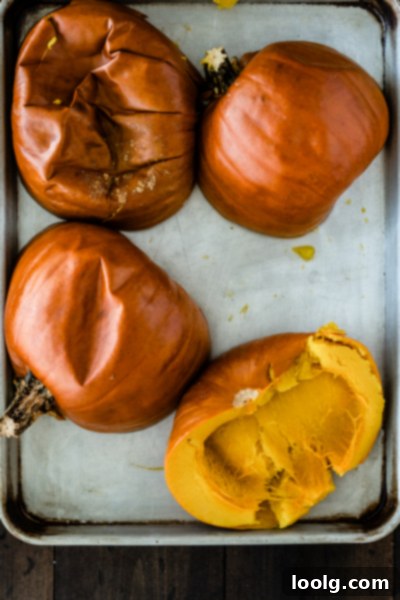
Cooling Down Before Blending
Once the pumpkins are roasted to perfection, remove the baking sheet from the oven. Let the pumpkin halves cool down for at least 10-20 minutes, or until they are cool enough to handle safely. It’s important not to blend extremely hot pumpkin, as the heat can create pressure in a blender or food processor, potentially causing the lid to blow off or damaging the appliance. Allowing it to cool slightly also helps with thickening, as some moisture evaporates.
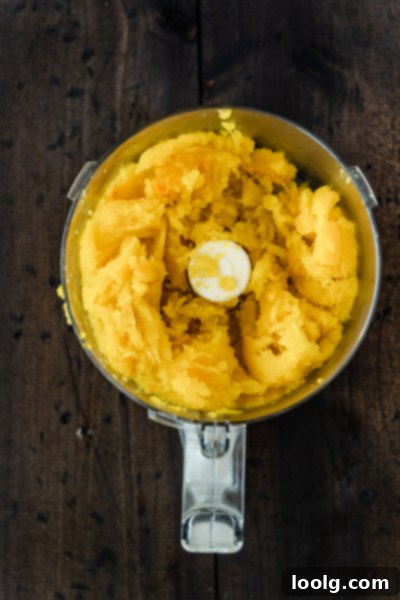
Achieving the Perfect Smoothness: Blending Your Pumpkin
Now it’s time to transform those soft pumpkin halves into a luscious puree. Scoop the cooked pumpkin flesh (and skin, if desired and appropriate for your pumpkin type) into a food processor or a high-powered blender. If you’re using an immersion blender, simply place the pumpkin flesh in a large, deep bowl. Blend until the pumpkin is completely smooth and free of any lumps or fibrous strands. Depending on your appliance, this may take a few minutes, with occasional scraping down of the sides. For an extra-velvety texture, some people like to pass the blended puree through a fine-mesh sieve, but for most recipes, this step is optional if your blender is powerful enough.
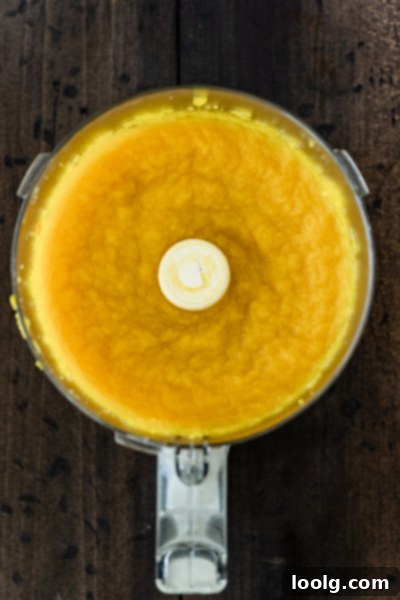
The Secret to Non-Watery Pumpkin Puree: Draining is Key!
This is the most crucial step to ensure your homemade pumpkin puree is thick and comparable to (or even better than) the canned variety, preventing those watery disappointments. Freshly roasted pumpkin naturally contains more moisture than commercially processed canned pumpkin. Simply blending it often results in a looser consistency that can ruin baked goods. The solution is simple: **draining the excess liquid.**
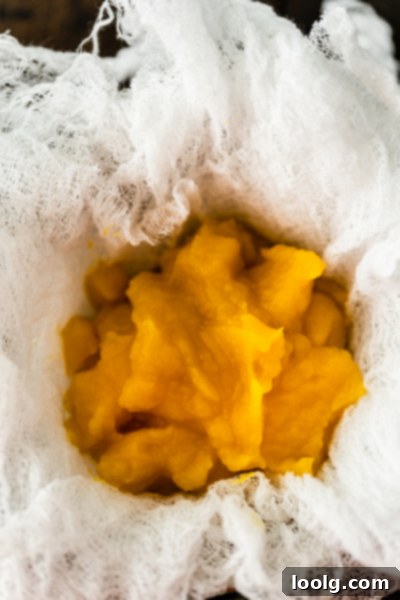
To do this, place a large sieve or colander over a deep bowl. Line the sieve generously with several layers of cheesecloth or a clean, thin tea towel (like a flour sack towel). Carefully pour the blended pumpkin puree into the lined sieve. Allow it to sit and drain for a period, anywhere from 30 minutes to several hours, or even overnight in the refrigerator. The goal is to let gravity pull out the excess water.
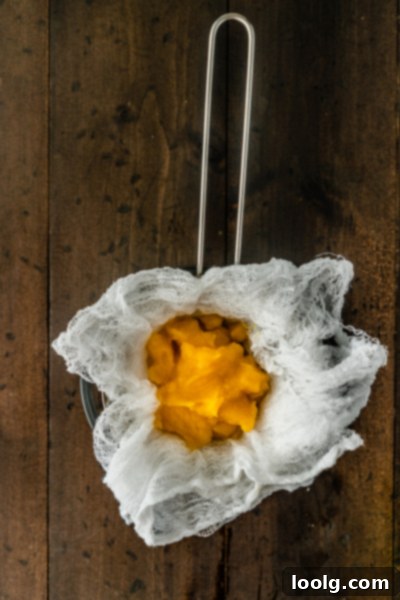
The time needed for draining will depend entirely on how watery your initial puree is and how many pumpkins you’re processing. If you’re working with a large batch, it’s best to divide the puree into a few smaller batches in separate sieves to ensure proper and efficient draining. You’ll observe a surprising amount of liquid collecting in the bowl beneath the sieve – this is exactly what you want to remove!
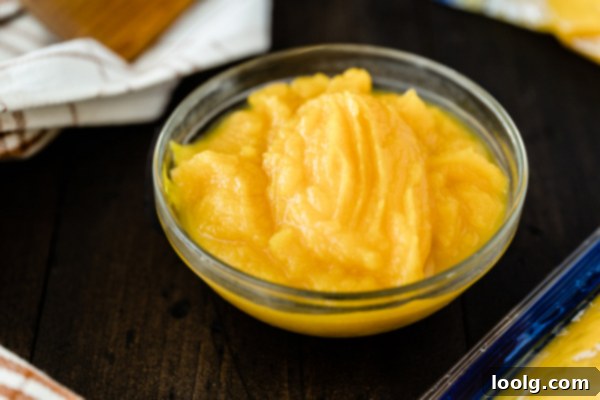
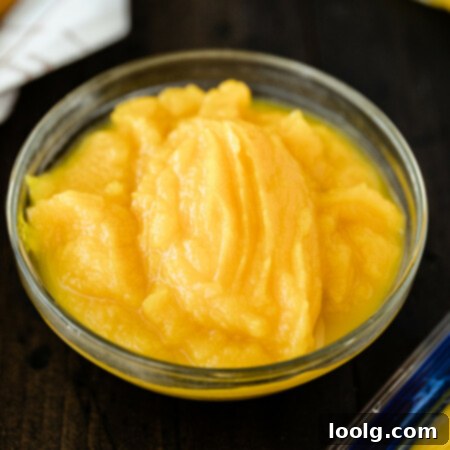
Check the consistency periodically. Your puree is ready when it reaches a thick, spoonable texture, similar to that of canned pumpkin. Once drained, transfer the pumpkin puree from the cheesecloth-lined sieve to a clean bowl. Give it a good stir to reincorporate any parts that might have drained more than others (the puree closest to the cheesecloth will be drier than the top). If, by chance, your puree seems *too* dry after draining, you can always stir in a tablespoon or two of the collected liquid from the bowl until you achieve your desired consistency. This draining process is truly the game-changer for homemade pumpkin puree!
Storing Your Homemade Pumpkin Puree
Once you’ve made a batch of fresh pumpkin puree, proper storage is key to enjoying it for weeks or even months to come.
Refrigeration
If you plan to use your pumpkin puree within a few days, simply transfer it to an airtight container. Stored in the refrigerator, homemade pumpkin puree will keep well for 4-6 days. Always give it a sniff and look for any signs of mold before using.
Freezing for Long-Term Enjoyment
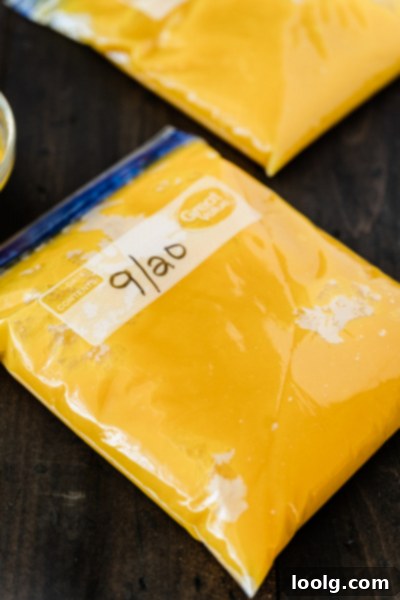
Freezing is an excellent option for preserving your homemade pumpkin puree, allowing you to enjoy the taste of autumn well beyond the season. I find it most practical to freeze the puree in amounts that I typically use for recipes. Common useful portions include 1/2 cup, 1 cup, or 15-ounce portions (which is roughly equivalent to a standard can of pumpkin puree, about 425 grams or 1 ¾ cups).
There are several methods for freezing:
- Freezer Bags: Scoop the measured puree into freezer-safe Ziploc bags. Press out as much air as possible, flatten the bags, and stack them in the freezer. Flattening allows for faster freezing and thawing, and takes up less space.
- Ice Cube Trays: For smaller portions, freeze the puree in ice cube trays. Once solid, transfer the pumpkin cubes to a larger freezer bag. This is great for adding a little pumpkin to smoothies or baby food.
- Airtight Containers: For larger amounts, freezer-safe containers work well. Ensure there’s about an inch of headspace to allow for expansion during freezing.
Always label your containers or bags with the date of freezing. Homemade pumpkin puree is best used within 3-6 months for optimal quality and flavor, though it can remain safe to eat for much longer periods (up to a year) if properly stored, though its quality may decline over time.
When you’re ready to use frozen pumpkin puree, simply thaw it overnight in the refrigerator or use the defrost setting on your microwave. Once defrosted, it’s ready to be incorporated into your favorite dishes, such as a quick and savory Pumpkin Curry Soup, which can be made in about 20 minutes with your prepped puree!
Delicious Recipes to Make with Your Homemade Pumpkin Puree
Now that you have a supply of glorious homemade pumpkin puree, the culinary possibilities are endless! Its rich flavor and perfect consistency will shine in any recipe. If you’re looking for inspiration, consider trying these delightful dishes:
- Whole Wheat Pumpkin Cake with Greek Yogurt Cream Cheese Frosting: A healthier twist on a classic, moist and flavorful.
- Healthy Chocolate Chip Pumpkin Muffins: Perfect for breakfast or a snack, packed with goodness.
- Whole Wheat Crustless Pumpkin Pie Bars: All the flavor of pumpkin pie without the fuss of a crust, with a dairy-free option.
- Pumpkin Spice Lattes: Create your own cozy café drinks at home.
- Pumpkin Soups & Chilis: Add depth and creaminess to savory dishes.
- Pumpkin Pancakes or Waffles: Infuse your breakfast with autumnal warmth.
Have you embarked on the journey of making homemade pumpkin puree before? How did your experience compare to using canned versions? I’m genuinely eager to hear about your results, especially if you give this perfected recipe a try!
How to Make Pumpkin Puree
Ingredients
- Sugar pumpkins (aka baking pumpkins, or Hokaiddo pumpkins or butternut squash)
Instructions
-
Wash sugar pumpkins thoroughly before cutting in half. Carefully cut off the stem.
-
Scoop out all the seeds and stringy bits from the pumpkin halves. Place the cleaned pumpkin halves cut side down on a baking sheet. Pour water into the baking sheet, filling it about halfway up the edge of the pan.
-
Place the baking sheet in the oven and bake at 350 °F (175 °C) for approximately one hour, or until the pumpkin flesh is very soft and easily pierced with a fork. The exact cooking time will vary based on the size of your pumpkins.
-
Once cooked, remove the baking sheet from the oven and allow the pumpkin to cool sufficiently until it reaches a safe temperature for blending, usually 10-20 minutes.
-
Scoop the soft pumpkin flesh (and skin, if edible and desired) into a food processor or high-powered blender. Alternatively, if using an immersion blender, place the cooked pumpkin directly into a large bowl. Blend until the pumpkin is completely smooth and free of any lumps.
-
To thicken the puree and achieve a consistency similar to canned pumpkin, line a large sieve with several layers of cheesecloth or a clean, thin tea towel and place it over a large bowl. Pour the blended pumpkin puree into the lined sieve and let it drain for as long as needed (30 minutes to several hours), allowing excess water to drip into the bowl below. If processing a large quantity, drain the pumpkin in multiple batches.
-
Once the pumpkin has reached your desired thick consistency, transfer it to a clean bowl and stir thoroughly to ensure an even texture. Store the completely cooled pumpkin puree in airtight containers in the refrigerator for 4-6 days.
-
For longer storage, freeze the puree in convenient portion sizes, such as 1/2 cup, 1 cup, or 15 ounces (approximately 425 grams, equivalent to a can of pumpkin). Freezer bags or airtight containers work well. Label with the date. While it can be frozen for much longer, it is best used within 3-6 months to maintain optimal quality.
Notes
