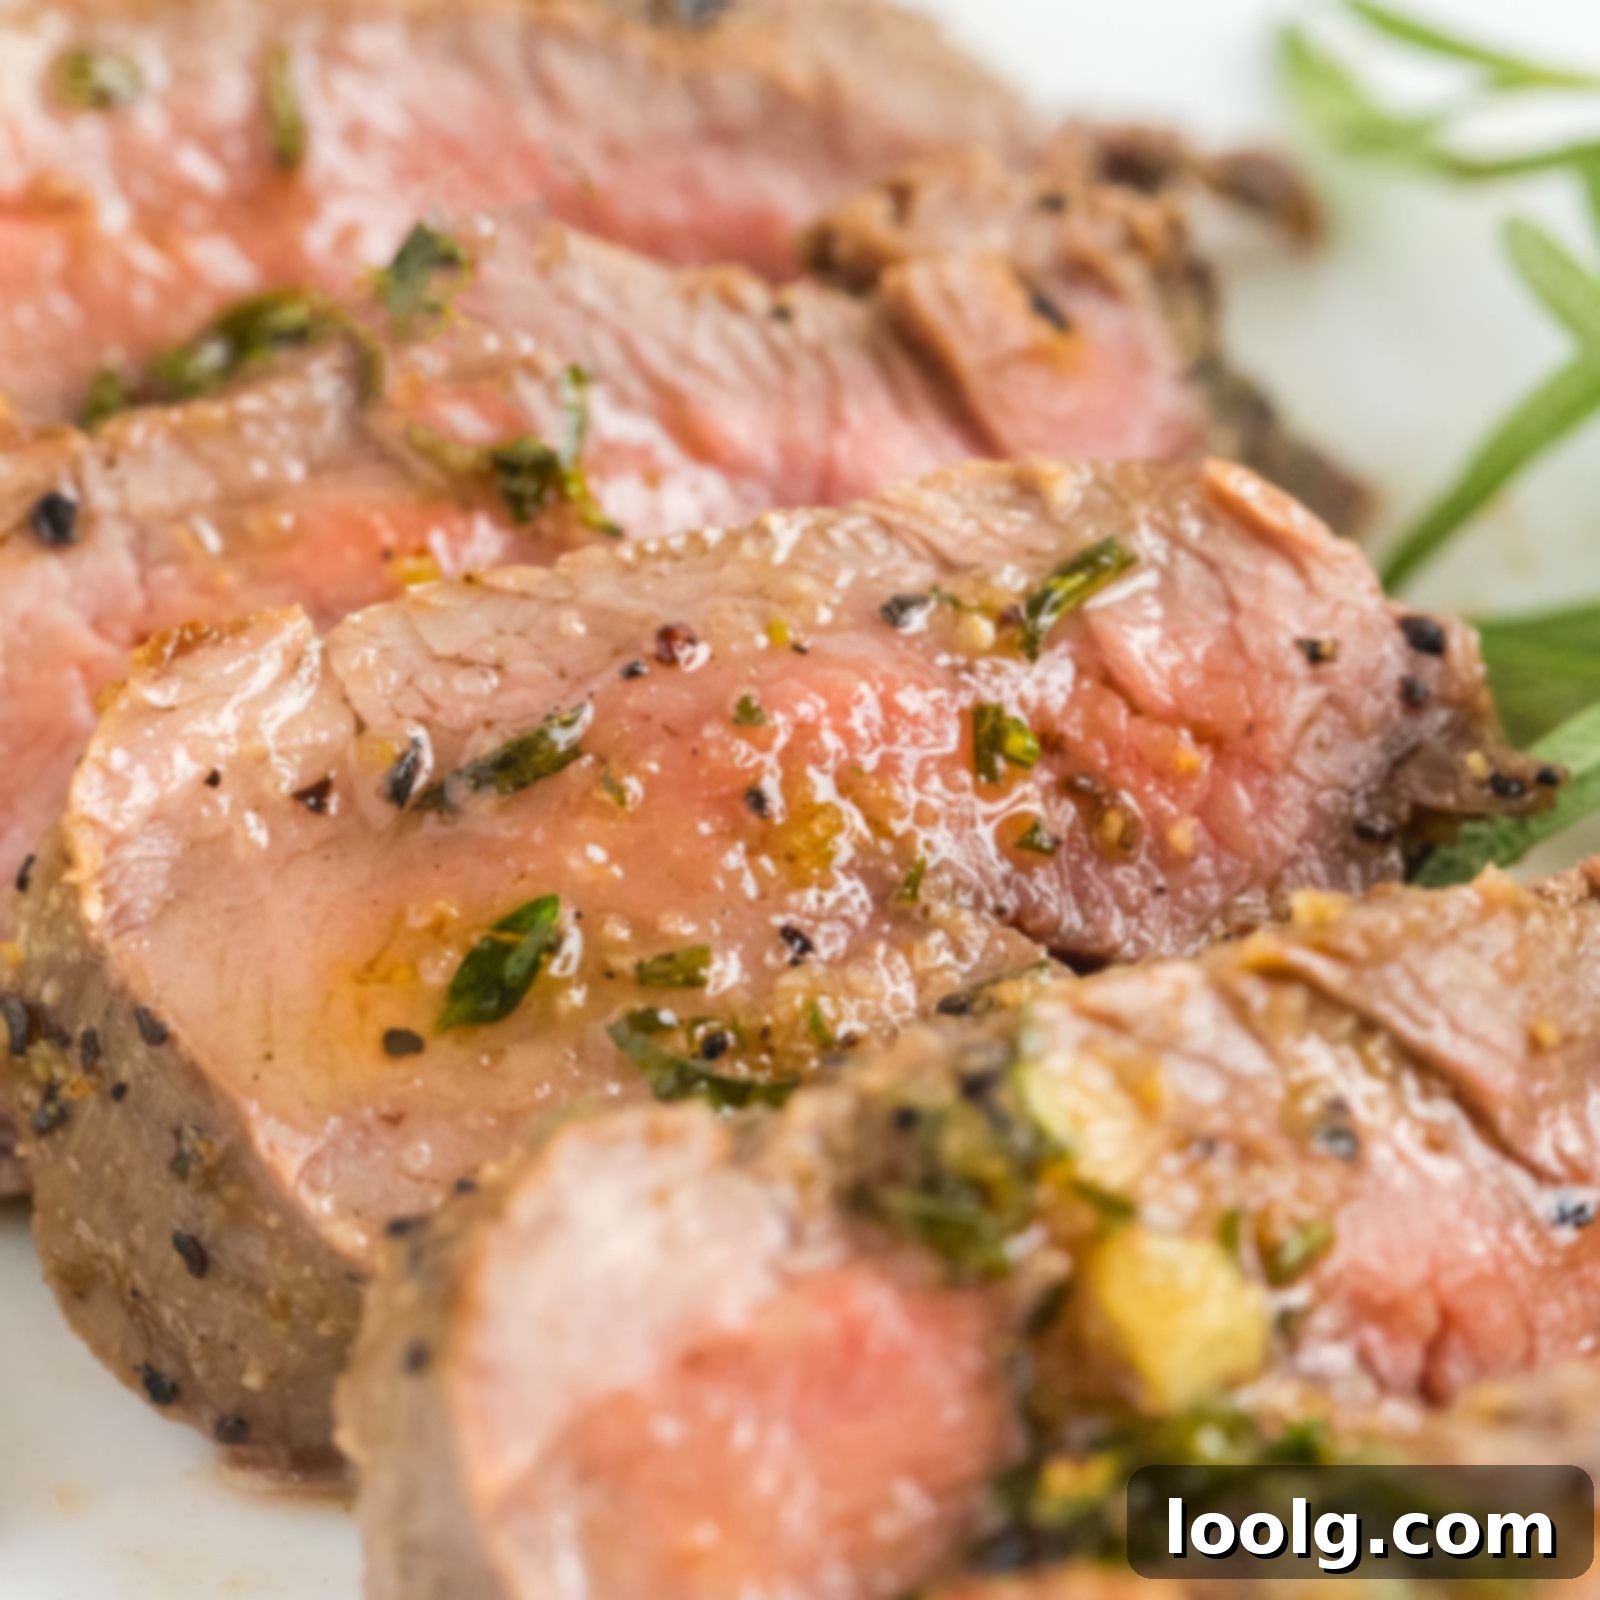
Perfect Pan-Seared Venison Tenderloin with Herb Garlic Butter: An Exquisite & Easy Recipe
Prepare to be amazed by this venison tenderloin recipe, a dish that epitomizes tenderness and juicy perfection. Thanks to a quick, high-heat sear and an effortless fresh herb garlic butter, this venison tenderloin transforms into an extraordinary culinary experience. It’s not just a meal; it’s the ideal choice for an exceptional dinner for two, inherently gluten-free, and perfectly suited for a keto lifestyle. This recipe promises a gourmet experience without the fuss, showcasing the delicate texture and exquisite taste that make venison steaks truly memorable.
Whether you’re celebrating a significant anniversary, commemorating a special achievement, or simply seeking to elevate a romantic evening, this venison tenderloin is guaranteed to impress. Its rich flavor and buttery tenderness create an unforgettable dining moment, making any occasion feel grand. The lean nature of venison, coupled with the aromatic herb butter, delivers a sophisticated flavor profile that stands out.
For those times when you’re catering to a larger gathering, or simply craving hearty, comforting flavors, don’t miss our Venison Chili. This fantastic one-pot dish brings robust, warming flavors to the table, making it perfect for cozy family gatherings where everyone can enjoy a satisfying and flavorful meal together.
Additionally, our Venison Hamburger Helper From Scratch offers a delightful and especially kid-friendly venison recipe. It ingeniously transforms a beloved classic into a nutritious and incredibly tasty option, providing a brilliant way to introduce children to the unique and mild flavor of venison in a fun, familiar, and utterly delicious format.
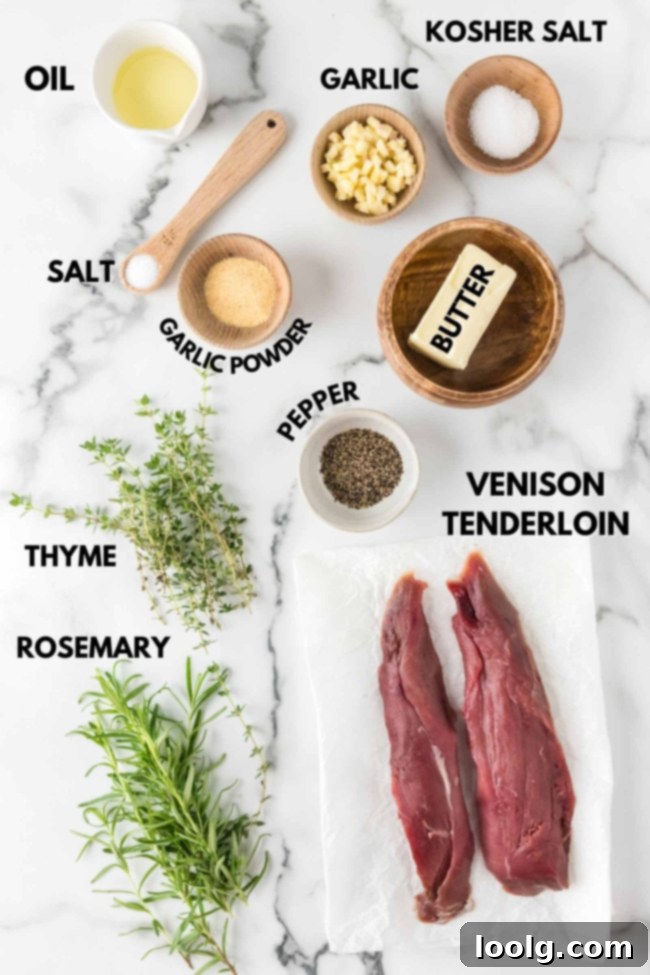
Essential Ingredients for Your Venison Tenderloin
Crafting the perfect venison tenderloin begins with selecting the right ingredients. Here’s a detailed overview of everything you’ll need to create this succulent dish, along with tips for optimal flavor and texture.
For the Flavorful Dry Rub
- Sea Salt: Essential for seasoning and tenderizing the meat. Salt helps to draw out moisture initially, which then reabsorbs, carrying flavor deep into the muscle fibers.
- Medium-Coarse Black Pepper: Provides a robust, peppery bite that complements the venison without overpowering it. Medium-coarse grinds offer more texture and flavor than fine pepper.
- Garlic Powder: A foundational flavor that offers a milder, more consistent garlic presence than fresh garlic in a dry rub, ensuring even distribution and a delightful aroma.
For the Star of the Dish: The Meat
- Venison Tenderloin: This is the most prized cut of venison, renowned for its incredible tenderness. It’s crucial to cook the tenderloin as one whole piece of meat initially; avoid cutting it into chunks or slices before searing to maintain its juiciness and prevent it from drying out. If using frozen venison, ensure it is fully thawed. The best method is to place it in the refrigerator overnight. Before cooking, bring the tenderloin to room temperature by leaving it on the counter for at least one hour. This step promotes even cooking and prevents the exterior from overcooking while the interior remains cold.
- High Smoke Point Oil (Canola, Avocado, Peanut, Grapeseed, or Sunflower Oil): The choice of oil is critical for achieving a perfect sear. These oils have high smoke points, meaning they can withstand high temperatures without burning, which is essential for creating that coveted golden-brown crust. Olive oil, with its lower smoke point, is likely to smoke excessively and cause the meat to burn before it properly sears, so it should be avoided for this recipe.
For the Aromatic Herb Butter
- Unsalted Butter: Using unsalted butter allows you complete control over the saltiness of your dish, which is particularly important when creating a pan sauce that incorporates the seasoned meat drippings.
- Garlic Cloves: Freshly minced garlic provides an intense, pungent flavor that is central to the herb butter, infusing the sauce with its distinctive aroma and taste.
- Fresh Rosemary (or 1 1/2 teaspoons dried rosemary): Rosemary contributes a distinct piney, slightly peppery, and woody flavor that pairs exceptionally well with venison. While fresh is always preferred for its vibrant aroma, dried rosemary is a suitable alternative; just remember that dried herbs are more concentrated, so use less.
- Fresh Thyme (or 3/4 teaspoon dried thyme): Thyme offers a subtle, earthy, and slightly floral note that complements rosemary beautifully and enhances the overall complexity of the herb butter. Like rosemary, fresh is best, but dried thyme can be used sparingly.
- Salt: A pinch of salt for the butter helps to balance and bring out the flavors of the herbs and garlic, ensuring the sauce is perfectly seasoned.
Is Backstrap the Same as Tenderloin? Understanding Venison Cuts
No, venison backstrap and tenderloin are not the same, though both are highly prized cuts from a deer. Understanding the distinction is key to cooking them correctly and appreciating their unique qualities.
The backstrap, often referred to as the loin, consists of the long, lean muscles that run along the outside of the deer’s spine, from the shoulders to the hindquarters. It’s comparable to a beef ribeye or strip steak in terms of its location and characteristics. Backstraps are very tender and flavorful, often considered one of the best cuts for steaks, roasts, or grilling.
The tenderloin, on the other hand, is a smaller, even more exquisitely tender muscle located inside the abdominal cavity, nestled beneath the spine. It is the venison equivalent of a beef filet mignon. Due to its location and minimal use by the animal, the tenderloin is incredibly fine-grained and exceptionally delicate. It typically has a milder flavor profile than the backstrap.
Both cuts are undeniably delicious and highly sought after by hunters and chefs alike. However, the tenderloin is particularly revered for its unparalleled tenderness, making it ideal for quick-cooking methods like searing. If you’re looking to explore other cuts, I have a delicious Venison Backstrap recipe that highlights its unique qualities!
Why Does Venison Sometimes Taste Gamey?
The “gamey” taste often associated with venison is a complex characteristic influenced by several factors, and it’s a topic of much discussion among wild game enthusiasts. While some appreciate this distinctive flavor, others prefer to minimize it. Understanding its origins can help you manage it in your cooking.
One of the primary reasons for a pronounced gamey flavor is the animal’s diet. Deer that forage on a diverse array of wild plants, herbs, acorns, and grasses in their natural habitat often develop a stronger, more complex, and sometimes more “earthy” flavor compared to domesticated animals fed a controlled diet. This natural diet directly impacts the composition of the deer’s fat and muscle tissue, contributing to the unique taste.
Another significant factor is the age and sex of the deer. Older bucks (male deer), especially during the rutting (breeding) season, tend to have a stronger, more intense flavor. This is largely due to increased hormone levels and the physical exertion associated with the rut. Younger deer or does (female deer) typically yield milder-tasting meat. The specific time of year the deer is harvested can therefore also play a role.
Crucially, the way the deer is handled and processed after the hunt plays an enormous role in the final flavor of the meat. Proper field dressing, which involves quickly gutting the animal, and immediate, thorough cooling of the carcass are essential. If the meat is not rapidly cooled, enzymatic processes and bacterial growth can lead to stronger, less desirable flavors. Additionally, improper cleaning, prolonged aging in unsuitable conditions, or failure to remove all connective tissue and silver skin can also contribute to gaminess.
To mitigate or reduce the gamey taste, many hunters and culinary experts recommend specific preparation techniques. One popular method is soaking venison in a marinade or solution before cooking. Soaking the meat in liquids like milk, buttermilk (the lactic acid helps tenderize and neutralize flavors), vinegar solutions (acidity breaks down muscle fibers), or a saltwater brine (which can draw out blood and impurities) can effectively temper some of the stronger flavors. Additionally, incorporating bold and aromatic herbs and spices, as well as ingredients like garlic and onions, into the cooking process can help balance and complement the venison’s natural flavor, creating a more harmonious and enjoyable dish.
How to Make This Succulent Venison Tenderloin
This recipe is remarkably straightforward, allowing the natural goodness of the venison to shine. Here’s a quick, step-by-step overview of the process. Full, detailed instructions can be found in the recipe box below.
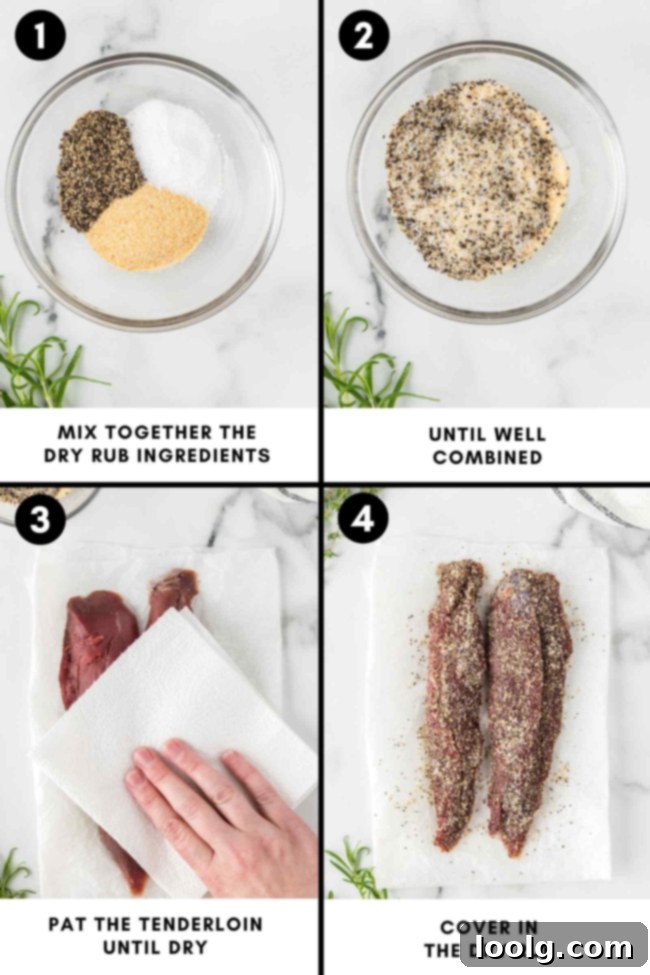
- Prepare the Dry Rub: Begin by combining sea salt, medium-coarse black pepper, and garlic powder. Pat your venison tenderloin thoroughly dry with paper towels – this is crucial for a good sear. Then, liberally rub the seasoning mixture all over the entire piece of meat. Allow it to sit, refrigerated and uncovered, for a minimum of 40 minutes, or ideally, up to 24 hours. This dry brining process enhances flavor and tenderness.
- Preheat for Perfection: Before cooking, remove the tenderloin from the refrigerator and let it sit at room temperature for at least 1 hour. This ensures more even cooking. Meanwhile, preheat a heavy-bottomed cast iron skillet over high heat until it is piping hot.
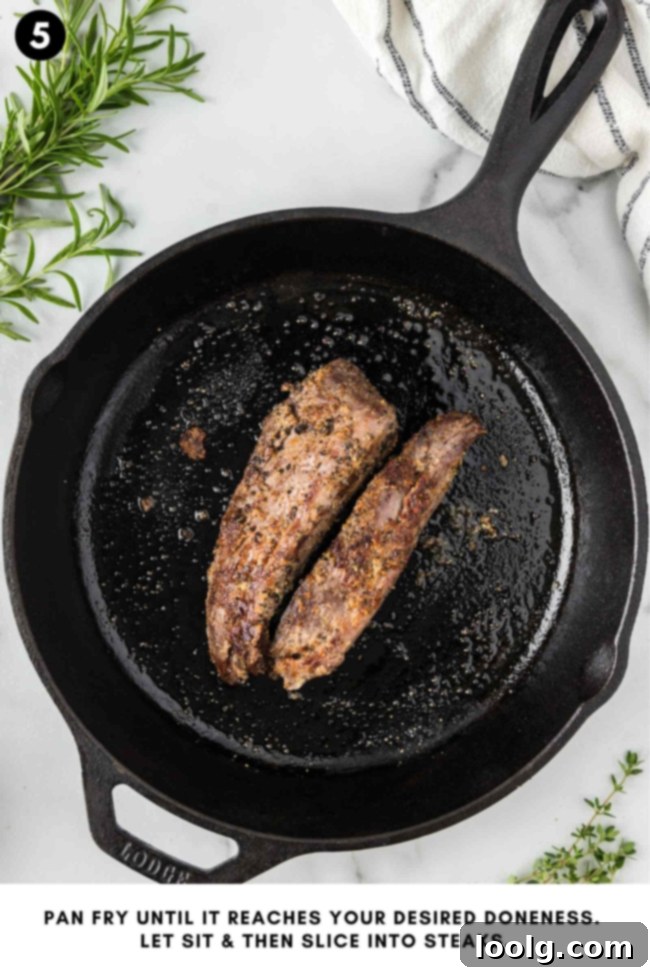
- Achieve the Perfect Sear: Add your chosen high smoke point oil (like canola or avocado oil) to the scorching hot skillet. Once the oil shimmers, carefully add the venison tenderloin. Sear it over medium-high heat, turning frequently to brown all sides evenly and create a beautiful crust. If your tenderloin is particularly large or thick, you may need to finish cooking it in a preheated 375°F (190°C) oven until its internal temperature reaches 120-130°F (49-54°C).
- Rest for Juiciness: Once the desired internal temperature is reached, remove the tenderloin from the heat and transfer it to a plate or cutting board. Allow the meat to rest undisturbed for 5-15 minutes. During this crucial resting period, the internal temperature will continue to rise to its final desired doneness (around 130-135°F / 54-57°C), and the juices will redistribute throughout the meat, ensuring maximum tenderness and flavor.
- Whip Up the Herb Butter: While the venison rests, return the same skillet (with any pan drippings) to medium-low heat. Add unsalted butter, minced garlic, fresh rosemary, fresh thyme, and a pinch of salt. Deglaze the pan by scraping up all the flavorful browned bits from the bottom with a wooden spatula. Cook until the garlic is softened and the herbs are fragrant, typically 1-3 minutes. This creates a delectable pan sauce to accompany your tenderloin.
Expert Tips for Venison Tenderloin Perfection
- The Art of Resting: After cooking, it’s absolutely imperative to let the tenderloin rest before slicing and serving. This critical step allows the muscle fibers, which contract during cooking, to relax. As they relax, the internal juices, which have been forced to the center of the meat, are reabsorbed and redistributed throughout the entire cut, resulting in a significantly juicier and more tender steak. Only after resting should you cut the tenderloin into individual steaks or medallions.
- Pre-Salting is Key: Salting the venison tenderloin at least 40 minutes (or even up to 24 hours) before cooking is vital. This process, known as dry brining, allows the salt to draw out some of the meat’s natural moisture. This moisture then dissolves the salt, creating a brine that is reabsorbed back into the meat. This not only deeply seasons the meat but also helps to break down muscle proteins, leading to a much more tender final product. If you’re short on time, season it immediately before cooking, but understand that the tenderizing effect will be less pronounced.
- Seasoning Penetration: For maximum flavor infusion, aim to season the meat for at least 40 minutes before cooking. This duration provides enough time for the salt and other dry rub components to work their magic, penetrating beyond the surface and flavoring the meat throughout.
- The Power of Cast Iron: Utilizing a heavy-bottomed cast iron skillet is highly recommended for searing venison. Cast iron excels at retaining and distributing heat evenly across its surface, which is essential for achieving a consistent, beautiful, and deeply flavorful crust (Maillard reaction) on all sides of the tenderloin.
- Don’t Force the Flip: When searing, if the meat is not easily coming off the pan, it’s not ready to be turned. This sticking indicates that the crust hasn’t fully developed yet. Patience is key; allow the Maillard reaction to complete, and the meat will naturally release from the pan when it’s perfectly browned.
- High-Heat Sear: Initiate the cooking process by searing the tenderloin in a piping hot skillet. This intense initial heat is crucial for quickly browning the exterior and locking in juices, creating a delicious crust before the interior cooks too much. Ensure all sides receive this high-heat treatment until uniformly browned.
- Trust Your Thermometer: To ensure the venison is cooked to your desired temperature and, more importantly, to prevent overcooking, always use a reliable meat thermometer. Venison is very lean and can become tough, dry, and distinctly gamey if overcooked. Aim for specific internal temperatures to achieve your preferred doneness, typically medium-rare for tenderloin.
When to Finish Venison Tenderloin in the Oven?
While venison tenderloin is often cooked solely on the stovetop due to its lean and tender nature, finishing it in the oven can be a valuable technique in certain scenarios, offering enhanced control and superior results. The decision to use the oven typically hinges on the size of the cut and your desired level of precision in doneness.
- Larger or Thicker Cuts: If your venison tenderloin is particularly large or unusually thick, achieving even cooking solely on the stovetop can be challenging. Searing the exterior to develop a beautiful crust might lead to the outside overcooking before the center reaches your desired temperature. In such cases, after a thorough sear on all sides to create that flavorful Maillard reaction, transferring the tenderloin to a preheated oven allows the internal temperature to gently and evenly rise to the target level without further burning or drying out the exterior. This indirect heat ensures the entire cut cooks uniformly.
- Achieving Desired Doneness with Precision: The oven provides a more stable and less intense heat environment compared to direct stovetop searing. This allows for greater control over the final internal temperature, which is especially important when aiming for a specific level of doneness, such as a perfect medium-rare. The gentle, ambient heat of the oven facilitates a gradual and even cooking process, making it easier to hit that sweet spot without risking overcooking. A meat thermometer is your best friend here, allowing you to monitor the temperature accurately as it approaches your target.
- Consistency and Texture: Finishing in the oven can contribute to a more consistent texture throughout the entire tenderloin. By providing even heat, it helps to avoid tough or undercooked spots that might occur if the stovetop heat distribution isn’t perfectly managed. The result is a uniformly tender and juicy piece of meat from edge to center.
That being said, for smaller or more uniform cuts of tenderloin, it’s entirely possible to achieve excellent results and the desired doneness solely by searing on the stovetop. The critical factor remains diligent monitoring of the internal temperature with a meat thermometer. Remove the tenderloin from the heat promptly when it reaches your target temperature, accounting for carryover cooking during resting.
Ultimately, the choice depends on the specific characteristics of your venison tenderloin, your equipment, and your personal preference for cooking methods. If a stovetop sear alone yields a perfectly cooked tenderloin for you, feel free to skip the oven step. Always prioritize a thermometer to guide your cooking decisions.
Understanding Venison Internal Temperature for Perfect Doneness
Cooking venison tenderloin to the correct internal temperature is the most critical factor in ensuring a tender, juicy, and flavorful outcome. Because venison is exceptionally lean, it can quickly become dry and tough if overcooked. Precision is key to enjoying this exquisite cut.
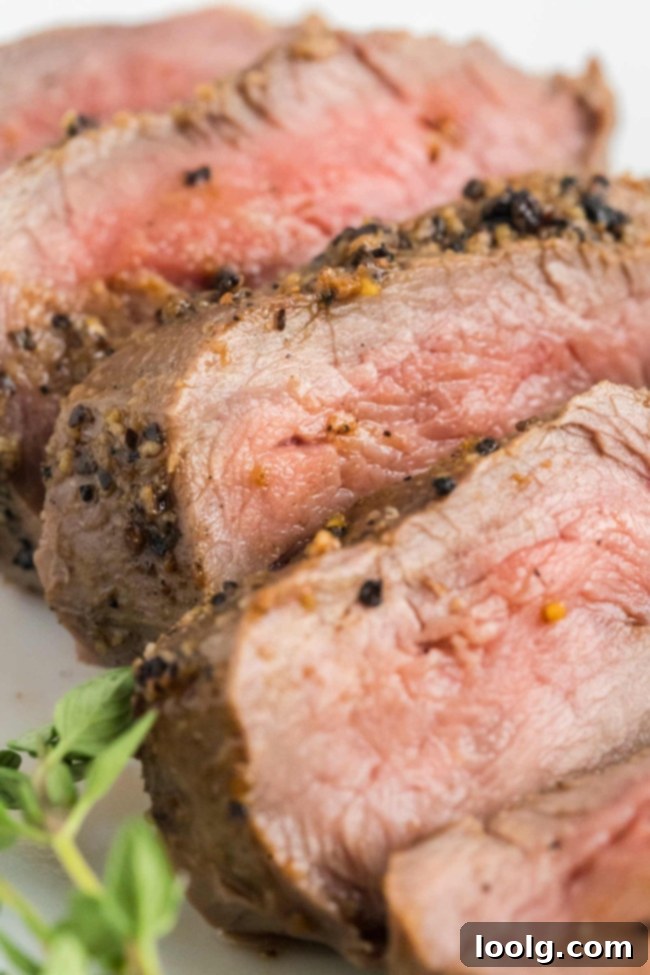
For a beautiful medium-rare venison tenderloin, you should aim to remove it from the heat when its internal temperature reaches 120-130°F (49-54°C). It is perfectly normal, and indeed desirable, for venison cooked to medium-rare to be a little pink inside; this vibrant pink center signifies optimal tenderness and juiciness.
After being removed from the heat, the meat will continue to cook slightly due to residual heat, a process known as “carryover cooking.” During the resting period, the internal temperature of your venison tenderloin should rise to approximately 130-135°F (54-57°C), which is the sweet spot for a perfectly tender and succulent medium-rare finish. Exceeding this temperature range risks drying out the lean meat and making it tough, diminishing its natural flavor and delicate texture.
While individual preferences vary, deer tenderloin is widely regarded as best when cooked to medium-rare. Cooking venison to higher temperatures, such as medium or well-done, can cause it to lose moisture rapidly, resulting in a noticeably dry, tough, and potentially more pronounced gamey flavor. Always use a reliable meat thermometer inserted into the thickest part of the tenderloin to accurately gauge its doneness, ensuring you hit that ideal temperature for maximum enjoyment.
How to Make Deer Meat More Tender (Even the Tenderloin!)
Venison tenderloin is inherently one of the most tender cuts of deer meat, often requiring minimal intervention to achieve a succulent result. The primary reasons for soaking other cuts of venison are usually to reduce a strong gamey flavor or to tenderize tougher muscle fibers. Since tenderloin is naturally mild in flavor and exceptionally tender, soaking it is often optional and not strictly necessary. However, if you have a tenderloin with a slightly stronger flavor than preferred, or you simply wish to ensure maximum tenderness, soaking can still offer benefits.
While less common for tenderloin, soaking is highly recommended for other, tougher cuts of venison like the shoulder, neck, or rump, which possess more connective tissue and often a more pronounced gamey taste.
If you decide to soak your venison, here are several effective options, along with an explanation of how they work:
- Milk or Buttermilk: Soaking venison in milk or buttermilk is a time-honored and highly effective method. The mild lactic acids present in these dairy products act as natural tenderizers, helping to break down some of the muscle tissue and connective fibers. Furthermore, the enzymes in milk can bind with and neutralize some of the compounds responsible for the gamey flavor, resulting in a milder, more palatable taste and an even more tender texture. Soak for several hours or overnight in the refrigerator.
- Vinegar Solution: A diluted mixture of water and vinegar (such as white vinegar or apple cider vinegar) can also be used to soak venison. The acidity of the vinegar helps to chemically tenderize the meat by denaturing proteins, and it can also effectively cut through and help remove some of the gamey taste. However, caution is advised: do not soak for too long, as excessive exposure to acid can sometimes make the meat overly soft or mushy. A soak of 1-2 hours is usually sufficient.
- Saltwater Brine: A simple saltwater brine works through osmosis to draw out blood and impurities from the meat, which can significantly reduce the gamey flavor. To create a brine, dissolve about 1/4 cup of non-iodized salt (kosher or sea salt works best) per quart of cold water. Submerge the venison in the brine and refrigerate for a few hours or, for tougher cuts, overnight. The brine also helps to season the meat internally and can improve juiciness.
- Apple Cider Vinegar and Water: Similar to a general vinegar solution, apple cider vinegar specifically offers a slightly fruitier and sweeter note. When diluted with water, its acidity effectively tenderizes the meat while imparting a subtle complementary flavor that can enhance the venison’s natural taste and minimize gaminess.
- Red Wine or Beer: Soaking venison in red wine or beer is another excellent method that combines tenderization with flavor infusion. The alcohol and acidity in these liquids work to break down muscle tissue, resulting in a more tender bite. Additionally, the complex flavors of red wine (tannins, fruit notes) or beer (malt, hops) can add depth and richness to the venison, masking or complementing any gamey undertones. This is particularly effective for recipes where these liquids will also be part of the cooking process or sauce.
Regardless of the soaking method you choose, it’s critically important to always pat the venison dry thoroughly with paper towels before cooking. Removing any excess surface moisture is essential for achieving a good, flavorful sear and a crisp crust, which is difficult to accomplish on wet meat.
Crafting the Irresistible Pan Sauce
The pan sauce for this venison tenderloin is a true highlight, transforming simple pan drippings into a rich and aromatic accompaniment. This sauce is born from the flavorful juices and browned bits left behind in the skillet after searing the meat. Given that venison is a very lean meat, this pan sauce plays a crucial role not only in adding incredible depth of flavor but also in introducing a touch of richness through butter, which wonderfully complements the venison and helps to mellow any perceived gaminess.
After you’ve seared the venison tenderloin and removed it from the skillet to rest, you might find some residual oil in the pan. If there’s an excessive amount, you can carefully drain off most of it, but it’s vital *not* to clean the pan. Those browned bits stuck to the bottom, known as “fond,” are packed with intense flavor—they are the foundation of your delicious sauce.
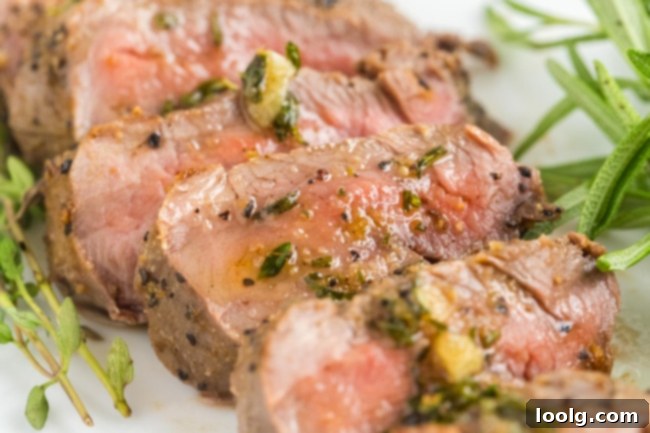
To create this dripping sauce, return the skillet to the stove over medium-low heat. Add the herb butter ingredients: unsalted butter, minced garlic, fresh rosemary, and fresh thyme. With a wooden spatula, gently but firmly deglaze the pan by scraping up all the flavorful bits from the bottom. These bits will dissolve into the melting butter and herbs, infusing the sauce with their savory essence. Continue to cook, stirring occasionally, for about 1 to 3 minutes, or until the minced garlic is soft and fragrant, and the herbs have released their aromatic oils. The result is a vibrant, rosemary and thyme garlic butter sauce, perfectly ready to be generously drizzled over your perfectly rested and sliced venison tenderloin, enhancing every bite.
Yield and Portioning
A venison tenderloin is typically a smaller cut compared to tenderloins from other animals like beef or pork, reflecting the lean and agile nature of deer. On average, a single venison tenderloin weighs between 0.5 to 1 pound (approximately 225 to 450 grams) and measures about 6 to 10 inches (15 to 25 cm) in length. This size makes it an intimate and special cut, ideal for smaller gatherings.
Because of its modest size, a single venison tenderloin is often perfectly suited for serving 2-4 people. The exact number of servings will depend significantly on the size of your particular tenderloin, individual portion preferences, and whether it’s being served as the main protein alongside substantial side dishes or as a lighter course. For example, a 1-pound tenderloin might be a generous serving for two adults, or adequate for two adults and two small children, but likely insufficient as the sole protein for four adults with hearty appetites. If feeding more people, consider preparing multiple tenderloins or supplementing with other protein options.
Storage Guidelines for Leftover Venison
If you anticipate needing to store your leftovers for a longer duration, freezing is an excellent option. For freezing, ensure the venison is well-wrapped—either in plastic wrap followed by aluminum foil or directly in a freezer-safe plastic bag or container. This double-layer protection helps prevent freezer burn. Be sure to label the container with the date of freezing. Frozen venison tenderloin can maintain its quality and taste for up to 3-6 months. When ready to enjoy, thaw overnight in the refrigerator and gently reheat to prevent drying out.
Delightful Serving Suggestions for Venison Tenderloin
What goes well with venison?
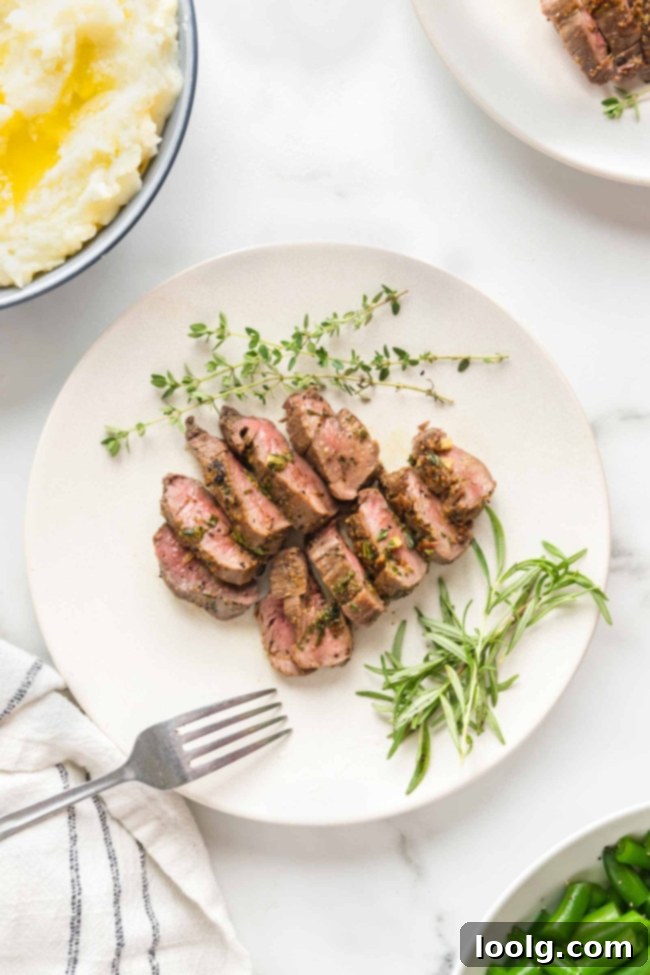
- Venison tenderloin’s rich, yet lean, flavor profile pairs exquisitely with a wide array of side dishes. Consider serving it with earthy sauteed mushrooms, which provide a savory depth that complements the game meat beautifully. Tender asparagus, whether roasted or steamed, offers a fresh, slightly bitter counterpoint, while any variety of roasted vegetables—such as carrots, Brussels sprouts, or parsnips—add sweetness and textural contrast. For a starchy side, these Air Fryer Red Potatoes are a fantastic choice, offering a crispy exterior and fluffy interior that soaks up the pan sauce.
- To complete a comforting meal, I also love serving this tenderloin with light and fluffy bread. Our Whole Wheat Dinner Rolls are exceptionally fluffy and provide the perfect vehicle for soaking up the delectable herb garlic butter and venison juices.
- For a touch of elegance and a vibrant addition, I sometimes pair this tenderloin with a Sweet Potato Goat Cheese Salad. Its colorful composition, nutritional richness, and filling nature make it an ideal, balanced side. The tang of goat cheese and sweetness of sweet potato beautifully harmonize with the venison. To further enhance the dining experience, a glass of robust red wine, such as a Cabernet Sauvignon or a smooth Pinot Noir, complements the rich and earthy flavors of the venison perfectly.
- If your preference leans more towards ultimate comfort, a creamy and satisfying pasta dish makes an excellent pairing. This Gluten-free Mac and Cheese is my absolute favorite, offering a rich and cheesy counterpoint to the lean venison. Simply use regular macaroni if you are not following a gluten-free diet.
I genuinely hope you’ll relish every bite of this perfect venison tenderloin! If you decide to try it out, I would be absolutely delighted if you could leave a comment down below to share your experience. Your feedback is greatly appreciated. Thank you!
Venison Tenderloin
Ingredients
Dry rub:
- 1 tablespoon sea salt
- 1 teaspoon medium-coarse black pepper
- 1 teaspoon garlic powder
To cook the meat:
- 1 venison tenderloin about 1/2 to 1 pound (225 to 450 grams)
- 1 tablespoon canola oil, grapeseed or avocado oil
Herb butter:
- 1/4 cup (56 grams) unsalted butter
- 4 garlic cloves 16 grams, peeled, minced
- 4 teaspoons fresh finely chopped rosemary from about four 6” sprigs or 1 1/2 teaspoons dried
- 2 teaspoons fresh thyme from about eight 4” sprigs or 3/4 teaspoon dried
- 1/4 teaspoon salt
Instructions
Dry rub:
-
In a small bowl, combine the sea salt, black pepper, and garlic powder thoroughly to create your dry rub.
-
Pat the venison tenderloin completely dry with paper towels. A dry surface is essential for achieving a good sear. If your tenderloin is particularly long or large, you may cut it in half to fit comfortably in your cast iron skillet.
-
Generously rub the seasoning mixture all over the entire surface of the meat. You can perform this dry brining step anywhere from 40 minutes to up to 24 hours in advance. If seasoning in advance, refrigerate the tenderloin uncovered on a plate or wire rack. Remember to let it sit at room temperature for 1 hour before you begin cooking to ensure even heat penetration.
-
Immediately before cooking, use fresh paper towels to pat the meat dry again. The drier the meat’s surface, the more effectively you’ll achieve a superior, crispy crust while searing.
Cook:
-
Select a cast iron skillet that is large enough to accommodate the tenderloin without crowding. If your tenderloin is exceptionally large or thick, it might require finishing in the oven after searing. Ensure your chosen pan is oven-safe if this is the case. For extra-large tenderloins, after searing, transfer to a preheated 375°F (190°C) oven and cook until the internal temperature reaches 120-130°F (49-54°C) for medium-rare.
-
Place the cast iron pan over high heat and allow it to preheat until it is piping hot. This may take several minutes.
-
Add the high smoke point oil to the hot skillet, swirl it around to coat the bottom, and as soon as it begins to shimmer, carefully add the venison tenderloin to the pan.
-
Sear the tenderloin over medium-high or high heat, depending on your stove’s intensity. If you notice the meat burning quickly on high, reduce the heat to medium-high. Once a beautiful golden-brown crust has formed on one side, typically after about 2-3 minutes, use tongs to flip and continue searing all other sides of the meat. A key indicator: if you attempt to turn the meat and it’s sticking firmly to the pan, it means the crust hasn’t fully developed yet; give it another minute or so until it releases easily.
-
The tenderloin should only be cooked until its internal temperature reaches 120-130°F (49-54°C). This range is crucial because the temperature will continue to rise to about 130-135°F (54-57°C) as the meat rests out of the pan (carryover cooking). It is extremely important not to overcook venison, as its leanness will quickly cause it to become tough and dry.
-
Once cooked to temperature, remove the pan from the heat (or oven, if used) and immediately transfer the venison tenderloin to a clean plate or cutting board. Allow the meat to rest for approximately 5-15 minutes, or until its internal temperature stabilizes at 130-135°F (54-57°C). This resting period is critical for juicy results.
-
Meanwhile, place the same pan (with its flavorful pan drippings) back on the stove over medium-low heat. Add all the ingredients for the herb butter: unsalted butter, minced garlic, fresh rosemary, fresh thyme, and salt. Use a wooden spatula to deglaze the pan, actively scraping up all the delicious browned bits stuck to the bottom. Cook until the garlic softens and becomes fragrant, typically within 1-3 minutes.
-
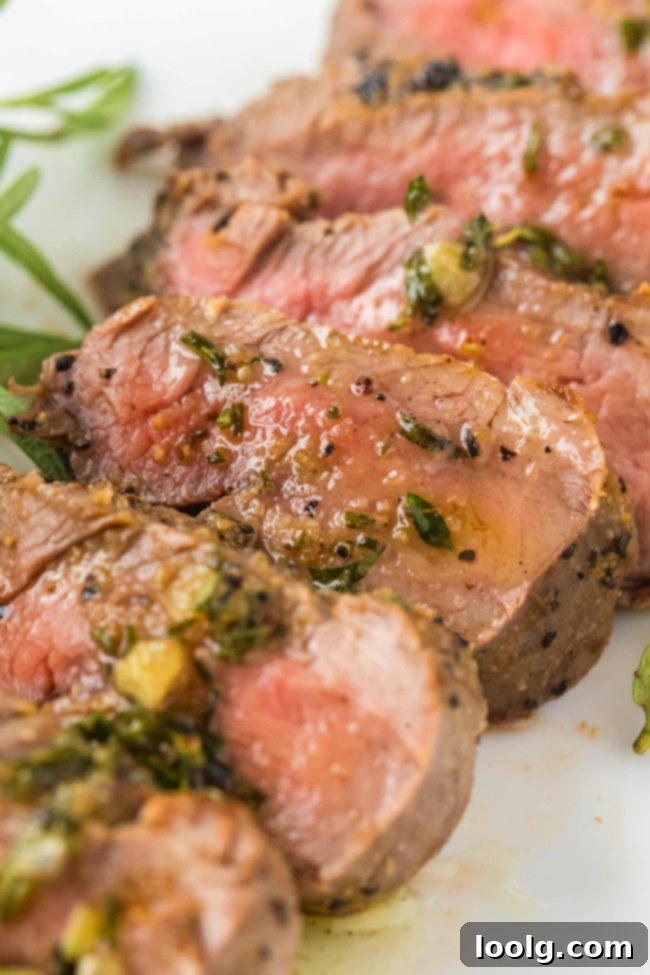
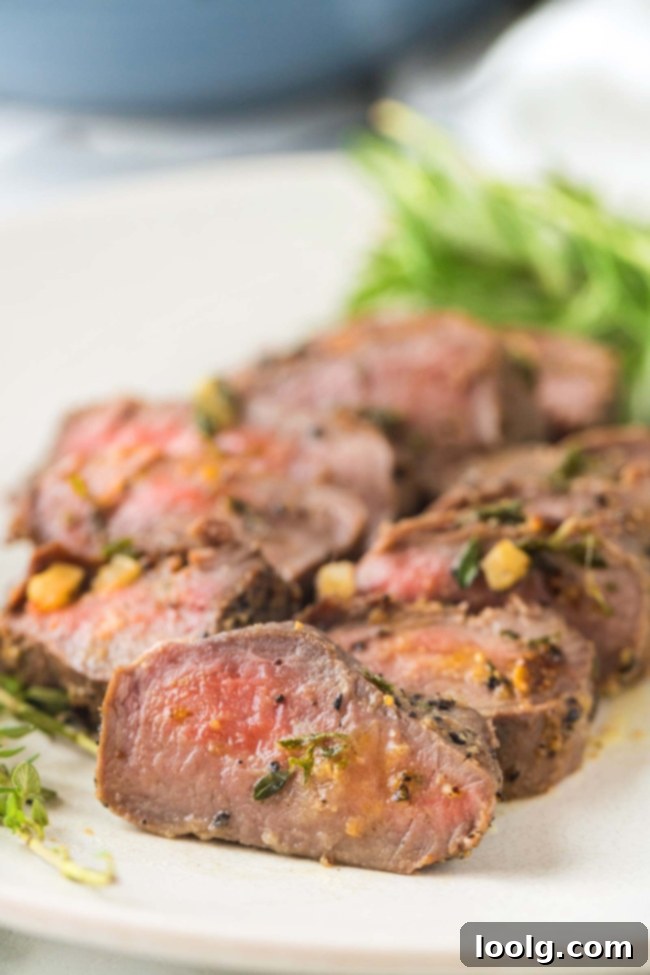
After resting, slice the venison tenderloin into 1 to 1.5-inch medallions. Arrange them beautifully on a serving plate and generously pour the warm, aromatic herb garlic butter sauce over the meat.
-
For any leftovers, allow them to cool completely before placing them in an airtight container and refrigerating for up to 3-4 days.
Notes
- Optimal flavor and tenderness are achieved when the seasoning is applied at least 40 minutes before cooking. If you find yourself short on time and cannot allow for this resting period, apply the rub immediately before cooking. Otherwise, delaying seasoning can cause the meat to release its natural juices, making it significantly more difficult to achieve a proper, flavorful sear. If you choose to refrigerate the seasoned tenderloin, always remember to bring it to room temperature for at least 1 hour before placing it in the hot pan.
- The yield of one venison tenderloin typically serves 2 to 4 people. This estimate largely depends on the specific size of your tenderloin and the desired portion sizes. For instance, a medium-sized tenderloin might be sufficient for two adults and two small children. However, it is generally not enough to serve four adults adequately as a main course. If your tenderloin is on the smaller side of the spectrum, it may only provide two adult servings, so plan accordingly based on your specific cut and guest count.
