Irresistible Soft Pumpkin Cheesecake Cookies: The Ultimate Fall Dessert (Gluten-Free Option!)
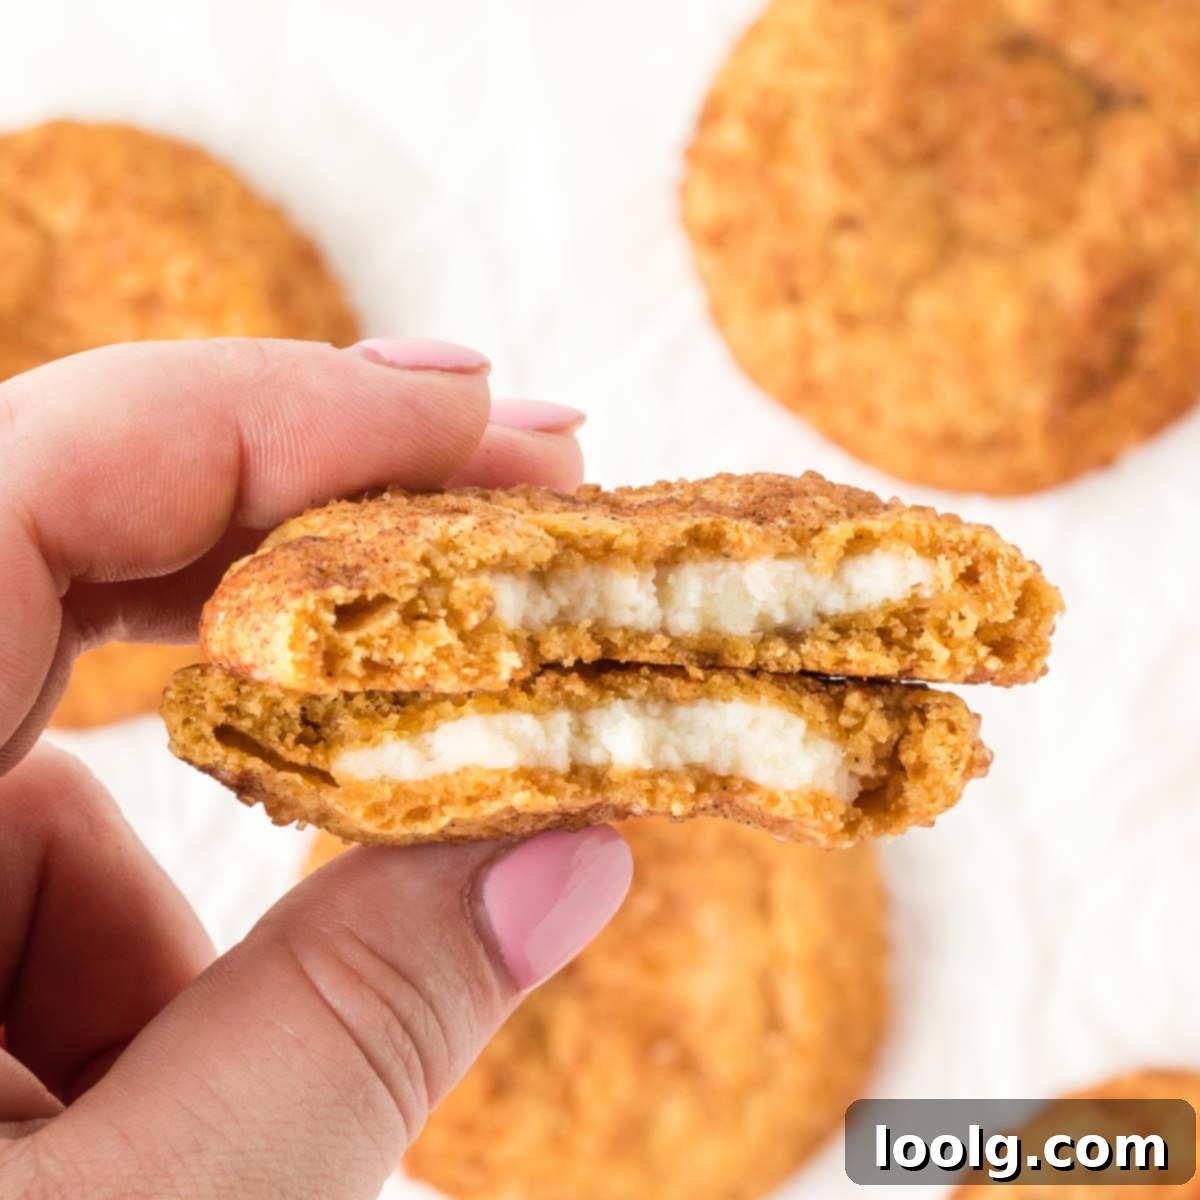
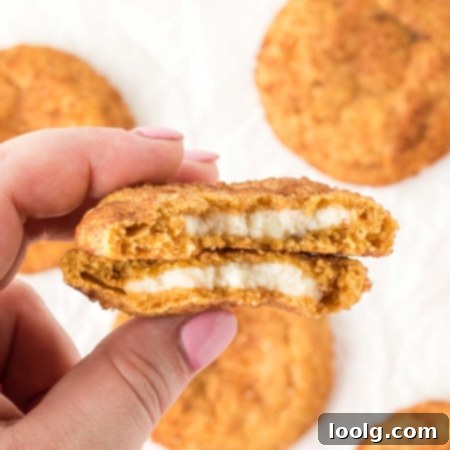
These incredibly soft pumpkin cheesecake cookies are truly the epitome of fall dessert perfection! Imagine a luscious, fluffy pumpkin cookie exterior giving way to a rich, tangy cheesecake filling – each bite is an irresistible symphony of flavors and textures. What’s even better is that this delightful recipe includes a thoroughly tested gluten-free option, ensuring everyone can enjoy this seasonal treat.
As autumn leaves begin to change and the air grows crisp, my kitchen transforms into a haven of fall baking. I confess, I can be a little enthusiastic when it comes to pumpkin-spiced everything. And honestly, what could possibly be better than the harmonious marriage of warm, earthy pumpkin and the creamy, zesty delight of cream cheese? This combination is a classic for a reason, and these cookies encapsulate that magic in a convenient, bite-sized form.
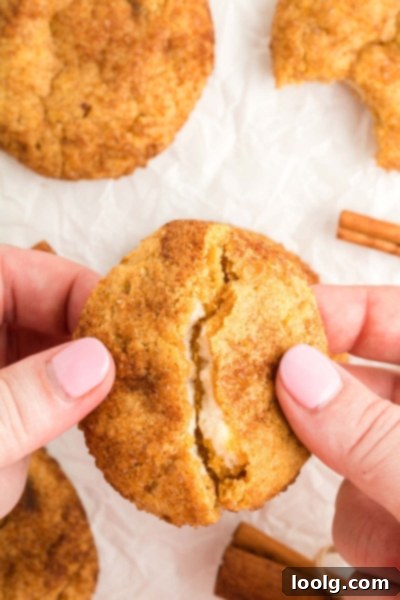
While these cookies do require a bit more effort than your standard drop cookie recipe, I promise you, every moment spent is absolutely worth it. The intricate process results in a treat that’s more than just a cookie; it’s like holding a miniature, perfectly portioned pumpkin cheesecake in your hand, ready to be savored. They offer all the decadence of a full-sized cheesecake without the need for plates or forks, making them ideal for gatherings, gifting, or simply indulging yourself.
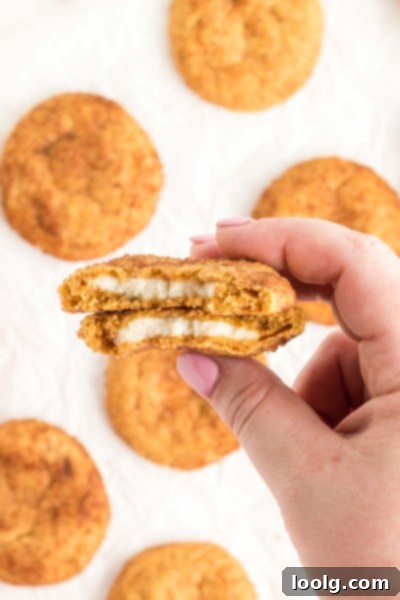
(If you’re wondering why these hands are different from the ones you usually see, it’s because they belong to a talented second photographer capturing the essence of these delicious cookies.)
The Art of Crafting Pumpkin Cheesecake Cookies: A Detailed Guide
Creating these culinary gems involves a few distinct stages, each contributing to their exceptional texture and flavor. The journey begins with preparing the wonderfully fragrant pumpkin cookie dough. Once mixed, this dough is carefully rolled into uniform balls and then placed in the freezer for about an hour. This crucial step helps firm up the dough, making it much easier to handle and preventing it from spreading too much during baking, ensuring your cookies maintain their delightful shape.
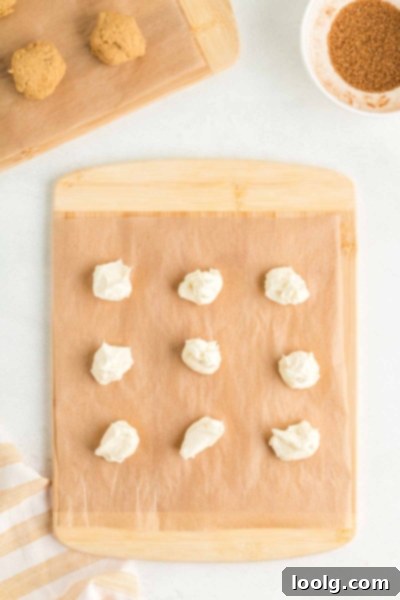
Next, your attention turns to the star of the show: the rich and tangy cheesecake filling. This creamy concoction is dolloped in spoonfuls onto a piece of parchment paper, forming small, individual portions. These filling portions then join the cookie dough balls in the freezer for another hour. Freezing the filling is absolutely essential, as it allows it to become firm enough to be encased within the cookie dough without simply melting and creating a messy situation. Without this step, the soft cream cheese would be impossible to work with.
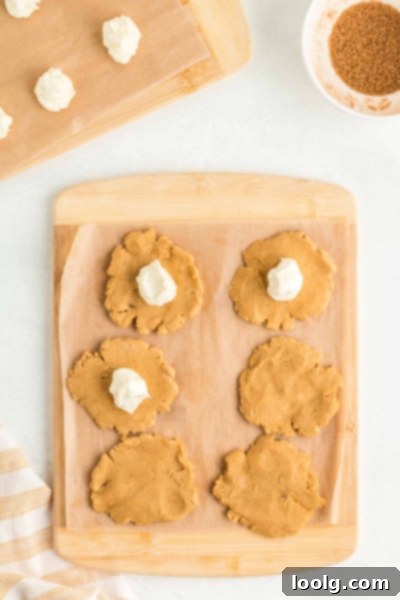
The most satisfying part of the process is perhaps the assembly. Once both the cookie dough and cheesecake filling are adequately chilled and firm, you take a cookie dough ball and gently flatten it into a disc. A frozen cheesecake ball is then placed directly in the center of this disc. With careful hands, you then wrap the cookie dough around the cheesecake filling, sealing it completely to form a perfect, seamless ball. This part is surprisingly fun and quite therapeutic, watching the two components come together into a single, promising sphere. It’s a bit like playing with delicious, edible clay!
Essential Baking Tips for Perfect Pumpkin Cheesecake Cookies
Achieving the perfect pumpkin cheesecake cookie is all about attention to detail. Here are some pro tips to guide you through the process, ensuring every cookie turns out beautifully:
- **Achieving Uniformity:** For cookies that bake evenly and look professional, a cookie scoop is your best friend. It ensures that each cookie dough ball is roughly the same size and weight, leading to consistent baking times and a uniform appearance across your batch. This also helps with consistent filling distribution.
- **Managing Warm Hands:** If you find your hands are naturally warm, working with dough can get a little messy. A fantastic trick is to flatten the cookie dough balls between two sheets of parchment paper. This not only keeps your hands clean but also prevents the dough from sticking and becoming too soft, making the wrapping process much smoother and less frustrating.
- **Dealing with Minor Cracks:** Don’t fret if a tiny bit of cheesecake filling peeks through a small crack in the dough after wrapping or during baking. This is quite common and usually resolves itself or creates a charming, rustic look. The cookie will still be delicious, and the filling will remain largely intact.
- **The Golden Rule of Not Overbaking:** This is perhaps the most crucial tip for soft, tender cookies. Pumpkin cheesecake cookies don’t need to be deeply browned. Keep a close eye on them; they are done when the edges are set and lightly golden, and the tops might show some slight cracking. If they appear a little too soft straight out of the oven, remember the magic of “carryover baking.” They will continue to firm up on the hot baking tray for a few minutes, so resist the urge to bake them longer than necessary. Overbaking will lead to a dry, crumbly cookie rather than the soft, chewy texture you desire.
- **Room Temperature Ingredients:** For the smoothest dough and filling, ensure your butter, cream cheese, and egg yolk are at room temperature. This allows them to cream together properly, creating a homogeneous mixture without lumps and incorporating air for a lighter texture.
- **Gentle Mixing:** Once you add the flour, mix just until combined. Overmixing gluten-containing flour can lead to tough cookies. Use a silicone spatula for the initial incorporation to prevent flour from flying everywhere, then switch to a mixer on low speed for a final quick mix.
How to Store and Freeze Your Delicious Pumpkin Cheesecake Cookies
Due to their delectable cream cheese filling, these pumpkin cheesecake cookies require careful storage to maintain their freshness and safety. Unlike regular cookies, they cannot be stored at room temperature on the counter.
To store them properly, place the cooled cookies in an airtight container and refrigerate them. They will remain fresh and delightful in the fridge for up to 5 days. This keeps the cream cheese filling stable and prevents spoilage.
For longer storage, freezing is an excellent option. Arrange the cooled cookies in a single layer in a sealed, airtight container or a heavy-duty freezer bag. If stacking, place parchment paper between layers to prevent them from sticking together. Properly frozen, these cookies will maintain their quality for up to a month. Beyond that, while still safe to eat, their texture might begin to degrade slightly.
When you’re ready to enjoy a frozen treat, the best way to thaw them is by placing them in the refrigerator overnight. This allows them to gently come to temperature, preserving the delicate texture of both the cookie and the filling. If you desire that warm, gooey cheesecake center again, you can microwave a thawed cookie for 10-15 seconds. Be careful not to overheat, as this can make the cookie dry. Alternatively, a quick reheat in a preheated oven (around 250°F or 120°C) for 5-7 minutes can also work wonders, especially for larger batches, bringing back that freshly baked warmth and a slightly crisp exterior.
Making Ahead: Can You Prepare Pumpkin Cheesecake Cookies in Advance?
Planning ahead for a special occasion or simply wanting to save time? These pumpkin cheesecake cookies offer some flexibility for advance preparation. The ideal strategy depends on how far in advance you wish to prepare them and your desired outcome.
If I were to make these cookies in advance, my preferred method would be to prepare the cookie dough first and freeze it. Once the dough balls are frozen solid, transfer them to an airtight freezer bag or container. This frozen dough can be stored for up to a month. The night before you plan to bake and serve, simply transfer the desired number of frozen dough balls to the refrigerator to thaw slowly. The next day, you can then proceed with making the fresh cheesecake filling, stuffing the cookies, baking them, and serving them warm. This approach ensures the freshest possible cheesecake filling, which is crucial for optimal flavor and texture.
You could also consider freezing the unbaked cookies already stuffed with the cheesecake filling. This would save time on the day of baking, as you would simply need to thaw and bake. However, I must add a word of caution here: the texture of cream cheese can sometimes suffer when frozen and then baked. It might become slightly grainy or release more moisture upon thawing and baking, potentially affecting the overall consistency of the filling. While many recipes suggest this, I haven’t personally tried freezing the fully assembled, unbaked cookies, so I cannot definitively guarantee that the cheesecake filling’s texture would remain perfectly intact. If you choose this method, I would recommend thawing the stuffed cookies in the fridge overnight before baking them according to the recipe to minimize potential issues.
For another fantastic pumpkin dessert that is perfect for making in advance, you might want to try these great-looking Pumpkin Chocolate Chip Brownies! They are equally delicious and hold up beautifully when prepared ahead of time.
Why Freezing the Dough and Filling is Non-Negotiable
The freezing steps for both the pumpkin cookie dough and the cheesecake filling are absolutely crucial for the success of this recipe. This isn’t just an optional chill; it’s a fundamental part of the process, and here’s why:
First, let’s talk about the cookie dough. The addition of pumpkin puree makes this dough inherently quite soft and delicate. While this contributes to the final cookie’s tender texture, it also means the dough would be far too pliable to work with at room temperature. Attempting to smash it into flat discs and then wrap it around a soft filling would be an exercise in frustration, resulting in a sticky, unmanageable mess that would likely spread excessively during baking. Freezing the dough balls firms them up significantly, making them stable enough to be flattened and shaped precisely around the cheesecake filling. This ensures that the cookie maintains its structure and doesn’t melt into an amorphous blob in the oven.
Similarly, the cheesecake filling, made primarily of cream cheese and sugar, is incredibly soft and creamy when freshly prepared. If you were to try and wrap the cookie dough around a completely soft, un-frozen cheesecake filling, it would simply ooze out or blend into the dough, losing its distinct tangy core. Freezing transforms these soft dollops into firm, manageable balls that hold their shape. This allows for clean encapsulation within the cookie dough, ensuring that when baked, you get that distinct layer of creamy cheesecake filling nestled perfectly inside the pumpkin cookie shell.
So, yes! You absolutely must freeze both the cookie dough balls and the cheesecake filling balls first. This strategic chilling is the secret to these cookies’ unique construction and delightful texture, preventing them from spreading too much and ensuring that irresistible creamy center in every bite.
Canned vs. Homemade Pumpkin Puree: What’s Best for Your Cookies?
When it comes to pumpkin puree for baking, especially in recipes like these cookies or a delicate Pumpkin Loaf Cake, consistency is king. That’s why my first choice is almost always canned pumpkin puree.
Canned pumpkin puree offers unparalleled reliability. It consistently has the same smooth texture and moisture content, batch after batch. This uniformity is incredibly important in baking, as even slight variations in moisture can significantly impact the final texture of your baked goods. A dough that’s too wet can be sticky and spread too much, while a dough that’s too dry can be crumbly and tough.
Homemade pumpkin puree, while wonderfully fresh and flavorful, can vary a lot in consistency. Factors like the type of pumpkin used, its ripeness, and how it’s cooked can all affect its moisture content. This variability can pose challenges in baking, requiring adjustments to flour or liquid ratios, which isn’t ideal when you’re aiming for a consistent result.
However, if you don’t have access to canned pumpkin puree (which, I understand, is the case for many parts of the world outside of the US and Canada), making your own is a fantastic alternative. I’ve even got a comprehensive guide on How To Make Pumpkin Puree to help you prepare the best possible puree for the season. For baking, sugar pumpkins or pie pumpkins are generally preferred over larger carving pumpkins, as they have a denser, less watery flesh and a sweeter flavor.
If you do opt for homemade puree, be aware that it often contains more moisture than its canned counterpart. To ensure your cookie batter isn’t too wet, you’ll need to take an extra step: squeeze out the excess liquid. You can do this by placing the puree in a fine-meshed sieve lined with cheesecloth or even several layers of paper towel. Allow it to drip out for at least 30 minutes, or gently press the liquid out. You want your homemade puree to be as thick and consistent as canned puree to ensure your cookies have the perfect texture and bake beautifully. This simple step can make all the difference in achieving a successful bake with homemade pumpkin puree.
I genuinely hope you find these Pumpkin Cheesecake Cookies as utterly delightful as we do. They are a true celebration of autumn flavors and textures, perfect for sharing with loved ones or enjoying as a special treat. If you decide to make them, please don’t hesitate to leave a comment below and let us know what you think. Your feedback is always appreciated! And if you share your beautiful creations on social media, feel free to tag #easywholesome so I can admire your baking prowess!
Pumpkin Cheesecake Cookies
Ingredients
Cookie dough:
- 1/2 cup (113 g) unsalted butter, softened
- 1 cup (200 g) light brown sugar
- 1 (1) large egg yolk room temperature
- 1 1/2 teaspoons (1.5 teaspoons) vanilla extract
- 1/4 cup (60 g) canned pumpkin puree
- 1/2 teaspoon (0.5 teaspoon) pumpkin pie spice
- 1/2 teaspoon (0.5 teaspoon) ground cinnamon
- 1 teaspoon (1 teaspoon) baking powder
- 1/4 teaspoon (0.25 teaspoon) salt
- 1 1/2 cups (188 g) all-purpose flour, white whole wheat flour – or for gluten-free, use King Arthur Measure for Measure Gluten-free Flour
Cheesecake filling:
- 6 ounces (170 g) cream cheese room temp
- 3 tablespoons (3 tablespoons) granulated sugar
- 1/2 teaspoon (0.5 teaspoon) vanilla extract
- Pinch (Pinch) of salt
Cinnamon sugar:
- 2 tablespoons (2 tablespoons) coarse/raw sugar
- 1 teaspoon (1 teaspoon) ground cinnamon
Instructions
-
Prepare your workspace: Line 2 cookie sheets with parchment paper. Additionally, place a piece of parchment paper or plastic wrap on top of a cutting board, small baking tray, or any flat surface that will fit comfortably in your freezer. This is where you will place the 18 dough balls.
-
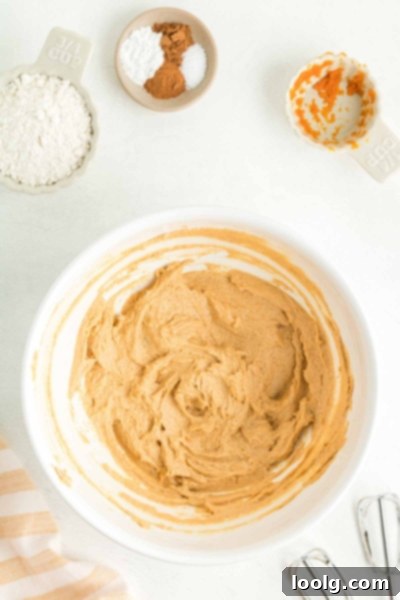
In a large mixing bowl, using an electric mixer, cream together the softened butter and light brown sugar at high speed until the mixture is light, fluffy, and well combined. Reduce the speed to low and beat in the large egg yolk, vanilla extract, and canned pumpkin puree just until they are fully incorporated into the butter mixture.
-
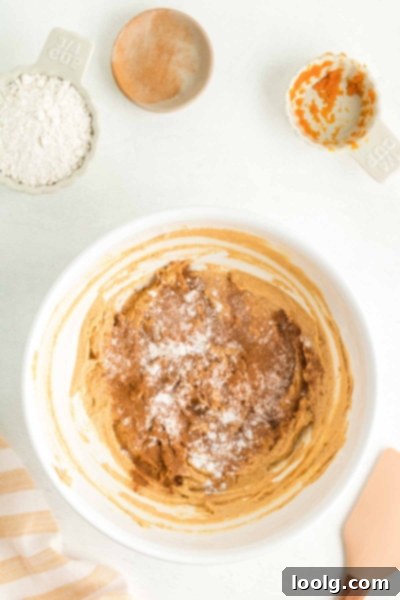
Evenly sprinkle the pumpkin pie spice, ground cinnamon, baking powder, and salt over the wet ingredients in the bowl.
-
Continue beating on low speed for just a few seconds until these dry ingredients are thoroughly combined into the wet mixture. Be careful not to overmix.
-
Gradually add the all-purpose flour to the bowl. To prevent a flour cloud, use a silicone spatula to gently incorporate the flour a bit before turning on the mixer. Then, with the mixer on low speed, mix just until the flour is combined and no dry streaks remain. Avoid overmixing, as this can lead to tough cookies.
-
Divide the cookie dough into eighteen uniform balls, each weighing approximately 33 grams (or about 1.5 tablespoons). Place these dough balls onto the prepared cutting board or baking sheet and freeze them for at least 1 hour. This chilling time is essential for the dough to firm up, making it easier to handle and preventing excessive spreading during baking. If you freeze them longer, simply allow them to sit at room temperature for a short while until they are soft enough to work with.
-
While the cookie dough is chilling, prepare your creamy cheesecake filling. In a separate medium mixing bowl, beat the room temperature cream cheese and granulated sugar at medium speed until the mixture is light, smooth, and fluffy. Stir in the vanilla extract and a pinch of salt until well combined.
-
Prepare another surface for freezing: place a piece of parchment paper or plastic wrap on top of another cutting board or small baking tray that fits in your freezer. Using a small cookie scoop (ideally about 2 teaspoons in size) or a spoon, scoop out eighteen individual portions of cheesecake filling, each weighing about 11 grams. Place these mounds onto the prepared tray. It’s important to freeze them as mounds, not flat discs, as you will be wrapping the cookie dough around these filling balls. Freeze for at least 1 hour until the filling balls are firm and frozen solid. Towards the end of this freezing time, preheat your oven to 350 degrees F (175 degrees C).
-
Once both the cheesecake filling and cookie dough balls are firm, begin the assembly process. Take one frozen cookie dough ball and flatten it in the palm of your hand to form a disc, similar to a small pancake. Place one frozen cheesecake ball directly in the center of the flattened cookie dough. Carefully pull the edges of the cookie dough up and around the cheesecake ball, completely enclosing it and pinching the seams to seal it securely into a smooth, round ball. Ensure that no cheesecake filling is peeking out. As an alternative to flattening in your palm, you can also flatten the cookie dough balls on a countertop between two pieces of parchment paper for a cleaner process.
-
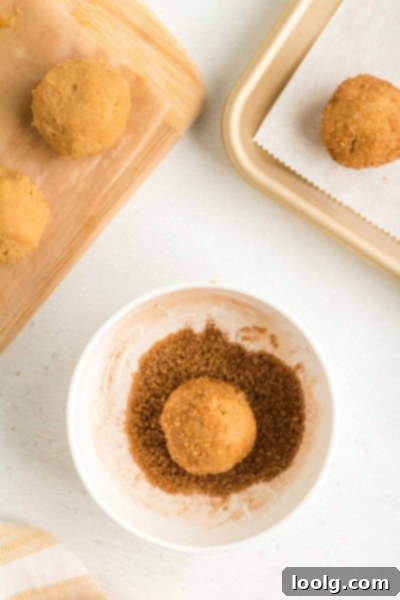
In a small shallow dish, combine the coarse/raw sugar and ground cinnamon for the topping. Dip each filled cookie dough ball into this cinnamon sugar mixture, ensuring it’s evenly coated. Place the coated cookies approximately 3 inches apart on your prepared cookie sheets. Remember: do NOT flatten them down at this stage; they will spread naturally during baking.
-
Bake the cookies for 14-16 minutes. They are ready when the edges are lightly set and golden, and the tops may show some characteristic cracks. The cookies should feel firm to the touch when gently pressed.
-
Allow the baked cookies to cool on the baking sheet for 5 minutes. This is important for them to firm up slightly and prevent them from breaking. After 5 minutes, carefully transfer them to a wire rack to cool completely.
-
Store any leftover cookies in an airtight container in the refrigerator for up to 5 days, due to the cream cheese filling.
